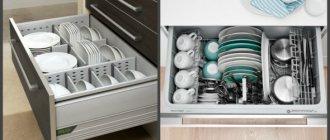
Repair and replacement of drawer guides
Firstly, it is important to understand the causes of the breakdown.
If the fittings require replacement only because they have served their purpose, then everything is simple. Unscrew the old guides, measure their length and purchase exactly the same ones. Installation can be done in the same holes. I advise you to read about the restoration of chipboard - it is quite possible that in order for the fasteners to be strong, you will first need to putty the holes. Well, or choose thicker screws - not 3x16, but 4x16.
If the box initially “did not please” with trouble-free operation, constantly fell out, warped, or jammed, then most likely the guides failed prematurely. And simply replacing with new ones may not solve the problem. Here we need to eliminate the cause itself.
Correct operation of any retractable mechanism is possible only with the coaxial installation of the runners themselves (clearly opposite each other) and the correct geometry of the cabinet box and the drawer itself. And during operation, due to insufficient rigidity, heavy loads, or simply due to an uneven floor, distortions could occur.
Possible causes of failure:
- Initially cheap and low-quality fittings. When purchasing, pay attention to the thickness of the metal. It is better to purchase guides from reliable brands.
- Incorrect installation of guides. When replacing, re-measure all distances down to the millimeter so that the runners are installed clearly opposite each other.
- The drawer itself is skewed. If the box is very large, then the fiberboard bottom does not help in maintaining the correct, clearly rectangular shape. It needs to be strengthened by adding rigid partitions to the box or replacing fiberboard with plywood.
- The cabinet itself is skewed. It helps to solve the problem of leveling furniture using pads for supports. You can also install additional stiffening ribs into the design of the cabinet.
- Heavy loading of the box. Perhaps the previously installed guides are simply not designed for such loads. Maybe it's worth changing them to other, more powerful ones?
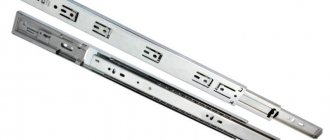
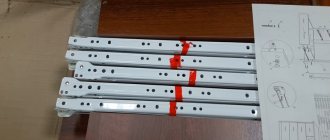
Selection of ball guides
To choose the right furniture guides, you need to consider:
- types of device;
- technical characteristics of guides;
- manufacturer, on which the quality of furniture fittings depends.
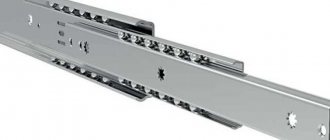
Types of ball guides
Ball-type guides can be classified according to several criteria:
- degree of opening. Partial and full extension systems are available. With limited movement, the viewing angle of the contents is reduced and approximately the distant 5–6 cm of the box is not visible. The full extension system allows you to view the entire contents of the drawer;
Differences in guides according to the degree of opening of drawers
- maintainability. There are cheaper one-piece guides, which in case of breakdown can only be replaced, and detachable structures that are subject to repair, and within the same manufacturer, the interchangeability of component parts;
- installation method. There are standard guides, which are mounted on the side walls of the drawer, and hidden-mounted guides. With this method, the drawer system is installed from the bottom of the drawer, which allows you to hide all the elements and increase the internal space of the cabinet, chest of drawers, cabinets, and so on.
Concealed ball guides
- number of steps. There are single-level and multi-level guides. Depending on this indicator, the maximum load on the box is determined;
- the presence of additional elements. The guides can be equipped with closers that allow the drawer to be closed smoothly, which increases the service life of the furniture and/or with a Push-to-open system - opening the drawer by pressing the front part of the facade.
Push-to-open system principle
What are the best guides? Each user must decide independently, based on the type of furniture (wardrobe, cabinet, chest of drawers, etc.) and the surrounding space.
Selection of technical parameters
After determining the type of guide, you need to select the correct dimensions. Allowed:
- reducing the length of the retractable system relative to the length of the drawer by 10 - 15 mm, but not more than 75% of the indicator (calculation according to the manufacturer’s recommendation). For example, for a drawer 400 mm long, guides 300 - 400 mm long are suitable;
- The width of the guide system is determined according to the required load.
The greater the expected load on the box, the wider the guides need to be selected. If the drawer width is large, it is possible to install two guides parallel to each other, which will also increase the load rate.
Main dimensions of ball-type guides
Popular manufacturers and their features
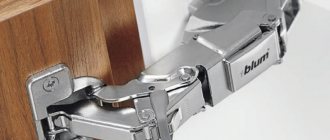
The most popular company engaged in the manufacture of various types of retractable systems, including ball guides, is the Austrian company Blum. The main advantages of the manufacturer are:
- use of high quality materials;
- production control at all stages;
- checking accessories before sale;
- application of diagrams for self-installation;
- long service life (manufacturer’s warranty – 15 years).
Among the disadvantages, one can note the high cost of guides and other types of retractable systems.
Furniture fittings from the Austrian company Blum
To reduce the cost of purchasing accessories, you can pay attention to the following companies:
- German company Hettich. The quality of the manufactured accessories is not inferior to the generally recognized leader, but the cost is significantly lower;
- the Polish company GTV, which produces large-sized fittings;
- the Polish company Fgv, whose main specialization is the manufacture of various types of guides and furniture hinges;
- Russian companies Boyard and Firmax. The price of fittings from domestic manufacturers is the lowest, and the quality is at a high level.
Is it possible to replace one drawer system with another?
Usually this question is puzzled by those who purchased a budget kitchen set with drawers on roller guides, the quality of which is “not very good”. I would like to replace them with something better and generally different, more pleasant to use.
It happens that owners of expensive kitchens also think about replacing them. When the tandembox on the box is out of order, and you don’t really want to buy another one at a price of 7, 10 or more thousand rubles. Moreover, the drawer is not the most “important” and you can get by with simpler fittings.
In general, the reasons may be different. And there is one good news - yes, it is possible. There is no need to change the facades or the body of the cabinet with drawers. There may be a mismatch in fasteners. But since all fastenings are located on the inside of the facades and walls of the case, this will not be noticeable.
But regarding the drawer boxes themselves, everything is not so clear. After all, different retractable mechanisms may differ in both the size and design of the drawer.
Installation and adjustment of telescopic guides
Hello, friends!
Any business has its own nuances and subtleties. And often, they relate to fairly simple (and obvious) things. However, they can play quite an important role...
Today I want to talk to you about the widely used retractable fittings used to make any furniture.
These are telescopic guides.
Their widespread use is due not only to reliability and practicality, but also to some technological conveniences.
For example, in the installed position, such guides can be adjusted in two planes.
When making modules that contain drawers, adjusting one front is often indispensable.
You can, for example, set equal gaps on all sides in the frontal plane.
But they can “come out”, for example, between the front edge of the side and the facade.
In this case, you need to adjust the position of the drawer itself. And this can only be done with the help of its guides.
But having done this, you will need to adjust the facade again, since the original dimensions of the indentations will naturally change.
In order not to engage in such “monkey gymnastics”, you first need to correctly set the position of the box in the box.
It is necessary that it be installed strictly in three planes. To do this, of course, the box itself must have the correct geometry.
The easiest way to determine its correct position
- this is to attach an even strip to the side edges of the box and see if the gaps between it and the drawer are the same.
If they are different, then you need to align them using guides, and only then proceed to install and adjust the facades.
You can change the position of the drawer in space both with the help of runners attached to it, and with the help of elements of this fittings attached to the box itself.
By slightly releasing the screws (with which they are secured), they can be moved, for example, up and down (they have longitudinal and vertical adjustment holes).
After which, they are fixed through regular (round) holes.
As a result, you get correctly adjusted boxes on which the facades are hung.
The video below shows the general principles of changing the position of the drawers using the fittings we are considering.
To learn how to correctly make an additive map (marking the fastening of guides), read this article. You can read more about the installation of this fittings in this post.
That's all, see you next time!
How to replace roller guides with ball guides
Standard ball and roller skids are interchangeable . To replace roller slides with ball slides, simply twist the slides, following the step-by-step instructions described in the last section of the article “How to Install Drawer Slides.” In this case, the holes on the sidewalls from the position of the roller guides will remain uncovered. They can be masked with self-adhesive plugs.
The exception is mortise-in full-drawout ball guides.
Unfortunately, they cannot be replaced with anything else, while maintaining the same dimensions of the drawer box. Only for a similar retractable system. Or saw the box frame to maintain the same gaps (read - calculating the size of the box for ball and roller guides).
The same can be said about narrow rail guides. They are also ball-shaped, but differ in design: the runners themselves are much narrower and the “balls” in it are arranged in one row, and not in two. It is unlikely that you will be able to find them on sale; they are usually used on foreign-made furniture walls and chests of drawers.
How to replace ball or roller guides with metaboxes or tandemboxes
It is not so easy to replace a drawer with ball and roller guides with tandemboxes or metalboxes (metaboxes). And this is quite obvious, because the design of the boxes themselves is completely different.
Therefore, you will have to completely saw down the parts of the box, taking into account the height of the existing facades, and assemble a new box for installation in the same cabinet.
Blum and tandem boxes are interchangeable . Therefore, you can always exchange one retractable system for another by choosing a suitable analogue.
And this is not the only “successful” coincidence in terms of savings. For almost any fittings from well-known brands in the premium segment, you can find cheaper analogues. Let me clarify: I do not address the issue of quality and feasibility of such savings.
What you need to know before you start installing drawers
The principle of attaching the runners to the sides of the cabinet is the same for almost all retractable systems. As a rule, 2 mm are removed from the front edge and then screwed along the outer mounting holes and several central ones, depending on the size of the guides themselves.
The only difference is the calculation of the height at which the skids are mounted.
There are three main types of drawer slides, with different slide positions:
- Along the bottom edge (bottom). The simplest and most cost-effective roller guides are installed strictly under the bottom of the drawer frame itself, overlapping on the fiberboard. As in fact, the most expensive options for equipping drawers are tandem boxes. They are also installed on the lower level of the drawer frame.
- In the center of the side of the box. Ball telescopic ones give greater freedom during installation - they can be mounted at any level of the sidewall of the box box. But it’s still better to stay at the central one. As practice shows, installation and adjustment are greatly simplified.
- With top mount. For metaboxes (metalboxes), the roller guide runners are located along the upper level.
In each case, the box will “sit” completely differently. Let's look at the example of a drawing of a regular chest of drawers with three drawers. To make the task easier, let’s assume that the boxes begin to be installed from the bottom of the side of the cabinet itself, without deduction for the base box and bottom. This is possible in the following option.
- The height of the sides of the cabinet is 668 mm (with the height of the chest of drawers without legs being 700 mm).
- The height of the drawers is 150 mm with the height of the facades being 221 mm.
How to install roller guides
The bottom is captured by part of the runners that are attached to the box at a height of 8-10 mm, depending on the thickness of the bottom (fibreboard).
Let's take the distance from the bottom to the lower edge of the facade to be 20 mm (usually it ranges from 10-30 mm).
The installation diagram of the roller guides will look like this.
There will be no harm in rounding the values. Take not the height level 32/255/478, but round for convenience to 40/260/280. The main thing is to secure the roller guides equally on both sides.
How to install ball guides
With a similar tolerance under the bottom of 20 mm, the installation diagram of the ball guides will look like this.
The difference is that it is customary to install ball guides in the center of the sidewall. Since they come in different widths, it's easier not to move them higher or lower.
Also, the values 99/322/545 can be rounded and made, say, 100/330/550.
How to install metaboxes on a drawer
A distinctive feature of a drawer with metal sides is its fastening along the top edge. The main thing here is to choose the right height of the metaboxes relative to the vertical of the facade. It can be 54 mm (optimal for installation in a narrow niche under the built-in oven in the kitchen), 86, 118 or 150 mm. If a deeper drawer is required, it can be “expanded” using one or two rows of special rails.
In our case, it is optimal to take a 150 mm metabox; the installation diagram will look like this.
As in previous options, rounding is acceptable for convenience: instead of 134/357/580, it is quite possible to take 130/360/580.
How to install fronts on a drawer
Fronts on drawers are always installed after “testing” and alignment of the inner box.
First you need to make sure that the box moves freely and smoothly, does not warp during movement and does not jam.
Only then, with the help of special linings (chipboard scraps, a wooden or plastic ruler will do), is the uniform position of the facades pretended.
Then, using double-sided tape, the facade is fixed and attached from the inside using 4x30 self-tapping screws. The through fastening of the handle also “holds” the facade. But it is worth drilling for the handle only after the facade is securely fixed.
