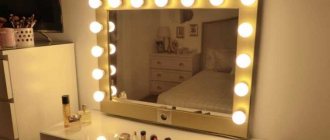
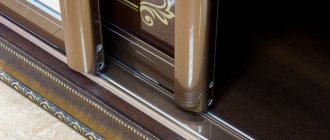
A mirror on the closet door greatly simplifies the process of selecting the optimal clothes; all the results of fittings can be seen immediately and the final decision can be made. Some types of modern furniture cabinets have a large mirror on the front door, but not all. In addition, most old designs did not provide this element. It is not advisable to buy a new cabinet just because of the mirror; it is much more profitable to reconstruct it and glue it to the front door. Let's look at ways to solve the problem and give practical advice.
How to glue a mirror to a cabinet door
Methods for gluing a mirror
Modern building materials and technologies make it possible to glue mirrors in several ways, while ensuring reliable fixation and inadvertent falling of the mirror is completely eliminated. But under one condition – all recommendations are followed and generally accepted technology is not violated.
| Gluing method | Brief description of technology and performance characteristics |
Using chemical compounds | The mirror can be fixed with liquid nails, silicone, sealant, special glue and other chemical compounds. They have high adhesion rates and, after hardening, are characterized by high stability. Frozen compositions can be hard and plastic, transparent and colored. Hardening occurs due to the evaporation of moisture or as a result of complex chemical reactions, in some cases there is a risk of damage to the back surface of the mirror. The most reliable method of fixation is considered to be adhesive. |
Using double-sided tape | Most often used as a temporary or additional mount for small mirrors. Glue is used at the same time as the tape. Double-sided tape has a limited use time, it is much shorter than the life of the cabinet. |
How to glue a mirror with double-sided tape
Preparation of glue
You can buy glue at the store, but I made it myself.
I poured four cups of cold water into a saucepan, put in one and a half cups of cornstarch (you can use potato starch) and put it on low heat.
Stir for five minutes until the consistency becomes soft and smooth, like sour cream. After removing from heat, I continued stirring until the glue cooled.
The ex-husband of Polina Gagarina owes the tax service about 100 thousand rubles
Private clinics in the Russian Federation are prohibited from using the Pfizer vaccine
Hidden shelves, bathroom and more: everyday life of a large family living on a bus
Step-by-step instructions for gluing a mirror
For example, we will consider the classic option - gluing a mirror to a cabinet door; the mirror is large and requires high reliability of fixation.
First you need to drill holes in the doors for the hinges . This is not difficult to do, you just need to pay attention to the distance and symmetry.
Doors have holes drilled for hinges
Step 1. Place the mirror on the door and check the dimensions of the elements.
Checking dimensions
Practical advice. Protect the amalgam layer from damage; through scratches are visible on the front surface.
To prevent mechanical damage to the back of the mirror, place a soft cloth or other protective pad between the door plate and it. Amalgam is an alloy of mercury with metals; it is a heterogeneous or homogeneous system; it can be liquid or solid. To make cheap reflective coatings, tin or zinc, and less often silver, are most often dissolved in mercury.
If the doors have curves around the perimeter, then the edge of the mirror should not reach their turn. Otherwise, a gap will appear between the parts, dirt will accumulate in it over time, and the appearance of the furniture will be significantly damaged. It is best to check the position of glass and furniture boards with your fingers; this is the most accurate and sensitive tool; professional furniture makers very often perform final checks of various connections only with their hands. This makes working convenient, fast and very accurate.
Mirror edge
Step 2. Check the correct location of the hole according to the previously drawn sketch.
Sketch
If a door handle is planned on the mirror, it is recommended to drill the hole in special workshops. Doing such work yourself is not recommended for several reasons.
- Firstly, to drill glass you need to have a set of special tools and devices.
- Secondly, such work can only be done by experienced craftsmen; the first attempt is most often unsuccessful.
- Thirdly, the cost of professional services is much less than the price of a new mirror. And you will have to buy it to replace the damaged one.
Step 3. On the cabinet door, mark the location of the holes on the mirror. Such manipulations must be performed on the second door.
Marking
It is not recommended to remove the mirrors before final marking; let them remain in place. This will make it possible at any time to check the correctness of their placement and the correspondence of the marks made.
Step 4. Remove the mirror and drill through holes for the handles. Constantly check the position of the elements.
Drilling holes
At this point the preparatory operations are completed, you can proceed directly to gluing
Gluing the mirror
Prepare the work surface of the table; it should be smooth and clean.
Important. The dimensions of the work table are selected in such a way that the door fits completely in length.
The fact is that laminated boards are not very durable. If the edges hang down, then under the influence of its own weight the slab bends slightly. The mirror is made of glass, which is much stiffer than slabs and hardly bends at this distance. As a result, a gap will appear between the surfaces, which will have an extremely negative impact on the quality of gluing of the elements.
Do not allow a gap to form between the mirror and the door.
Step 1. Prepare the glue for use. The composition is sold in plastic tubes and is squeezed out using a special gun.
- Using a sharp knife, cut off the sealed end of the tube, but do not touch the threaded part. The glue is sealed completely hermetically, which increases the storage time. Before use, carefully look at the date of manufacture and expiration date; never buy low-quality or expired materials.
- Screw the cone onto the thread, cut the end at an angle of approximately 30°. Please note that the cone can be cut at different distances, thus adjusting the diameter. If you are gluing large surfaces, then increase the diameter of the cone, and for small elements, reduce the hole.
- Insert the prepared tube of glue with the screwed end into the gun, carefully adjust its rod to the glue piston and press until the glue appears.
After each application of glue, release the piston lock lever as quickly as possible and remove the load from it. If you don’t do this, quite a lot of material will come out after the gluing process is completed. It can stain the surface of a mirror or cabinet, and once it hardens, it is very difficult to remove the glue. In addition, unproductive losses increase; it is better to save the composition and use it for good.
What types of sealant guns are there?
Prices for a sealant gun
Caulking gun
Step 2. Very thoroughly degrease the surfaces of the elements; the adhesion strength largely depends on this. You can use special products or ordinary solvents. After degreasing, the surfaces must be completely dry. Work with the compounds carefully, some of them are quite poisonous.
Surface cleaner
Step 3. According to the attached instructions, apply glue to the surface of the door. Often these are longitudinal stripes at a distance of about 10 cm. But in practice, to increase the reliability of fixation, it is recommended to increase the dimensions; if possible, then it is necessary to fill the maximum area of the joined parts.
Applying glue
Step 4. Place a mirror on the door and carefully check its position. Be sure to pay attention to whether the holes in the glass and the furniture board match. Experienced craftsmen recommend inserting any objects of suitable diameter into them; they center the holes and completely eliminate accidental movements. If after movement the glue completely hardens, then the defect cannot be corrected. Modern high-quality compositions have very high adhesion; it is even theoretically impossible to tear glass off the surface of a furniture board; it will definitely crack. You must always remember this and work extremely carefully.
If a problem does occur, then you need to try to save the door; in any case, the mirror will have to be changed, even if it cracks. Remove it in pieces; if necessary, use thin metal devices or tools.
Gluing the mirror
Step 5. After gluing is completed, it is recommended to press the cabinet parts a little; use pieces of slabs or other large objects for this purpose. Allow time for the composition to dry or harden; specific parameters are indicated by the manufacturer on the surface of the tube.
Finished products with mirrors
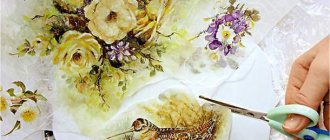
Fabric pattern
My first experience was gluing to the surface of a tapestry. It was on the same back side, and I took it off easily.
But since in this case I had to select a pattern, I decided to make the surface white. For this purpose, thick fabric was purchased in a size similar to the size of the panel itself.
Ten Soviet actresses who are strikingly slim in adulthood
Set goals in new areas: how to break up forever if you're being abused
“Princess Huawei”: the youngest daughter of the owner of Huawei decided to conquer show business
I placed it on the mirror and carefully cut out a rectangle. You can measure the length and width and that will be enough. Make sure they match completely.
