What it is?
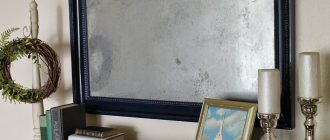
Mirror sun or “sunburst”. A shaped mirror consisting of a round plate and rays of different sizes and widths emanating from it. Most often, the central disk is made small and the rays long . They can be decorated with small mirrors, small LED flashlights, glass, rhinestones, and look like a snowflake, flower or star.
The golden mirror symbolizes the sun, the silver one – the star.
The design of sun-shaped mirrors is very diverse, so such an item can fit into almost any interior.
DIY sun mirror
We already have a couple of ideas and workshops on how to create such a mirror yourself.
- Original mirror frames: 8 master classes
- Decorating a mirror with your own hands
A sun mirror can be made from absolutely any available materials. Here's another example:
A little history
It is unknown when exactly the first sun-shaped mirrors appeared , but they can be seen in the paintings of ancient artists starting from the 15th century. For example, the painting by artist Jan Van Eyck “Portrait of the Arnolfini Couple”. In the background you can see a mirror that vaguely resembles a sunburst. At that time, such mirrors were made convex, so they greatly distorted the image.
In the Middle Ages, such mirrors were hung in churches; they symbolized deity. They always “looked” at the parishioners.
the highest popularity under the “Sun King” Louis XIV . There is an opinion that it was he who came up with this design, but this is not so, he only made it very popular. Such a mirror is fun in royal chambers. Every morning the king looked into it. The mirror disk was not large, so it looked as if the rays were emanating from the king’s very face. It’s as if he himself is the sun.
After Louis, sunburst mirrors came into fashion only 200 years later. Then mirrors ceased to be a luxury, so designers began to actively experiment with shapes and sizes, also inspired by the heavenly bodies.
At the beginning of the 20th century, the Art Deco style became popular , one of its main features was its appeal to the sun's rays. Therefore, it could not be done without solar mirrors. And already in the middle of the 20th century, mirrors - suns became mirrors - stars, due to the fact that the whole world began to actively become interested in space.
And even in the 21st century, interest in mirrors in the shape of the sun does not fade away. People actively use sunburst mirrors to decorate their homes. For more than two centuries, the mirror sun has found its connoisseurs.
How to make your interior fashionable
In all modern design publications you can definitely find very beautiful photos of mirrors with a frame in the shape of sun rays. Such mirrors easily allow you to place accents in a certain way and, thus, change the interior. These unusual mirrors, very popular today, were known in ancient times, but then they most often represented sacred objects and were located in temples.
The oldest work of art depicting a mirror-sun is considered to be a painting by the artist Jan van Eyck, painted back in the 15th century. Later, in the 17th century, various metal elements with sparkling rays of the sun, very reminiscent of mirrors, began to be used by the Catholic Church as objects personifying the spiritual principle.
From their very origins until the end of the 17th century, all mirrors were very small and convex. This size and shape were dictated by the manufacturing technology that existed at that time. It was, of course, impossible to see a real reflection in such mirrors without distortion. The situation changed only when King Louis XIV of France ordered the construction of his own glass factory, one of the main directions of which was the production of mirrors of the best quality at that time. However, these mirrors cost a lot of money, and only very noble and wealthy people could afford them. With the ascension of King Louis XIV to the throne, a new era in architecture and interior design began.
Louis XIV chose the head of Apollo, surrounded by shining rays of sunlight, as the symbol for his personal coat of arms, as a result of which he became known as the “Sun King”. In the royal palace at Versailles, the symbol of Louis XIV can be found in almost every element of the interior, from the entrance gate to writing utensils and similar little things. The palace even had a unique hall of mirrors, where, of course, there was room for sparkling mirrors framed in the shape of sun rays.
Since then, the sun mirror has not lost its relevance, regardless of changes in interior styles. In various antique shops and flea markets today you can easily buy an antique mirror from the late 18th or early 19th centuries, which will ideally fit into an interior in styles such as classic, country, baroque, rococo, modern, fusion and eclecticism. It is best to hang a similar mirror in a wrought-iron frame on a plain painted wall above an antique chest of drawers and complement the mirror with metal elements: vases, candlesticks, etc.
Of course, such a designer mirror costs quite a lot (about $500), but you can very easily make it yourself from scrap materials, literally for pennies!
Materials needed: round mirror, frame, old vinyl recorder, round wooden sticks, sandpaper, scissors, hacksaw, all-purpose glue.
Operating procedure.
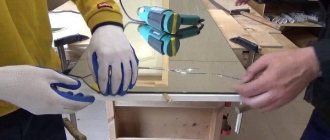
1. We saw wooden sticks into pieces of different lengths. They will be the rays of the star. Sand the edges of the sticks. It is enough on one side - the other will not be visible.
2. Glue the sticks around the circumference of the record using universal glue. It is advisable that there are no rays of the same length nearby. The wave-like “pattern” of the rays can be copied from our sample.
3. We attach the mirror using universal glue, and then attach the frame to it. We lift the protective film along the edges of the mirror to glue the frame, but do not remove it completely. We will need it at the coloring stage.
4. Close the junction of the mirror and frame with decorative cord. The same cord can be used to close the joint between the frame and the beams.
5. Cover the frame and rays with gold spray paint, attach a loop on the back side for hanging the mirror on the wall and remove the protective film from the mirror.
Ready!
The undoubted advantage of a mirror framed by the sun's rays is that it literally “adjusts” to any interior and is sure to add notes of refined and unobtrusive luxury to it. All this makes it easy to use such a mirror to create stylish accents in the living room, bedroom and even bathroom.
"Sunburst" and "Starburst" in the interior
A solar mirror will fit perfectly into your interior if you choose the right place for it.:
- For example, above a sofa, bed, nightstand. This solution will place emphasis on the wall where the mirror is located.
- In America, such mirrors are often hung on one of the walls in the dining area.
- Also, such a “sun” will look great above a desk in a woman’s home office.
- If the house has a fireplace, then an excellent solution would be to hang a mirror above it.
- In addition, such mirrors are used to decorate the walls above the doorways in the bathroom. And also near the front door.
- Most often, “sunbursts” are used as interior items, but in some cases such a mirror can also fulfill its original function, for example, in the bathroom, above the washbasin.
Although the sun-shaped mirror does not allow you to see small details, it is good for looking at yourself and quickly correcting any imperfections in your makeup or hairstyle.
A large sun mirror will perfectly decorate a wall in any room, but small mirrors are used in a duet or trio.
- Such mirrors are hung on the wall in a row or randomly, which gives the room a designer flair.
- Similar products can also be combined with other types of mirrors, for example round or oval.
- Paired mirrors can be placed above symmetrically arranged furniture, such as a bedside table or armchairs.
Illuminated mirror device
Standard arrangement of rear mirror elements
Once you have decided on the external requirements, it is worth thinking about how exactly to provide light - with ordinary light bulbs or a strip of diodes. The second option is preferable, especially if contour illumination of an object of complex shape is required. The lighting structure can be placed in a box or simply glued on.
Installation of LED strip around the mirror
LED strip for mirror
The photo shows a strip where each LED is soldered to a flexible board with resistors, and this entire structure, in turn, is attached to double-sided tape.
Choosing an LED strip
When thinking about how to make a backlit mirror in the bathroom, you should first make sure that the diodes have a moisture-resistant coating. The more powerful the diodes, the brighter they will shine and the more electricity will be consumed.
There are also diode strips in which the color of the lighting can be switched. An important criterion is the power of the tape power supply. To calculate it, multiply the power of one meter (usually 4-8 watts) by the length of the tape.
In order to illuminate a mirror with an LED strip, you need to:
- Secure the tape to the mirror with double-sided tape.
- Solder the wires to the LED strip, observing the polarity. If necessary, treat the joints with sealant. Homemade mirror lighting is ready. No additional light sources are required, which means it can be mounted almost anywhere. A properly installed structure will work effectively for a long time.
- Secure the power supply outside the bathroom and connect it, paying attention to the need to ground the unit body.
You will need: LED strip, soldering iron, double-sided tape, sealant
Secure the tape with double-sided tape
Solder the wires to the tape, observing polarity
Treat joints with sealant
Secure and connect the power supply
How to cut LED strip yourself
Understanding how to make a backlit mirror with your own hands is impossible without knowing the rules for working with LED strip.
It is divided into many segments. Typically, manufacturers mark with a line where disconnection is possible. If there are no markings, you can independently calculate the contact pads between which a cut is possible.
When cutting a tape with waterproofing, after connection it is necessary to treat the contact pads with silicone sealant.
The correct option for cutting LED strip
Material of manufacture
When making mirrors, different materials are used (wood, plastic, metal, etc.) it all depends on the interior into which the mirror should fit, as well as on the desired cost of the product.
The mirror panel comes in silver and aluminum.
It is best to choose wood or MDF as the material:
- Wood is an expensive and practical material that can be adjusted to any design.
- MDF is an excellent material, in no way inferior to wood, but its price is lower, which does not affect the quality at all.
- Metal - such a mirror will fit perfectly into a cold interior, but a metal mirror will be heavy, bulky and expensive. An excellent replacement for it can be a mirror made of MDF and painted to look like metal.
- Plastic is the cheapest and not very practical material. The choice of plastic products is small, because it looks very cheap and designers rarely start working with this material.
Eternal traditions and fashion trends
Empire and baroque, classicism and rococo - all classical styles are invariably in fashion. The luxury and sophistication of the classics creates a unique atmosphere of a royal palace in the apartment. The overall design of such an apartment is perfectly complemented by a large mirror in the bathroom. Hanging or floor-mounted, framed in a frame that matches the style, it not only performs the utilitarian function of reflecting objects, but often serves as the main decoration of the room.
Mirror makers are sensitive to the latest whims of fashion. The latest styles require strict adherence to them even in the smallest details of the interior. If your spacious apartment is furnished with the latest fashion, you should think twice before buying a large mirror for the bathroom. For trendy hi-tech and loft styles, choose mirrored surfaces in frames made of metal or a material that imitates it. Then stylistic unity will reign in your apartment.
The reddish shade of the wooden frame for the mirror is perfect for the bright brickwork of this loft-style room
For eco-style, frames made from natural materials - wood or MDF - are more suitable. Natural fabrics framing a mirror surface are a good solution for decorating a room in a country style. In this way, interior items corresponding to any of the ethnic styles are obtained. National patterns applied to the frame of reflective surfaces create a unique flavor specific to a particular country.
Mirrors in a wooden frame. This option for decorating mirrors is more suitable for a fairly strict and laconic design of a country-style bathroom.
How to do it yourself: step-by-step instructions
To make a sunburst mirror we will need:
- Thick cardboard.
- Scissors.
- Bamboo sticks in the amount of 100 pieces and at least 30 cm long.
- Spray paint.
- Glue for a glue gun.
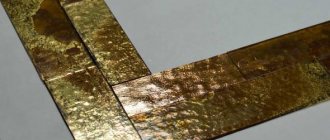
- Brass ring (can be purchased at a craft store).
- Fastening for the finished product.
- Glue gun.
- A small hacksaw.
- Sandpaper.
- Compass.
- Ruler.
- Pencil.
- We cut out a circle from cardboard that completely matches the size of the mirror.
- From the center of the circle we draw straight lines to the edge so that we get 24 sections of equal size.
- Inside the large circle, draw a smaller one, moving 3 cm from the edge.
- We divide the set of bamboo sticks into four parts.
- Each contains 24 pcs.5. We leave the first stack of sticks at the original size, shorten the second by 6 cm, the third by 10, and the fourth by 12.6. We saw off the sharp edges of the sticks and sand them with sandpaper.
- We glue the longest sticks from the center of the circle according to the drawing. Glue short from the edge of the inner circle.
- We paint the rays using a spray can. You can choose any color, the main thing is that it matches the interior.
- We are waiting for the paint to dry completely.
- Glue a mirror on top of the rays so that its edges coincide with the edges of the cardboard circle.
- Glue a ring on top of the mirror; if it is a little larger in size than the mirror itself, the work will be more accurate.
- Fasteners are glued to the back of the product.
- Decoration. Here you can give free rein to your imagination. Various mirrors, glass and rhinestones can add zest to the finished product.
Required Tools
In the process of work we will need;
- glue gun;
- scissors;
- small hacksaw;
- sandpaper;
- compass;
- ruler;
- pencil.
The mirror has more of a decorative function, so you should choose a small diameter.
Before gluing the missing elements, you need to paint the beams.