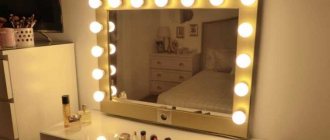
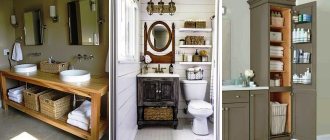
Types of wall mirrors
Manufacturers produce products in various forms:
- Square. Give visual proportionality to the room;
- Round. Suitable for rooms with a relaxed interior style, visually expanding the space;
- Oval. Serve as a complement to a room with a classic design;
- Rectangular. Emphasize the geometry of the walls and the severity of the lines of the tiled cladding;
- Curly. They can serve as the main accent in interior design.
Depending on the decor, there are mirror models with:
- pattern (application is carried out using matting or sandblasting);
- chamfer (the mirror has beveled edges and is characterized by significant weight and thickness);
- artificially aged surface;
- colored.
Depending on the materials used for the production of mirrors, the following products are produced:
- made of sheet glass with silver or aluminum amalgam (models with silver coating are highly resistant to high humidity and temperature fluctuations);
- made of mirror acrylic, polystyrene or polyvinyl chloride.
Products can be with a base (made of chipboard or fibreboard) or without it; with or without frame.
The size of the installed reflective coating is selected taking into account the dimensions of the room and personal preferences.
To decorate a bathroom, it is advisable to buy a mirror with a coating that is resistant to moisture and can withstand temperature changes.
Preparatory work for mounting the mirror
The first step is to choose the right bathroom mirror with the right size and finish. It should be understood that as its size increases, more serious fastening will be required.
In addition, when purchasing a large mirror, you should take into account the load-bearing capacity of the wall, as well as the place for safe placement and operation of the product.
The number of fastenings for each blade is different and, as a rule, is determined by the manufacturer, based on the dimensions and total weight.
At the second stage of preparatory work, it is worth deciding on the installation method. A mirror can be attached to a tile in the following ways:
- on special mounting tapes;
- on an adhesive base;
- on hooks.
The first two methods for hanging a mirror in the bathroom are suitable in most cases, since usually in standard layouts the rooms are small and therefore a canvas with minimal dimensions is hung.
If there is a need to remove and rehang the mirror, there will be no problems, since during installation the tiles are not damaged, and the decorative finish remains in its original form.
But if the manufacturer's recommendations for the use of adhesives or tapes are not followed, they may pose a danger: the mirror can easily fall at any time, especially when the humidity in the room increases.
Therefore, it is recommended to use the third method. It is more labor intensive, but is ideal for hanging a mirror securely. During operation, it will be completely safe and protected from mechanical influences.
Due to the fact that many manufacturers complete their products with special fasteners, the main part of the work will consist of competently drilling holes in the tiles for dowels or screws.
Before gluing, you will need to thoroughly wash the surface of the tile with detergents to degrease, and then wipe dry with a soft cloth. Such actions must be performed to increase the adhesion of the coating.
Also interesting: Bathroom mirror with lighting or lamps
Necessary materials
When performing installation work you will need:
- mirror;
- dowels (for installing medium and small format canvases - with a diameter of 6 mm, for a large mirror - with a diameter of at least 8 mm);
- wooden strip or metal profile for support;
- fastening material. Depending on the installation method: screws, self-tapping screws, anchor bolts, liquid nails, staples, tile adhesive, double-sided tape, moisture-resistant drywall;
- rubber gaskets;
- degreaser.
Option 2 – for liquid nails
You can attach the mirror using liquid nails. Thus, it is installed in niches if there is a plasterboard gasket between the wall and the mirror or on a tiled surface. The product must be moisture resistant and not destroy the amalgam.
Before applying the product, the surface is thoroughly degreased, and control marks are made on the wall - landmarks. It is best to completely circle the mirror. Then an adhesive substance is applied to its back side.
Liquid nails are applied along the perimeter, retreating 2-3 cm from the edge and pointwise or in a grid - in the middle. After this, the sheet is lightly pressed against the wall, torn off for 1 minute and pressed again. The composition will dry within 24 hours. During this time, it is better to fix the mirror with a support.
Which mounting method to choose - gluing or drilling
There are many methods for installing mirrors; choose the one that suits you most, depending on the weight and design of the product itself and the type of base.
Mounting to tile mortar
Advantage of the method: suitable for installing products of any shape and weight. Disadvantages: thorough preparation of the base surface for work and the impossibility of dismantling the mirror (if it is necessary to rehang the product, the old coating is broken and the fragments are removed).
Progress:
- mark the mirror mounting on the wall;
- remove the cladding along the marked lines;
- clean the base, putty or level the surface if necessary;
- apply primer to the base;
- lay the bottom border with tiles, inserting dividing crosses between the slats to obtain even seams;
- fix a profile or rail on the wall along the upper edge of the cavity for support;
- lay the top border, then the sides;
- remove excess glue with a sponge;
- wait until the composition has completely hardened. This will take at least a day, but more accurate information is contained on the packaging;
- prepare the adhesive mixture for work (it is advisable to make a solution of thick consistency). Using a notched trowel, apply it evenly and thickly to the wall;
- Place the bottom edge of the mirror on the installation site. Immediately insert dividing crosses between the canvas and the border;
- Place the entire surface of the accessory against the adhesive mixture. Adjust its position so that it is flush with the tile;
- Press the reflective surface with your hands for 10-15 minutes;
- After the glue has dried, remove the support strip and fill the seams with grout mixture.
Be sure to leave small gaps between the mirror and the tile - this will allow excess mortar to escape. Use a composition that has moisture-resistant properties.
Fastening with hardware and other fasteners
A simple and convenient way is to fix the canvas with ready-made holes:
- mark the location of the mirror and drill holes in the wall, the diameter of which should correspond to the size of the dowel, and the depth should be 5 mm greater than the screws or self-tapping screws used;
- drive in the dowels;
- fix the canvas by installing rubber gaskets between the metal parts of the fasteners and the mirror, cover the caps of the screws with decorative heads.
The product can be secured with special supporting brackets, fixing them on the wall.
How to properly drill holes in a mirror
The product can be secured with self-tapping screws by drilling holes in it:
- lay the canvas horizontally on a solid base;
- Mark the future holes with a marker on the surface (make an indent from the edge of the canvas of at least 13 mm, if the thickness of the product is large - at least 25 mm);
- set the minimum speed of the drill (you can use a screwdriver), put on safety glasses and make a small indentation in the center of the marking;
- drop machine oil into the hole and continue drilling, without pressing the drill and holding it strictly perpendicular to the plane of the mirror. Using oil, you can significantly reduce the risk of drill breakage and cracking of the product.
You can use step drilling: make a small recess on the front side of the mirror at the attachment point, turn the canvas over and continue drilling on the back side, placing a plasticine bath on the mark (stick a piece of material around the future hole and fill it with water - this will reduce overheating of the surface and prevent chipping) .
Use only special diamond pen or tubular drills to work with a mirror.
The nuances of installation between tiles
- check the evenness of the niche lines before installing the mirror, measure the corners and, if necessary, perform alignment (to make the work easier, you can make a template of the product from a solid material and take measurements using it);
- most often the depth of the niche is greater than the thickness of the mirror; To prevent the product from being “recessed” into the cladding, compensate for the difference in size by installing moisture-resistant drywall or applying a thick layer of mortar. Consider not only the size of the mirror, but also the size of the adhesive layer;
- before removing the tiles, decide on the processing of the mirror edges: chamfering, framing or polishing with sandpaper;
- choose the fixing solution carefully: it must be suitable for working with mirror surfaces and be resistant to high humidity.
Fastening with liquid nails
The method allows you to install heavy canvases and is suitable for installation on drywall:
- degrease the tiles in the area where the canvas will be installed;
- Mark the bottom line of the mirror and attach a support rail or profile to it. You can secure the product with tape while the composition dries;
- Apply liquid nails to the back side of the canvas (dashed lines, snakes, dots), making an indent from the edge of the surface. If the product is large, apply glue with a notched trowel over the entire surface;
- leave the glue in the air for 10 minutes and then press the mirror to the base;
- dismantle the support no earlier than after 24 hours.
The fixing mixture must be designed for working with mirrors, otherwise the composition may dissolve the amalgam.
Fastening with double-sided tape
You can install a mirror in the bathroom without removing the facing tiles and drilling holes by securing it with mounting tape:
- degrease the wall section;
- place the mirror with the back side up on a hard surface;
- glue strips of tape to it vertically; you can additionally cover the perimeter;
- remove the protective film from the tape and press the mirror firmly against the wall, hold it for several minutes and remove your hands.
Be as precise as possible when gluing the mirror to the base - once fixed, you cannot change or adjust its position.
At what altitude?
If you need to hang a mirror in the bathroom, then first of all you should decide on its location. It is important to do this correctly. This will ensure ease of use and safety for all family members.
To determine the optimal height and location of the mirror element of the interior, you need to study the following rules: In families with small children, the bottom edge of the mirror should be located at a level of 1.2 m from the finished floor. At this height, it will be convenient for a child over 5 years old to use the accessory.
As for younger children, this height will not allow them to reach the mirror and, for example, break it
If there are no children in the family, then you should focus on the shortest tenant. In such a situation, it is necessary to place the mirror cloth 1.5-2 cm below the person’s solar plexus.
To prevent splashes of water and detergents on the mirror.
To ensure that the mirror remains clean, select its installation location by measuring 30-40 cm from the edge of the washbasin;
An important point is the size of the element.
You can choose it based on the tallest person living in the house. The edge of the mirror should be 1.5-2 cm higher than such a person;
The height of the bathroom door should be taken into account. It is not recommended to place the product higher than the edge of the doorway.
The final stage is decoration
You can make your own mirror decor:
- make an original frame using various materials - mosaic tiles, wood, drywall. Paint the surface and cover with moisture-resistant varnish;
- glue beads, shells, bugles to the mirror in any order or in the form of a pattern;
- Apply a design using a stencil or by hand using stained glass or acrylic paints.
Installing a mirror is a responsible job, complicated by the fragility of the material. Be precise, careful, and never rush. Then your efforts will not be in vain, and the bathroom will acquire a complete, harmonious look.
