Repair
0
64 361
Share
Partial restoration of kitchen facades allows you to update the interior, make it fresher, and visually attractive. Replacing a kitchen unit can be quite expensive, so you can only update the facade. This restoration technology will help change the appearance of the furniture, while its main parts will remain old, which will significantly save on replacing cabinets.
- Benefits of façade renovation
- How to fix the problem?
- Using heating devices
- Restoring coating using friction
- Application of glue
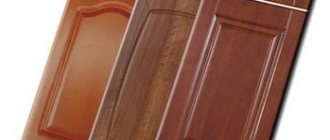
Types of coatings
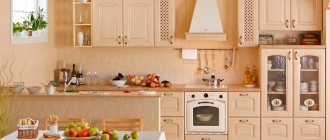
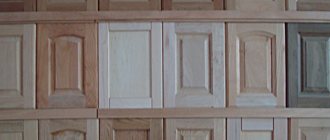
For the kitchen, the best choice would be MDF furniture. And the point is not even in its greater density, but in the high homogeneity of the composition. Unlike chipboard, the material does not crumble and holds fasteners well, even repeated ones, which is extremely important when replacing hinges, handles or other fittings. In addition, the manufacturing method itself is based on lignin, and not formaldehyde resins, which makes MDF facades more environmentally friendly.
In the photo - a kitchen with MDF facades covered with veneer
The slab is decorated in a variety of ways.
- Veneer is a section of natural wood glued to a slab. It requires exactly the same care as a real tree, is just as capricious and just as beautiful. If damaged, this coating cannot be restored with your own hands.
- PVC film is most often used for laminating chipboard, since this is the most budget option. The film can imitate any type of wood, although not entirely convincingly. The main disadvantage is that with prolonged exposure to moisture and temperature, the film peels off. Repair is partially possible.
- Melamine film - its basis is decorative paper impregnated with melamine resin. The advantage of such kitchen facades is their higher resistance to moisture.
- Acrylic film is a paper-laminated plastic, characterized by much higher strength, resistance to mechanical damage and dampness. This coating can have a matte, satin or glossy surface, and therefore extremely rarely imitates wood. Any colors are available - white, red, blue, black and all possible combinations.
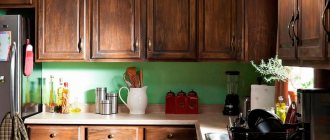
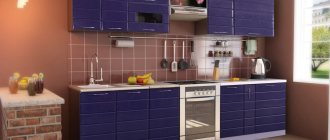
The facades of the kitchen in the photo are covered with film.
The undoubted advantage of the three listed film options is the possibility of finishing radius facades. And such a solution always looks original. Moreover, the size and configuration of the kitchen have little effect on the price.
- Acrylic panels – here the color or design, including photo printing, is applied directly to the MDF board and then filled with transparent acrylic glass. Such an impeccable gloss enhances any color - white, lilac, crimson. Despite their considerable strength and absolute resistance to moisture and heat, acrylic kitchen panels have a drawback: their restoration if chipped or other damage is impossible - the sash must be replaced. The photo shows a kitchen with a white glossy facade.
White color as in the photo is best combined with companion flowers - Enamel coating. Provides an exceptionally rich range of colors and color effects: smooth transition of shades, mixing of colors, pearl shine, “chameleon” effect - all this wealth can be achieved by applying enamel and varnish in several layers to the surface of the slab. The mechanical strength of the enamel layer is not too high, so the paint may darken when exposed to sunlight. However, repairing enamel facades is possible even with your own hands. And you can paint any doors with enamel - smooth, milled or radius.
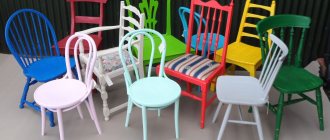
As a rule, plastic kitchens are those models in which the coating shows a bright color - white, pink or lilac, and no less bright gloss. In fact, painting can easily transform furniture into either a modern, glossy or “aged” rustic look.
Restoration of kitchen facades from
Kitchen furniture, compared to furniture in other rooms of a house or apartment, is influenced by a much larger number of different unfavorable factors. They significantly affect the appearance and characteristics of furniture, and also cause premature aging of work surfaces and other components. In particular, furniture is influenced by:
- moisture;
- temperature changes;
- evaporation;
- direct rays of the sun;
- open fire.
Since furniture facades are always in sight, they first of all require replacement or repair. The most popular materials used in the production of furniture facades are MDF, chipboard, natural wood, and tempered glass. There are two options for solving the problem of damaged facades - replace them with new ones or use restoration. The latter method allows you to significantly reduce financial costs.
The most popular methods of restoring kitchen facades
The most common methods used to update furniture are:
- painting;
- self-adhesive film;
- varnishing.
Painting is one of the popular ways to restore the appearance of furniture surfaces. However, it is applied only if the facade is in good condition - has no cracks, delaminations or chips. If there are any defects on the surface, they are first eliminated and only after that paint is applied.
Most often, MDF facades are painted, and if everything is done correctly, the restored facade will be truly “new.” It is mandatory to apply a primer, which helps improve the adhesion of the paint to the surface. In addition, this will reduce the consumption of paints and varnishes. If you want to get a surface with a glossy effect, use a special acrylic-based varnish as a finishing coat.
Experts also know the basic techniques for working with glissal, which allows you to obtain a very interesting surface texture. These can be broken lines, bubbles, some kind of abstract ornaments that give the furniture a spectacular appearance.
You can also use a film with a self-adhesive layer to restore the ideal appearance of kitchen furniture. High-quality film allows you to extend the service life of furniture. In addition, it is easy to apply and is relatively inexpensive. It is a very cost-effective material that comes in a variety of colors and textures.
Manufacturers offer film both standard and with various modifications. There are even coatings that have reliable UV protection, which helps protect the furniture surface from fading. On sale are both solid color solutions and films with imitation surfaces like stone, wood, fabric, and brickwork. Therefore, you can easily choose the best option that matches the shade of the kitchen.
If the furniture is made of wood, varnishing is used to restore its facades. Wooden facades can last a very long time, and if they are damaged, their original appearance can be restored by applying a layer of varnish.
Before coating, specialists plaster the surface and varnish it in several stages, applying layer after layer with breaks to allow them to dry completely. In order to give the furniture the desired shade, tinting materials are added to the varnish, but the last layer is made with varnish that has no color.
Also, one of the options for restoring kitchen furniture is to replace the panel with a new one or use another material instead of a damaged element - glass, glass mosaic, rattan, etc. The last material - rattan, is very popular today and furniture with inserts from it is among the real hits. Rattan decor looks very stylish, but do not forget that it is an environmentally friendly material.
Restoration of facades allows you to breathe new life into damaged or old furniture. However, for this you need to seek help from specialists.
carries out restoration work that helps restore the original appearance of facades. In the restoration process, we use effective technologies and high-quality materials that allow us to carry out all stages efficiently and effectively.
We invite you to use our services and evaluate the impeccable quality of the work performed, reasonable cost of services and compliance with deadlines. Contact us by phone or visit the ProRestavraciya office and we will help you restore your furniture at the lowest cost.
Source: restavracija.pro
Benefits of painting
Painting kitchen facades with your own hands allows you to transform old furniture and give it an original look. A wide selection of coloring compositions with various shades complicates the search. Glossy and matte finishes are suitable for doors and drawer fronts of kitchen units, and with skillful combination of colors you can achieve a unique result. Painted details with an unusual pattern will delight not only the owner, but also his guests.
What are the benefits of treating kitchen cabinet doors and drawer fronts? The following advantages can be highlighted:
- Environmental friendliness. Natural paints and varnishes create a durable coating that does not emit substances hazardous to health during kitchen operation. Elevated temperature and humidity do not lead to the evaporation of harmful substances.
- Sustainability. Elements coated with a coloring composition are not afraid of mold, do not absorb excess moisture, and are not subject to deformation. Taking into account the specifics of the room in which food is regularly prepared, painting turns out to be the optimal method.
- Constant contamination with cooking products, grease splashes and soot deposits are not a problem for a kitchen set whose front side is treated with paint. The protective paint layer can withstand regular cleaning and washing, and without them it will not be possible to keep the appearance of the room at a level.
- Surface evenness. Parts painted in accordance with the technology have a smooth surface. The effect of ideal smoothness can be maintained throughout operation, restoring the surface if necessary.
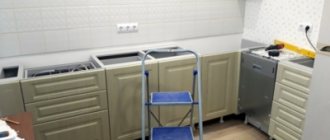
Painting will help eliminate the problem of film peeling
Pasting with film
This method is suitable for quick and inexpensive restoration of kitchen facades. Vinyl coating with a bottom self-adhesive layer has a number of advantages:
- good strength;
- resistance to moisture and high temperature;
- does not fade in direct sunlight;
- maintains the brightness of colors for a long time.
The material is easy to work with, and its low price allows you to restore kitchen facades without much damage to the budget.
Before pasting, the doors are removed from their hinges, the surface is cleaned of dirt, treated with a degreasing compound, and then the film is carefully straightened with your hands and a spatula. The air bubbles that appear are pierced with a needle. If you fail to apply the self-adhesive without any unevenness or creases the first time, tear off the piece and try to work with a new one. The used material should be thrown away. Plain film can be purchased at construction or wallpaper stores. If you want your kitchen to become not only beautiful, but also unusual, order a cover with photo printing.
Necessary tools for painting
Painting furniture facades requires a certain execution technology. Taking into account the selected composition and method of applying the paint layer, appropriate tools are selected. If the kitchen is undergoing renovations and the cabinetry needs to be repainted, then it will be useful to prepare in advance. For example, make a preliminary sketch, a project for a future updated kitchen.
With proper preparation, you can avoid most of the problems that inexperienced repairmen encounter. A preliminary embodiment of the appearance of the headset on paper will help to calculate the required amount of material. With a sketch it is easier to figure out the color, notice shortcomings, correct them in time, and get an idea of how the kitchen will look in the end.
To carry out painting work on kitchen facades you will need:
- coloring composition;
- grinding machine with attachments;
- primer to create a base for paint;
- sandpaper;
- brushes, rollers, spray gun;
- container for paints and varnishes;
- masking tape to protect areas that do not require painting;
- screwdrivers or screwdriver for dismantling fittings;
- film to protect the floor (if painting will be carried out on it);
- construction hair dryer (for heating the film on MDF);
- protective gloves, respirator.
Read on the topic: Cornice for the kitchen - how to choose, installation and photos in the interior
Pay attention to: Stained glass painting: paints, stencils, brushes
The set of tools and materials varies depending on the processing method. In addition to the above items, you may need various stencils, elements for finishing decoration, and glitz (to obtain iridescent colors).
Grinder with attachments Spray gun Screwdrivers Construction hair dryer
The main stages of restoration and the necessary tools
There are many options for restoring old furniture. It can be given a second life by painting, pasting with self-adhesive film, decoupage and other methods. In any case, the restoration will take place in two stages: repair and preparation for finishing.
Despite the fact that upgrading your furniture doesn't cost much, there are a few things you should have on hand. Tools for furniture restoration are always available in the house; if they are absent, it is necessary to purchase the following items:
- small nails and hammer;
- screwdriver;
- small spatula;
- fine and coarse sandpaper;
- brushes for painting;
- wood glue.
You may need screws, wood putty and primer, new hinges for cabinet doors and corners. In some cases, you will have to buy paint, varnish and new fittings to bring your plans to life. Once you decide on the idea of restoration, you can purchase all the materials required to implement the idea.
Types of paints for MDF
Laminated MDF boards, from which the facades of finished furniture are made, are the easiest to paint - the film coating on them acts as a leveling layer and primer.
The following compositions are suitable for coloring them:
- Alkyd or oil based enamels. These are universal compositions with high coverage and resistance to water, abrasives, mechanical and chemical influences, but with a pungent odor and additives harmful to human health.
- Paints containing polyurethane resins. They are characterized by increased wear resistance and durability, but working with them requires some professional skills.
- Acrylic-based enamels can be liquid or in aerosol form. They contain water-soluble components - acrylate or latex polymers, therefore they are safe, resistant to moisture and temperature changes, but do not protect well from abrasive and mechanical damage.
- Furniture enamels and nitro paints. Their advantages are high coating density, good adhesion to the surface, quick drying and durability.
It is more difficult to paint the furniture body, since MDF boards without additional coating absorb a lot of paint, and wood fibers that rise during the painting process make the surface rough.
In this case, the following types of paints are suitable:
- Acrylic compositions in the form of aerosols. To get a fairly smooth surface, you will need to apply at least 4 layers.
- Special paints for MDF. They have a polyurethane or urethane-acrylic base, are applied with a brush or spray, and the furniture coated with them almost does not fade and is resistant to various types of influences.
- Automotive enamels. Despite the fact that they were developed for painting metal surfaces, they are also suitable for MDF, as they have suitable characteristics - fast polymerization, good adhesion, resistance to high temperatures and moisture.
A decorative effect, such as imitation of patina, leather, silk, shagreen, textured metallic, can be achieved using polymer powder paint for wood and MDF, but its application requires special equipment.
There are two types of auto enamel
- Acrylic. It is applied at once and after drying the facade immediately looks uniformly glossy. Using acrylic you can create color effects. For example, combining base enamel with acrylic, you will get a solid and expensive surface
- Alkyd. It is made from glycerin and resins, costs less than acrylic and dries quickly at room temperature.
Methods for updating and restoring kitchen facades
It is advisable to carry out restoration work if the furniture is well preserved, has a strong frame, and the cost of repair measures does not exceed the cost of new products. By getting rid of old stains, removing and masking cracks and chips, and replacing the cladding, you can transform the kitchen façade, which will be visually in no way inferior to the new models.
You can restore an attractive appearance in different ways. For example, scratches can be easily painted over with a furniture pencil or hidden under decorative stickers; the damaged coating can be repainted or varnished. In some cases it will be appropriate to combine different methods to obtain the best effect. Let us dwell in more detail on the most popular restoration options.
Decorating with interior stickers
Interior stickers will help disguise minor local scratches, cracks, chips, and indelible stains. They can be used to decorate not only the facade, but also the walls of the kitchen room. They tolerate moisture, steam, temperature changes well and are easy to care for. The elements adhere well to plastic, wood, veneer, MDF, chipboard, glass, and metal.
The gluing process itself takes very little time; you just need to clean the surface from dust and dirt and degrease it. At the same time, stickers will help hide minor defects, and will also become an excellent addition to the interior of the room, giving the home atmosphere a feeling of comfort and warmth.
If the wood or veneer is not painted, not varnished, or has a very cracked finish, then problems may arise with gluing the elements. They simply will not stick to such a surface. You can do a preliminary test using regular adhesive tape by sticking it on the furniture to be restored.
Pasting with self-adhesive film
Along with interior stickers, vinyl films allow you to carry out inexpensive repairs, for example, in a small area of a Khrushchev-era building. They are resistant to moisture, do not fade under the influence of sunlight, and do not lose their color over time. The average service life is 3 years. When caring for them, it is recommended to use a soft cloth and soap solution, since abrasive substances and mechanical friction will damage the material and will have to be restored.
It is easy to glue the product to the facade. The fittings are removed from the surface selected for restoration, it is thoroughly washed, cleared of grease and plaque, degreased, and dried. At this time, the film is prepared. It is cut out with a margin of 2 cm on each side, taking into account the bends. Afterwards, part of the protective layer is removed from the sticker, its wrong side is pressed and glued to the door, straightening and smoothing with a spatula. Places where air bubbles have formed can be pierced with a needle.
If something goes wrong during the work, a bevel occurs, the material can be immediately detached from the surface and re-glued, but no more than 2 times. Complete setting occurs after 5 hours.
Painting with chalk paint with a detailed master class
Updating the kitchen facade can be done by painting. This is one of the best ways to restore and completely change the color of a product. Restoration should begin with preparatory work: doors are removed from the cabinet, shelves and drawers are removed, fasteners are checked, broken elements are replaced with new ones.
Next, they decide on the color and begin to prepare the materials and tools necessary for the work. To carry out the activity you will need:
- kitchen set;
- film, masking tape;
- screwdriver;
- sandpaper;
- chalk paint, primer, varnish, degreaser;
- brushes for applying paint, rubber gloves.
Surface preparation
The first step is to remove the fittings and decorative elements. After which all parts are thoroughly washed and degreased. There should be no dirty spots left on the surface. If there is glass on the door, they must be protected from paint using masking tape.
Usually there is no need to sand the facade or remove the old coating from it. In some cases, when the paint is peeled off or applied in a thick layer, it is better to scrape it off with a knife, or use special removal products. Afterwards, rub the top with sandpaper until rough and remove dust.
Sand or prime
Manufacturers of chalk paint write on the packaging that before applying it there is no need to putty the surface or remove the old layer of paint from it. But in practice, especially in the presence of defects, these actions cannot be avoided, otherwise the defects will be visible on the painted facade.
It is better to apply alkyd primer in two layers. Before covering the next layer, the first one must be completely dry. This process takes up to 12 hours. On top of each layer, after it has completely set, you should walk with fine sandpaper, which will ensure the best adhesion of the material.
Coloring
Chalk paint developed by Annie Sloan is great for upgrading furniture. It is chalk dissolved in water, mixed with various additives, but the original recipe is kept secret. When applied, a patina is formed, which gives the item a unique look. This is the best choice for a shabby chic interior.
Using a brush, roller or sponge, apply the first layer. It must be remembered that, unlike other painting analogues, if stripes remain during painting, then the facade will eventually have a striped appearance. The paint dries within one hour. Experts do not recommend speeding up the drying process yourself, for example, using a hair dryer. Before applying the second layer, you should sand the previous one a little.
Treat with varnish
After drying, the painted surface is covered with a layer of varnish. For these purposes, you can use polished or acrylic options. It is also applied in several layers with sanding of the first. The second one is not rubbed, otherwise the product will not be smooth.
Instead of varnish coating, the attractiveness of facades can be restored with wax. It is applied to a dry surface using a soft brush, sponge, or textile. After 15 minutes, it must be rubbed into the surface with a cotton cloth without pressing on it. After the facade dries, it will become smooth and a satin shine will appear.
Returning fittings and facades to their places
After the facade has completely dried, it is inspected for the presence of thick spots of paint and minor defects. When they are discovered, they are cleaned up or eliminated. Next, the masking tape is removed from the glass, and decorative elements and fittings are installed in their places.
After making sure that the frame is strong, the prepared doors are attached to it. Using a screwdriver, adjust the position of the element and level it. At the final stage, the functionality of the fastening mechanisms is checked.
Decoupage
An old kitchen set that has already served its purpose does not necessarily need to be replaced with a new one. It is enough to revive its facades with the help of decoupage. If the internal hinges and fittings are in working order, they do not need to be changed. The work will not take much time, in just a day, the doors will be updated with all kinds of pictures and will delight the owners.
First of all, you need to remove the facades and wash them well. It is necessary to get rid of stains and dried drops of fat. Now we wipe the surfaces with alcohol for better adhesion to adhesives. All cracks and chips must be treated with sealant.
At the next stage, we measure all the details and transfer the numbers onto paper and cut out the pattern. You can transfer the drawing to the sheet yourself or choose a suitable one and reprint it in a printing house or photo studio. We cut out the finished picture and proceed to decoupage the surfaces.
Place the workpiece in warm water for a few minutes. While the paper is softening, apply glue to the surface. We transfer the decor to the door and smooth it with a roller, carefully removing air bubbles. After 12 hours, the parts can be mounted in place.
Varnishing
An excellent option for restoring facades made of solid wood, wood materials, and MDF is varnishing. As with other materials, when remodeling, work should begin with preparing the surfaces. If there are shallow chips or cracks, they should be filled with putty with a special compound for natural materials and cleaned well. For ease of operation, the door of the headset should be removed.
Before applying the finishing coat, the surface should be degreased and treated with a primer and stain. This will help protect the wood from moisture and other negative influences in the kitchen. After drying, varnish compositions can be applied to the surface. For reliability and greater shine, you can paint in several layers, reducing the volume of each subsequent one. After drying, we collect all the elements and place them in place.
Use of moldings and decorative overlays
You can give your furniture a completely new design using moldings and other decorative inserts. Facades can be restored using plastic and wooden overlays. If the furniture has lost its beautiful appearance, it should be refreshed with paint before decorating. Do-it-yourself restoration takes place in several stages:
- Preparation - removing doors, protruding elements, fittings. Cleaning from dirt, removing old coating if necessary;
- Priming – treatment with special mixtures, depending on the material of the set and the type of finishing coating;
- Preparation of overlays, moldings - the decorative material must correspond to the type of surface. For plastic doors, plastic elements are chosen, wooden facades are decorated with appropriate details;
- Decoration – surfaces can be updated with rectangular strips, smooth or carved, with imitation stucco. They can simply be glued according to the intended pattern or using clapboard nails;
- Painting - the mixture is selected based on the door material (natural wood, MDF, plastic). Apply paint with a roller or brush in several layers.
Types of varnishes suitable for MDF
Varnishing furniture made from MDF greatly increases its service life. The following varnishes are used:
- Alcohol or oil based. They dry quickly and are inexpensive, and oil-based ones give the surface additional moisture resistance.
- Alkyd-urea compositions of two components, which are mixed before starting work. Gives the surface strength and shine.
- Epoxy varnishes also consist of two components. They withstand contact with water well, so they are often used for application on countertops.
- Polyester compounds. Resistant to high temperatures and chemicals.
- Nitrocellulose. They are not durable, so they polish well.
- Acrylic-urethane and acrylic. They are diluted with water and do not have a strong odor. Surfaces coated with them are safe for health, allowing contact with food.
- Polyurethane. Used in places where increased wear resistance is required.
Pay attention to: How to remove paint from furniture at home: recommendations for beginners
Applying varnish to furniture parts is a more complex process than painting.
Repair of furniture made of chipboard and MDF
Furniture restoration workshop, repairs furniture made of chipboard and MDF.
Restoration of individual parts, hinges, replacement of tabletops, veneering of facade doors, making marquetry, gilding, carvings and stucco moldings. Chipboard furniture has confidently entered our homes. Over the years, it breaks, becomes chipped, swells, and deteriorates in the places where the hinges are attached. We restore furniture made from chipboard, MDF, plywood and other materials with the same care as expensive wooden furniture. The restoration of modern furniture differs in many ways from the restoration of antique furniture, although the removal of scratches, damage to varnish, and chips is carried out according to the same rules as the restoration of rarities. The adhesive for modern laminated surfaces is selected to be special, colorless, or discolored when dry. Restoring the design of modern cabinets, chests of drawers, facades, doors occurs using completely different technologies dictated by the material itself - chipboard or laminated MDF.
Our workshop is focused on eliminating complex breakdowns. The furniture is swollen after a flood, a fire, a pogrom, although we also carry out minor repairs.
You can find out about the prices of furniture repair, restoration, restoration by phone or by sending us a photo by email [email protected]
Anyone can repair small scratches with hard wax. To do this, just buy a wax pencil of a suitable color in a specialized store or construction market and read the instructions. Carry out everything in accordance with the instructions and cover the restoration result with a can of non-areola varnish (matte or glossy). A chip is more difficult to remove. Need to build up. The corners of countertops, cabinet doors, and places where hinges are attached are the most vulnerable places that require professional gluing, leveling, and extension.
Choice of colors
To achieve a better result and really change the interior of the kitchen, it is recommended not only to repaint the set, but at the same time replace the curtains on the windows and change the upholstery on the chairs. In this case, the color scheme will be combined and harmonized as much as possible, creating the feeling of a complete renovation.
The choice of color depends only on individual preferences. To update the interior, you can use either one tone or several at once (they can be in the same color scheme or contrast with each other). If you have some taste and minimal experience, achieving the perfect combination is not difficult, but for beginners it can be a little difficult.
The most common options for painting a kitchen are:
- neutral solution . These include white, beige, light milky, brown, gray and black tones. These colors can not only be adjusted to any interior, but can also be perfectly combined with each other. This solution is especially relevant: the lower cabinets are painted in a dark color, and the upper ones in a light color. This combination is optimal; it suits both classic and modern styles;
- contrasting colors . If you want to make your kitchen unusual, you can combine yellow and purple (lilac, blue), red with black, blue with pink (red). Despite the fact that the colors are completely different, they combine perfectly with each other and will make the kitchen bright and rich. This solution is suitable for different styles;
- combination of several colors. A very popular solution is to dilute a calm shade with a bright detail. You can paint the entire set one color, and some individual element another. In this case, you will get a retro style set.
Before you go to the store to buy paint, you need to think carefully about everything and decide what colors will be used to paint the kitchen. With the right approach, the set will “live” a new life and completely transform the kitchen.
On a note ! When choosing combinations of shades, the color wheel will help. With the help of his schemes you can create an interior no worse than professionals. You can read in detail about the combination of shades in the book “The Art of Color” by Johannes Itten.
Unusual solutions
The imagination of home craftsmen literally has no limits, so completely unexpected things can serve as materials for kitchen renovation.
- Photo wallpaper is a material that is in no way inferior to PVC film in terms of density and strength. It is fixed to the surface of chipboard, MDF and even plastic with liquid nails. Photo wallpapers are cut to the size of the facades and pasted in the most usual way. After the glue has dried, the products must be opened with varnish. If desired, you can order photo wallpapers with images from your personal archive.
- Tile finishing. As a rule, walls are decorated with ceramics. However, nothing prevents you from using this beautiful material as decoration for a flat or paneled facade. The tiles are cut and fixed using the same liquid nails.
- An even more interesting, but also labor-intensive option is porcelain mosaic. There are not enough broken dishes from one apartment for this, so you will have to get the fragments somewhere: if you negotiate with the nearest cafes and restaurants, you will get the material quite quickly. The fragments are sorted by color, used to form a pattern or simply a color gradient and glued to the surface of the facade. The gaps between the fragments are sealed with grout.
Restoring kitchen furniture should first of all restore functionality. However, the process is creative and exciting, so that as a result the kitchen can completely change its appearance.
- VKontakte
Surface preparation and painting algorithm
Before you start work, you need to prepare the room. You need to do everything sequentially:
- Rearrange, separating the area for repair.
- Cover the floor with film or newspapers where spraying will occur.
Read on the topic: DIY blinds made from wallpaper and other materials
Then they dismantle those elements that, according to the plan, need to be repainted. These can be not only facade parts, but also visible sidewalls, cornices, plinths, etc.
Decoupage technique
Drawings and patterns drawn on paper will help change the appearance of outdated furniture and fit it into the interior in the Provence and classic style.
For work you need to prepare: two-layer napkins with the desired pattern, PVA glue, a brush made of natural materials, varnish (acrylic or alkyd).
- a pattern cut from napkins is laid out on a thoroughly cleaned, degreased surface (the top layer of the napkin is used);
- PVA glue is diluted with water to the consistency of liquid sour cream;
- the desired area is smeared with glue, after which a cut-out pattern from a napkin is laid out on it;
- Using gentle movements, the napkin is ironed with a brush dipped in glue. All movements must be extremely careful, since a thin napkin tears very quickly;
- After the glue on the pattern has dried, the decor must be coated with colorless varnish. Layers are applied several times.
Important: each subsequent layer is applied only after the previous one has dried.
Updating old chipboard furniture is not only a good way to save money on purchasing new interior items, but also an opportunity to demonstrate creative and artistic potential.
Grinding
Use fine-grained sandpaper. Grinding is carried out evenly, applying the same effort on all areas of the surface, otherwise unevenness may appear. Instead of sandpaper, a sander is also used. With its help, you can remove the top layer of paint from MDF panels and natural wood.
If there are deep scratches or other significant defects on the facade, they need to be eliminated using putty. The material is applied using a spatula. When the composition dries, the surface is sanded with fine-grained sandpaper. After this, it is necessary to remove debris and dust with a brush. If you clean the façade with a rag, dirt may get trapped in small crevices.
Door restoration methods
Many people remember with horror their interior or entrance doors, which have already served their intended life. The paint on some examples is peeling off in huge patches, the upholstery is fraying and torn, the overall picture is terrible. The solution to the problem is restoration of the doors. How it is carried out and how to revive entrance and interior doors will be discussed below.
Restoration of interior doors
Not all types of interior doors can be restored, but many examples can regain their original appearance. In particular, wooden and veneered doors can be restored.
In order to restore the surface, it is necessary to remove the old layers of paint and then fill the surface. After this, you should paint the door.
To work you will need the following tools:
- Drill with suitable drill bits;
- Hacksaw with small teeth;
- Construction hair dryer;
- Various types of sandpaper;
- Putty (for wooden surfaces);
- White paint;
- Brush.
Work can be carried out both indoors and outdoors. It is better to carry out work outside, since during the restoration of doors a large amount of dust is generated.
Door preparation
First of all, the door must be removed from its hinges. It is better to first lay a backing made of polyethylene or newspapers on the floor. The surface on which the door is to be placed must be level and smooth.
Removing paint from the door surface
The easiest way to remove paint is to use a hair dryer. Any cheapest version of the device will do; there is no point in buying expensive models. The work must be done as carefully as possible, since the surface of the door gets very hot. For safety reasons, you should not lean towards the surface; you can easily get burned.
The work is carried out according to the following algorithm. First, a small area of paint is heated, and then it is removed using a spatula. Then the next section is heated and the procedure is repeated. You must be careful when carrying out work, since you can easily damage the surface of the doors with a spatula. Particular attention should be paid to the corners, since removing paint in these parts of the doors is the most problematic.
Surface grinding
After the paint has been completely removed, you should proceed to the next step - sanding the surface of the door. The purpose of this procedure is to remove paint residues. Door restoration at this stage can also be carried out using power tools, but it is quite possible to completely remove paint residues using regular sandpaper.
Removing defects
In order to remove various surface defects that could have formed during operation, as well as during the procedure for removing old paint, it is necessary to use wood putty. You can apply putty in two layers for a better effect.
After the surface has dried, it is sanded using medium-grain sandpaper. To simplify the procedure, you can glue the skin to a wooden block. Sanding must be carried out in the direction of the wood fibers; movements cannot be made across their direction or diagonally. If you plan to cover the door with transparent varnish in future, then the sanding procedure should be of the highest quality. Any scratch will be visible if the polishing is poor.
When using matte varnish of any color, the requirements for polishing quality are not so critical. In order to remove sanding products, lint from sandpaper, the surface of the doors is wetted and removed using a regular rag or sandpaper.
Coloring
The next step in restoring the door surface to its original appearance is the painting stage. If you want to paint the surface any color other than white, you should apply the first layer of white, matte paint. You can choose any manufacturer, the main thing is that the paint itself is not too liquid.
Before painting begins, dust should be removed from the surface. Dust is removed with a damp cloth. For painting, use a regular brush. Paint is applied along the fibers. After the paint has dried, the surface is processed using zero sandpaper (fine-grained sandpaper) to remove dust microparticles.
Toning
The restoration of the doors is almost complete. The last step is toning using the desired color. The paint can be chosen according to personal preferences; it can be anything. The number of approaches can also be absolutely any, depending on how saturated the color is needed in the end. As a rule, two layers are enough, but sometimes 3-4 layers may be needed. Drying of each of them lasts from 6 to 12 hours.
After painting, the surface is treated with zero. The door will end up looking like new. After this step, you should install the old fittings or new ones, if you have the desire and means.
Restoring the front door
Many ways have been invented to give the front door a pristine look. Restoration of a metal entrance door can be carried out in different ways, depending on the type of outer covering. An ordinary door without cladding can simply be painted, or covered with a special film to resemble wood or with any other pattern. It is much more difficult to restore doors lined with laminate, veneer, slats, MDF panels. Let's consider the main options for bringing doors to their original form.
Restoration using film or painting
The easiest and most cost-effective way to restore the surface is to stick a film. The main thing is that the surface is smooth. When gluing with film, it is enough to apply it from top to bottom, from the ends to the center. The painting procedure is similar to that described for interior doors. The main thing is to remove old paint and ensure that the surface is degreased. The easiest way is to use a can of spray paint.
Restoration using laminate or veneer
Laminate can be glued to the surface of the door using liquid nails or high-quality glue. You can fill the edges with wooden slats to create a frame.
The veneer is sold with an adhesive base; it is enough to use an iron (through plain paper) to glue the surface. The remaining veneer is tucked under the ends of the door.
Restoration using wooden slats or MDF panels
To give the final result an excellent aesthetic appearance, the slats are sanded and coated with impregnation or varnish (colorless). The slats themselves can be attached using nails or glue. You can implement a variety of design solutions, since the direction of the slats can be any. In addition, you can create various patterns by intricately arranging slats on the canvas.
Primer coating
Before painting, it is highly advisable to treat MDF with a primer. This processing is carried out in two passes. At the first stage, the insulating soil is sprayed using a spray gun at the rate of 90-100 grams per square meter.
Note! If you intend to paint laminated MDF board (LMDF), then you can do without priming and immediately move on to the next step.
The primer should prevent new paint or varnish from being absorbed into the MDF board. The soil gets into all loose areas of the MDF, which means that the paint will not sag in the future. After the primer has dried, the surface is carefully sanded with sandpaper or sandpaper.
To form the second layer, it is best to use white polyurethane primer. Here the consumption should be 150 grams per square meter. And this layer of soil must be given a certain time to dry - up to 24 hours.
If we talk about general recommendations for priming MDF, it is carried out with a spray gun. If you don’t have a spray gun, then you can use a brush. First, the most complex elements of the cutters are processed, then the edge and the rest of the surface. For the first time, the part is coated lengthwise, and the second layer is made across the direction of the strokes of the first.
Coloring
It is important to remember that paint is applied only to areas that do not have external defects. Therefore, small scratches and chips are sealed in advance with wax or putty.
Acrylic paint or auto enamel is used in the work: it is more expensive, but more durable. Car spray is easier to apply, lays down more evenly, and better protects it from moisture and temperature in the kitchen.
- We remove the doors and unscrew the fittings. Fixed elements that need to be protected from painting are sealed with masking tape.
- If the MDF surface is covered with film, remove it. A hair dryer will make the job easier.
- We process it with fine sandpaper, remove dust and degrease.
- Apply primer in two layers. For hard-to-reach places we use a brush, for smooth surfaces we use a roller. You can apply the primer using a spray gun. Be sure to let the first coat dry completely before applying the second.
- Apply the paint with a brush or roller in one direction. The aerosol is applied only with the use of a respirator. Surrounding objects also need to be protected.
- After the paint has dried, cover the façade with a layer of transparent varnish.
Applying paint
After priming, it’s time to directly apply paint. Here, in principle, there is nothing complicated. First, prepare the dye according to the manufacturer's instructions. Then take the spray gun and adjust it so that its coverage area is small. This allows you to use material economically and paint as thoroughly as possible.
Painting MDF facades or other products made from this material begins with the most problematic (for example, covered with cracks and scratches) areas. And only after that the rest of the area is painted over. To achieve the best result, it is worth applying several layers. Moreover, after each layer it is necessary to take a break from twenty minutes to several hours to dry.
If you have no experience working with a spray gun, then you should first conduct training on some unnecessary piece of wood. Of course, you can use a roller or brush, but in this case there is a risk that the surface will not be perfectly smooth and even.
Video: Painting the material
In the video you can see how to properly paint MDF panels.
Repairing an MDF kitchen, if the material itself is reliable and durable, can completely change the design of the furniture. With sufficiently developed artistic skills, you can even draw on smooth facades. No industrial design can provide such a degree of uniqueness.
Repair of wooden surfaces
Monolithic elements of furniture sets made from solid natural wood are restored by re-painting the facades.
For the kitchen it is better to choose enamel rather than paint. The first has a higher degree of abrasion resistance and fades less.
Acrylic enamels are water-based. Having chosen to paint kitchen wooden facades with this material, it is recommended to apply a protective layer of transparent varnish on top. Alkyd enamels do not need such protection.
Painting kitchen facades is a popular method because it does not require much expense and takes little time. Most often, a different color is simply applied on top of the old, washed and degreased layer.
In case of major damage (deep scratches, holes, traces of fire), it is necessary to prepare the natural wood surface. Old paint is removed using chemicals (removers) or heating with a hairdryer. After this, the wood is cleaned with fine emery cloth. Deep damage must be filled with a special putty for wood. To ensure that the composition holds better, cracks and crevices are cleaned of dust and debris.
The putty is applied using a plastic spatula, pressing it in so that it fills the entire space. Otherwise, it will sag and depressions will appear.
The next step in restoring the coating is applying a primer. It will create better adhesion of the base to the paint, play the role of a protective layer, and extend the service life of the product.
The last stage is coloring. It is done with a paint roller or brushes of different widths. Narrow ones are used to process thin relief parts (they are painted first), wide ones are used for panels and other planes. For best results, it is recommended to apply several layers of paint.
Varnishing
After painting, in most cases it is also necessary to varnish the product. The first layer of varnish, prepared for use, is applied at the same rate as primer (150 g per 1 sq. m).
The second layer is applied after the first layer has completely dried. Then, when this paint dries, you need to sand the MDF panel again. First, coarse-grain sandpaper is passed over its surface, and then fine-grained sandpaper is used. To prevent lumps from rolling off, the treated area is periodically moistened with water.
Another week after this, the MDF must be additionally polished with a sander and abrasive paste. This is the most correct technology, although at home, when working with your own hands, it is sometimes not followed, limiting yourself to ordinary varnishing.
Restoring polishing
Restoring a layer of varnish is a complicated matter. Any furniture restoration begins with cleaning and degreasing, and repairing the varnish coating too. We use dishwashing detergent diluted in water: safe and reliable. After drying, we proceed to refinishing the polish.
- On dark furniture, a scratch can be painted over with iodine, achieving the desired color in a number of layers or diluting it with water. If you have furniture markers, you can use them.
- Deep scratches that have turned white cannot be painted over like this. There are other methods:
- Make mastic from 4 parts melted wax and 3 parts turpentine. This paste is applied to the polish and rubbed with a soft cloth.
If you have shoe polish of a suitable color, you can cover it with it and then polish everything with a cloth.
Scratches are painted over, then the coating is restored
You can simply refresh the faded polish on furniture using mixtures you prepare yourself:
- Two parts each of linseed oil and turpentine and one part vinegar. Mix everything, apply with a swab, wait until it is absorbed and polish.
- Mix oil and beer in equal parts and wipe the furniture with this mixture. After it has been absorbed, rub.
- The surface will be more shiny if you boil beer with a piece of wax, cool it and apply it slightly warm to the furniture. When the composition is absorbed, the surface is rubbed until shiny.
A few more recipes in the video.
How to remove polish from furniture
Quite often you have to remove the polishing: it is not the most fashionable finish. Modern furniture is most often painted with opaque or tinted paints, and the surface is matte. In any case, the polish must be removed. There are several ways. Since varnishes come in different compositions, you have to select them experimentally. But one of the methods should work.
- You can remove old polish from furniture mechanically. If you have a sander, the process will go faster; if not, take coarse-grain sandpaper and remove the varnish layer until wood appears. Then take a fine grit and sand it to a smooth surface. Mechanical removal does not always work. Sometimes even a grinder does not give results: the polish does not come off, but begins to melt and stink. Then they change tactics.
- You will need a piece of old glass. Put on gloves and break it into several fragments. Use the sharp edges that have formed to scrape the coating down to the wood. If there are chamfers and recesses, it is convenient to scrape them out with sharp edges. After the main layer of polishing is removed, everything is brought to a smooth state using fine-grain sandpaper.
Often, restoring furniture with your own hands requires tough measures: some types of polishing can only be scraped off with glass
How to paint polished furniture
If old furniture was prepared for painting, it must be cleaned of dust, wiped with a damp cloth and allowed to dry. Then level everything with putty, smooth out all the unevenness, wait until it dries. Take sandpaper and sand again, first with medium, then with fine grain. Next, apply a layer of primer and wait for it to dry.
Applying varnish with a brush when restoring furniture polish
You buy a primer for the paint you are going to use, or you can dilute the paint with a compatible solvent and coat it instead of primer. After drying, you can paint.
You can paint with a roller or brush. Usually several layers are needed: do not try to apply a lot of paint at once, as drips may appear. It is better to apply several thin layers. This way the surface will be smooth and uniform. Another trick: for uniform coloring, layers are applied in different directions - along, then across. This also applies to applying varnish.
Some types of varnish are easier to work with when they are warm. They are heated a little and then applied with a spray gun or brush. When heating, you need to be careful: vapors may flare up.
In order of painting: first paint the internal surfaces, edges and joints, then move on to the external ones. With this sequence, there is less chance of getting dirty or touching an already painted surface, ruining it.
If the varnish coating is smooth, without defects, and it needs to be painted over, you can do without removing this layer. There are special primers for complex surfaces. Apply them to the surface and paint after drying. They have components that penetrate even the varnish layer. Therefore, the paint will apply well and last a long time. But such soils have a disadvantage: they are expensive. But they save significant time.
Some secrets of painting wood (including brushing and painting in two colors) are in the article “How to paint lining.” Watch the video for a few secrets to applying acrylic paint evenly.
If the restoration does not bring the expected result, maybe you need to change the appearance? How to remake furniture in a new way is described here.
Common mistakes
The technology requires appropriate humidity (no more than 50%) and temperature (no lower than 20°C and no higher than 24°C). Therefore, paint and varnish work should be carried out indoors using lung protection.
The easiest way to change is the light base of the surface. When using stain (for wood) or colored varnish, you will get a darker facade, but at the same time maintain the structure of the material. If your base is dark, then it is more difficult to emphasize its structure.
The easiest way to get the desired tone is by mixing the desired colors several times in different dishes. Check the result on test surfaces and when the paint has dried, you will be able to make a more accurate choice.
Moldings, overlays and decoupage
These restoration methods will give the kitchen set unique features: there is no limit to the scope for imagination.
Before applying jewelry, the surface for it is prepared: the application area is sanded, cleaned and degreased.
A 3D decoupage pattern is formed using a stencil: a material is applied through it to form a bas-relief. A popular option is to use wood putty. After drying, the pattern is sanded with sandpaper and covered with a protective layer of transparent or colored varnish.
Volumetric decoupage Applying putty through a stencil Decoupage with putty
For decoupage using napkins or decoupage cards, PVA glue is applied to the selected material. Then the drawing is applied to the cabinet door and smoothed out. After drying, apply 4 layers of matte or glossy varnish.
Moldings are overhead wooden or plastic elements. They, like decorative overlays, are attached with glue to a previously prepared surface. For wooden moldings it is possible to attach them to small nails without heads.
Moldings and overlays Updating the kitchen with moldings Moldings for furniture Furniture decor
Decorative treatment of kitchen facades
Repainted façade parts can be easily decorated. The decor is applied to the dried paintwork and then fixed with a finishing coat. Various options are popular for independent execution:
- imitation of antiquity, decorative aging - all this refers to patina. They purchase a coating for patination and use it to accentuate certain places on the facade: most often they paint it on the frame, plinth, and surfaces with cutters. Paint with a sponge or brush followed by sanding. Achieve evenness along any line;
- The decoupage technique is widespread. Operate according to instructions. Decoupage is often used in Provence interior style;
- To create patterns, they resort to stencils. They are made with their own hands, and they are bought ready-made. Sometimes simple masking tape is enough;
- Decorative irregularities in the form of chaotic lines and strokes, dents, and bubbles attract the eye. This simple technology transforms the kitchen interior. You can apply glisal and, by pressing or making certain movements, create fancy embossing. They are also obtained using sponges, rags, brushes, seals, etc. Using glaze, you can also simulate the aging of furniture;
- Color schemes give an extraordinary look. Finding them is easy: just look at pictures on the Internet or draw them yourself. Most often, the inner sides are painted in a different shade, the top and bottom are painted in similar colors of the same tonality or, conversely, in contrast;
- decoration is created by gluing rhinestones, crystals, stones, chains, etc. Sometimes they serve as decor on handles and other small parts.
Read on topic: Dill on the windowsill: varieties, planting and care
Painting the facades of kitchen units significantly changes the appearance of the room. To transform furniture, you won’t need a large investment, because all you need to do is buy paint. Carrying out minor repair work is not a difficult task, which is completely within the capabilities of a beginner.
Aging of facades
This method of decorating kitchen furniture, making it look like antique, is widely used in country, baroque, Provence, etc., using materials such as patina, craquelure and simple emery. Initially, the furniture undergoes standard preparation with degreasing, putty, primer, and paint. After the painted facades have dried, it is necessary to cover the surface with craquelure varnish, which after a while begins to crack and reveals the presence of old cracks and abrasions.
The paint wiped down to the metal frame will appear on the surface of the facades after using a patina, neatly decorated in the corners and curves. Finally, simple sandpaper, which is used to sand certain areas with some effort, will help to add an antique element to new furniture.
Artificially aged furniture will give your kitchen a vintage look and is perfect for decorating a room in Provence, shabby chic or country style
Drawings made by hand or using a stencil will also look very impressive. Original moldings and intricate carvings will make the kitchen set unique in its beauty. Any owner who has put his hands and heart into working on improving his home is doomed to the love and respect of his family and friends.
Video: technology for making a painted facade at home.
DIY kitchen renovation ideas
How to breathe new life into old kitchen furniture? There are quite a few ways:
- Decorating with stickers will help hide minor scratches and chips.
- Covering with film will hide more serious damage.
- Painting gives a completely different look to the facades of kitchen units.
- Applying varnish is usually used to restore and protect furniture made from natural wood.
- Decoupage is the application of appliqués or raised patterns.
- The use of moldings and decorative overlays made of wood or plastic.
To achieve better results, these methods are combined. Let's take a closer look at restoration methods and features of restoration of different types of facades.
Disadvantages of painted furniture
Painted facades of kitchen units have several very dubious shortcomings, which can easily be overcome or converted into advantages.
- The biggest disadvantage is the fairly high cost. Not everyone can afford painted facades, but if there is such an opportunity, it is not recommended to save. Such a kitchen will last for many years, maintaining its beautiful appearance and demonstrating extraordinary wear resistance, not to mention its environmental safety of painted facades.
- The surfaces of painted facades can fade when exposed to direct sunlight, so it is recommended to either place the set away from them, or choose a suitable color, or decorate the kitchen in Provence, country, eco or other antique styles.
- Painted facades can be damaged due to exposure to chemical detergents, so you should treat them very carefully and select materials for washing, carefully reading the composition and intended use.
Despite some disadvantages, covering facades with enamel is one of the most common methods of finishing kitchen units
Restoration of a burnt tabletop
Burnt countertops can be restored to their original appearance in the following way:
- Using a router, carefully select the damaged area. It is necessary to go deeper into the surface with ledges, reducing the area and slightly capturing intact material around the perimeter. The result is a recess that looks like a miniature quarry.
- Fill the hole with softened wood putty. It dries quickly, so we compact it into the recess in small portions.
- We cut off the protruding excess with a sharp knife, carefully sand the patch, and then polish it.
- We paint the restored area. In this case, you need to try to reproduce the color and texture of the main part of the countertop.
By combining these methods, you can restore kitchen furniture without large financial investments. This will not only restore the appearance of the old kitchen set, but also make it unique.
And finally, the promised selection of photos of kitchens before and after restoration.
Rules of operation and care
Painted kitchen facades are designed for a long service life, but subject to the rules of operation and maintenance.
- Optimal indoor indicators: temperature from 10 to 30°C, humidity 45-60%.
- Do not expose furniture to open flame, hot air, or moisture.
- Thick curtains or blinds will provide protection against fading.
- To clean, use a solution of dishwashing detergent and a soft, lint-free cloth.
- Aggressive household chemicals, bleaches, and organic solvents can damage varnished and enameled surfaces, leave stains, streaks, and change the original color.
- Do not use abrasives or hard brushes for cleaning.
- Caring for facades involves treating surfaces every time after cooking and washing dishes. This will avoid complex contamination.
- Minor defects in the form of scratches can be hidden by polishing paste.
It is believed that painted facades are appropriate only in a modern interior. However, the variety of decoration methods makes it possible to purchase similar products for a kitchen in a classic style.
Restoration of chipboard, MDF
As a rule, complex repairs and restoration of chipboard furniture involve replacing parts. Modern laminated or veneered surfaces are rarely repaired. They change more often. In our workshop you can replace a tabletop, a veneered door, or part of a façade that has become unusable. We replace it with a similar one that matches the color, pattern, and texture of the veneer. The restorer will select the necessary veneer for veneering or purchase already veneered or laminated material. Next is a matter of technology. As a rule, when repairing chipboard furniture, it is updated and takes on a fresh look. And when replacing facades or cabinet doors, it becomes completely new. During restoration, the carved decor of the frame is carefully removed, the part (tabletop, part of a door or cabinet front) is changed, varnished, and polished. Then the decor returns to its place. There are no traces of repairs left.
We are focused on providing quality service. Making copies of furniture, veneering with valuable wood, marquetry, decoration. It is necessary to resort to restoration of furniture only if it is so expensive that it is not possible to replace it with a new one. This primarily applies to expensive luxury furniture. Italian designer furniture is so good in design, construction, execution and finishing that parting with it due to minor damage or disruption of the surface finish is wasteful.
Furniture made from chipboard began to appear in houses, apartments, and offices starting in the mid-20th century. Chipboard is a chipboard. First, the shavings obtained during the woodworking process were mixed with glue. Now technology has become more complex. The shavings are bonded into slabs with resin. Sheets are formed from the resulting mass. Chipboard width 1220-2500 mm. Length 1830-5680 mm. Thickness from 10 to 28 mm. Dimensions determine properties. Thin sheets of 8-10 mm break easily and are suitable for decorative partitions. 16-18 mm – used for furniture production. 22-25 mm have proven themselves well for the production of countertops.
Advantages of chipboard furniture.
1. Cheaper than furniture made from natural wood. Although this cannot be said about luxury expensive Italian or designer furniture.
2. Don't warp.
3. Does not crack due to changes in temperature and humidity.
1. Phenolic resins are used in the production of chipboards. Therefore, it is necessary to ensure that all planes and edges of the furniture are carefully veneered.
2. Under the influence of moisture, the tree swells and increases in size. The resin or glue cannot hold its shape. The slab swells and breaks up into chips.
3. If broken, it cannot be glued. Repairing chipboard furniture consists of duplicating or reinforcing the broken part with wood.
Repair and restoration of chipboard will not be required if you treat things with care.
Workshop gallery
Estimated cost of restoration (price as of January 9, 2019)
| Price, rubles | |
| Chair | 5000 – 20000 |
| Armchair | 10000 – 30000 |
| Sofa | 30000 – 60000 |