Wall mounting
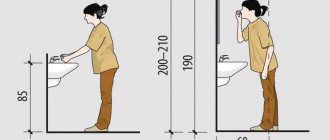
Before hanging curtain rods on the wall, you need to decide on the distances. At what distance from the ceiling should it be installed? Curtains look best when there is 1/3 of the entire distance between the window and the ceiling from the cornice to the ceiling, and 2/3 to the window. It must be remembered that the minimum gap from the window is 5 cm.
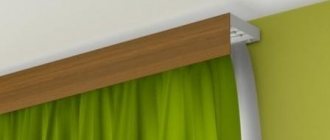
At what distance from the ceiling should you hang a cornice?
It is also worth deciding at what distance from the window opening the edges of the cornice (pipe or profile) should end. This applies more to the choice of cornices, but it would be useful to remind you: the minimum distance is 15 cm, and the maximum is up to 40 cm (more is possible, but it may look disproportionate).
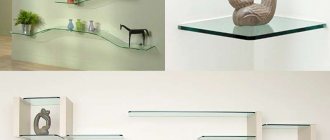
Types of brackets
To hang curtain rods, you need to consider the bracket on which it is attached. They come in several types:
- In the shape of the letter "G". Metal curtain rods are usually equipped with such brackets. They are the easiest to work with: the holes for fasteners are clearly visible.
L-shaped brackets are the easiest to install
The most difficult installation is for round collapsible brackets. The difficulty is that they disassemble and assemble. Otherwise, everything is the same, the installation procedure is the same as for other types.
Installation procedure
Having decided where the cornice will hang, you can begin installation. Attach the cornice and level it using a building level. At this stage, it is advisable to have an assistant who will hold the second edge.
We hammer nails into wooden walls or screw screws in immediately. You can only remove the pipe/pipes to make it easier. You cannot simply install fasteners into brick, concrete, foam concrete and other similar walls. Dowels are needed, and to install them, marks are needed.
How to install a plastic cornice on a wall: installation procedure in pictures
Having aligned the curtain rod, we put marks (right, left, top, bottom) in those places where the brackets will be located - 15 cm from the end of the pipe/profile and at the selected distance from the window and ceiling. We remove the cornice, remove the bracket, install it in the right place, mark the holes for the fastenings. We put all the marks - we put as many holes in the holder.
Drill holes according to the marks. The diameter of the hole depends on the size of the dowel - we use a drill of the appropriate diameter. Having made a hole, insert a dowel into it. It should go in completely - as a last resort, if it is not possible to sink the dowel a couple of millimeters, cut off the excess with a sharp knife.
The principle of assembling curtain rods with round holders/brackets
Having installed all the dowels, attach the bracket, align the holes, tighten the screws that come with the dowels. After all the holders are installed, we assemble the cornice and you can hang curtains and curtains.
How to hang wall-mounted curtain rods
In order for the curtain to look impressive in the room, it is necessary to correctly install the wall structure.
Assembling a wall cornice
Depending on the model of the curtain rod being installed, the assembly process may vary. If it is a solid sheet of metal, then this step is skipped. There are modifications that can be equipped with brackets. To fix them, you need to tighten the bolts to form a solid structure. For example, a cornice in the form of a tire is a simplified version of this design.
A double-row cornice requires special attention, which is assembled using the following technology:
- The hanging rings for the curtains should first be placed on the pipe. The quantity is determined based on the size of the material and its weight.
- Then you need to put on holders (brackets) on both sides, which are equipped with grooves for placing the cornice. Here it is recommended to be careful and evenly distribute the load.
- After this, the pipes should be secured using self-tapping screws or bolts. There are models where the manufacturer equips the pipe with a bracket with special grooves, which makes the assembly process more simplified.
The final point is to install the plugs; they are made of plastic or metal.
At what distance from the ceiling should you hang a cornice?
During installation work, it is very important to correctly determine the location for installing the structure, or rather the distance from the ceiling surface. There are no standards in this matter; it is enough to retreat 5-15 cm. In general, everything here is decided by the homeowner himself; the wall structure can be placed either very close to the ceiling, or relatively far from it. It should be both practical and harmonious, so that all interior elements create one whole picture.
Advice! When applying markings, you should focus not on the window level, but on the plane of the ceiling.
Stages of installing a wall cornice
Installation of the wall structure must be carried out according to the following algorithm of actions:
- Attach the assembled structure to the wall above the window to select the optimal mounting location.
- Mark a point first on one side, and then use a level to draw a straight line to the other end.
- By using a tape measure, measure the distance from the center of the point for the location of the fastener. This must be done taking into account the length of the wall structure.
- Make holes for dowels (6x40, 6x30 mm) in the marked places, using a hammer drill or electric drill for these purposes.
- Pour liquid nails into these holes; resin will do. After this, insert the dowels.
- When the glue sets, insert the brackets into the dowels.
- Use a level to check the position of the cornice on the wall.
It often happens that while drilling holes, the drill slips from the intended point, which is unacceptable. To avoid distortion, it is recommended to first deepen the points with a nail.
How to hang a curtain rod on the ceiling
Wall models of curtain rods with round holders for guides can also be hung on the ceiling - they are universal. The installation procedure is the same: mark, make holes, install holders, insert guides into them. Everything is exactly the same as when mounting on a wall. But there are plastic ceiling cornices, which are also called bus cornices. They have a different look and structure. We will talk about how to hang plastic curtain rods in this section.
Tire plastic ceiling cornice
Where and how to make holes in the tire
Plastic ceiling curtain rods come in one, two and three rows - depending on the number of curtains you are going to hang. They are sold without mounting holes. This is a single long strip of plastic with molded tracks along which runners with hooks move for hanging curtains and curtains. To install a plastic cornice on the ceiling, you need to drill holes in it.
Mounting holes are drilled in the spaces between the tracks. These gaps are a closed rectangular contour and both layers of plastic must be drilled. But they must be of two different diameters, so drills of two diameters are used:
- the diameter of the drill is larger than the diameter of the head of the self-tapping screw/dowel-nail for the front part of the cornice (so that the fasteners fit into this hole);
- the diameter of the drill is equal to the diameter of the fastener rod (the installed self-tapping screw/dowel-nail will hold the bar with its head).
How to install a plastic curtain rod on the ceiling
First, holes are made with a larger diameter drill in the front part. Change the drill to a smaller one, and through the hole already made, make another, smaller one in the back wall. Now you can install the tire curtain rod on the ceiling.
One more thing. Holes for single-row or double-row models can be made in one line - in the center (indicated by a red arrow in the picture above). For wider ones, it is better to arrange them in two rows (marked with yellow arrows). If you plan to use double curtains made of thick fabric, you can use all three lines.
If the curtains are not heavy, you can make one row of holes on double-row ones
The pitch of the holes is 50-70 cm. The exact distance depends on the weight of the fabrics being hung. The weight of tulle curtains can be ignored, but thick curtains can weigh a lot. The greater the weight, the more often you need to install fasteners.
Installation procedure
After the mounting holes have been made, take the cornice, center it relative to the window, level it, and put marks. Next, you need to mark on the ceiling with a pencil or marker where to drill holes for fasteners. If there are helpers, this is not a problem - they hold, you draw.
How to hang curtains on a ceiling cornice
The ceiling cornice has hooks or runners for hanging curtains. Each type of profile has its own, but they come in different heights.
It is necessary to select hooks/runners according to the type of profile
Now about the difference between hooks and runners. The runners have small wheels. They are more expensive, but the curtains move much easier. To save money, you can take hooks for tulle (we move it very rarely) and runners for drapes (curtains).
Types of hooks for ceiling cornices
To hang curtains on a ceiling cornice, a special ribbon is sewn to the top of the curtain. It helps to form folds of the required size. This ribbon has a strip that can be used as loops. This is where the hooks are attached.
Curtain tape and hooks on it
There is another option - to make the loops by hand, but then the folds will have to be laid and sewn up by hand. This option will have to be used if you need to lay not standard folds, but with some special pattern.
There are two ways to hang curtains on a ceiling cornice:
- Secure the hooks to the tape, and then tuck them one by one into the desired groove on the profile. Then install the stopper, then the plug.
- The second method is to first insert the required number of hooks/runners into the groove, install a stopper and a plug. Then put loops on the hooks.
Installing the locking screw. Then you need to put a plug
The first option is physically simpler, but the second option is more often done. When you remove the hooks for washing, they may get lost, or you may make a mistake in the order in which they are installed. In general, it is not so important how exactly you hang the curtains on the ceiling cornice. The choice is yours. And finally, a small life hack on how to make it easier to put loops on hooks. This is a tedious and difficult task that irritates many.
Features of installing cornices on a suspended or suspended ceiling
Neither suspended nor suspended ceilings are able to hold at least some mass. Therefore, hanging a curtain rod on a suspended/stretch ceiling “directly” will not work. There are two options:
- When installing the ceiling, install the mortgages (usually wooden blocks) to which the holders are screwed. In this case, the load, through the mortgages, is transferred to the main ceiling (floor). When attaching to wooden blocks, the fasteners are self-tapping screws. The length is less than the height of the beam.
Mortgages under suspended ceilings
Both options are working. Only in the second case is there a hidden cornice that is not visible. There are only curtains and curtains. The cornice (blind, curtain) is not visible.
When installing mortgages, you can fix the block parallel to the wall. In this case, the installation will be similar, but a whole beam under the cornice is wasteful. You can install small sections - 30-50 centimeters long in the places where the cornice is supposed to be attached. Installation will become more difficult - you will have to take into account the position of the mortgages, but this is nothing. If timber is expensive, savings are more important.
If you need to lower it lower
If the ceiling is lowered not by 5-7 cm, but by a greater distance, several bars should not be attached. In this case, metal brackets are screwed to the base (base floor), and a small piece of timber or thick plywood is screwed to them. The lower edge of the block/plywood should be set at the level of the suspended/suspended ceiling.
In the case of a plasterboard ceiling, you can use a profile as a mortgage, which is screwed “backwards” down. In this case, you will need to use metal screws. Most likely, before hanging the curtain rod, you will have to drill holes with a small drill, otherwise the self-tapping screw may not work. It will not be possible to develop a large force, since the suspensions will bend.
Installation on a suspended ceiling
In the case of a suspended ceiling, the ceiling cornice can only be secured to a pre-installed embedded beam. It is secured before the fabric is stretched. When fastening, use wood screws and attach them directly to the beam through the ceiling sheet.
How to attach a ceiling cornice to a suspended ceiling
The second option is a niche for installing a cornice, but this is also made during the installation of the ceiling and not later. In this case, there is also a wooden beam, but a guide for the stretch ceiling is attached to it.
Attaching a ceiling cornice in a stretch ceiling niche
There are no options for installation on a ready-made stretch ceiling. There is, however, a compromise - mounting to the wall with brackets right under the ceiling. There is a gap to the ceiling, but it is small and not too noticeable.
How to install curtain rods
1 Choosing a curtain rod
In glass telescopic cornice
| This small section cornice is attached to the window frame. It is threaded directly into the holes in the curtains. This cornice, made of metal or plastic, has a round shape and, as a rule, adjustable length. |
K round cornice
| This cornice, which is not covered by a curtain, serves a decorative function. It can be made of wood (stained or painted), metal (brass, wrought iron) or plastic. Round cornices come in different lengths and diameters (from 16 to 35 mm). |
Tire cornice
| Tire curtain rods include systems that are structures with grooves—curtain hooks are installed in them. The accessory is usually made of durable plastic. The plastic rail can be used as an independent curtain rod. There are two-row and three-row. Cornices are attached both to the ceiling and to the wall. You can purchase these curtain rods with or without rotating elements; whole cornices or composite ones. |
Decorative tire cornice
| Plastic tires are traditionally a structural part of cornices with wooden baguette or with decorative plastic strips laminated with a coating similar to valuable wood species. Cornices are attached both to the ceiling and to the wall. You can purchase these curtain rods with or without rotating elements; whole cornices or composite ones. |
2 How to take measurements
Wall or ceiling mounting
Fastening between two walls
| Length of the cornice = window width + 30-50 cm. Before attaching the ceiling cornice , leave a distance between the cornice and the top of the window: at least 5 cm, necessary for the window to open freely. Distance between wall and cornice: from 10 to 15 cm. | ||||
| Length of cornice = width between two walls - thickness of fasteners | ||||
3 Different types of fastenings
4 Installation of cornice
Before installation
| To Wall | To the ceiling | Between two walls |
| Cornices for window frames | ||
| Tire curtain rods | ||
| Profile decorative cornices | ||
| Make sure that the cornice will not interfere with the opening of the window: leave sufficient distance between the cornice and the top of the window (a). Make sure that the cornice is far enough away from the wall and from the window; curtains hanging on it should not touch the window handle or the radiator (b). Attention Before installing the ceiling cornice, make sure that the screws and dowels match the material from which the walls and ceiling are made. |
Installing a curtain rod on the wall
| Using a ruler and level, draw a horizontal line at the height of the cornice mounting. | |||
| Mark the mounting locations for the brackets at equal distances to the right and left of the window. | |||
| Attach the brackets. | |||
| Fix the curtain rod on the brackets, aligning it with the window. | |||
Installing a cornice on the ceiling
| Mark on the ceiling the location of the cornice and the location of the brackets at the same distance to the right and left of the window. | |||
| When installing ceiling cornices , attach the brackets, checking the symmetry of their location in relation to the window. |
Installing a cornice between two walls
|
5 Cutting cornices
If necessary, cut the cornice to the desired length.
Attaching the ceiling cornice to the wall
For cases with suspended or plasterboard ceilings, there is another installation option - on special brackets that are attached to the wall. In this case, the distance from the corner is determined by the parameters of the bracket. They have longitudinal slits that allow you to adjust the length at your discretion. There are several holes at a distance of 5-6 cm from each other. Wall mounting brackets usually come with mounting plates that are attached to the plastic case with four small self-tapping screws. The installation step of the fasteners for wall mounting is the same - 50-60 cm; two stops are placed at the joints, 10-15 cm away from the joint.
Types of brackets for wall mounting of ceiling curtain rods
How to attach a ceiling cornice to a wall? The installation procedure is the same as in the case of installation on a concrete ceiling: marking the mounting holes, installing dowels, then attaching the cornice itself to the wall with brackets. But with different brackets the procedure is different.
This is what comes together
Option with long cuts in the bracket body:
- The plates are fixed, the brackets are inserted into the grooves.
- We apply the cornice to the installation site, mark the holes on the wall (circle it). We outline all the holes, how many there are in the cornice.
- We make holes in the wall and insert dowels.
- We remove the brackets and fix them on the wall.
- We put plates attached to the cornice onto the brackets.
- We set it exactly, at the same distance from the wall.
- Tighten the fixing bolts.
Mounting on brackets
This option is good because, if desired, you can move the cornice closer or further within the length of the cut. You can also level out imperfect wall geometry. When using the option with several holes, it is easier to first attach the brackets to the cornice, then lift the entire structure and make markings. After installing the plastic part of the dowels, attach the cornice assembly to the wall again. As you can see, it is very difficult to do without an assistant: you need someone to hold the cornice.
How to properly hang curtains on the wall
Comfort in a living space is created by a harmonious selection of furniture, the color of the walls, and beautiful curtains in the window openings. Properly selected curtains and cornices play a paramount role in creating an interior.
The cornice should emphasize the beauty of the curtains and complement the interior of the room
Curtains are curtains used to decorate windows (doors). Many modern designers use them because of the possibility of functional use. Design features of curtains - the weight and design of the curtains, which are taken into account when choosing and attaching the curtain rod.
When deciding how to hang a curtain on the wall, to match the interior of the room, textile curtains, you need to choose the appropriate type of curtain rod:
Curtains are attached in different ways: to the ceiling/to the wall. Nowadays, suspended ceilings are in fashion, so the most popular technique is installing curtains on the wall.
Types of curtain rods
At the very beginning, they determine where the curtain will hang. Ceiling/wall mounting is carried out, and they are:
- wall;
- ceiling
When the wall does not hold the dowels well, is loose with lime plaster, in old houses, it is better to fix the curtain to the ceiling. To properly hang a curtain on a suspended ceiling, before stretching it, make a niche in front of the window, at a distance of 20 cm from the wall. When the film is already stretched, it can only be attached to the wall.
Attention! If the wall is loose, then for more rigid fastening, you can pour a little epoxy resin into the hole.
The materials used for cornices are wood, metal, string, plastic and profile. When buying a curtain, take into account the interior of the room. In a room where there are a lot of wooden parts, wooden cornices are attached. Iron - non-standard design execution. They have a lot of weight. You should not forget about this when mounting and attaching to the surface.
A light tulle curtain is hung on a string. The string is pulled back and needs to be re-tensioned. Flexible profile cornices are placed on uneven surfaces. They allow you to bend and round curtains at any angle. Plastic cornices are not expensive, can be chosen for different interiors, and are easy to attach.
Attention! Plastic curtain rods with a steel frame can withstand a weight of up to 70 kg.
Designs for hanging curtains are:
- Telescopic - small tubes that are pulled into the openings of the curtains. They come in metal, plastic and wood. The curtain should be hung using rings.
- Round. They make them in plastic, wood, and metal. When manufacturing they decorate with decorative elements. Rings are suitable for attaching curtains.
- Tire. They come in plastic, metal, and have a flat shape. They can be rounded at the edges. There are grooves inside for hooks to hang curtains on.
It must be taken into account that the surface to which the cornice is attached will not always support heavy curtains.
How to properly hang curtains over a window?
Before hanging the curtain, prepare the tools and material:
- Ladder.
- Electric drill (hammer).
- Screwdriver.
- Roulette.
- Level.
- Screws.
- Dowels corresponding to the screws.
First, the type of dowels is determined depending on the wall material, then screws are selected for them
The curtain rod must be unpacked and assembled on the floor to ensure that the parts fit together
Note! When choosing a cornice, it is worth considering that the recommended plank is 30-40 centimeters larger than the opening! Thanks to the protrusion, the curtain will not cover the window, which will allow daylight to penetrate.
Recommended scheme for fixing a wall cornice
If you have the necessary tools and consumables, a calculation is made and future holes for the dowels are outlined.
The mounting points of the curtain rod must be leveled so that the curtains fall evenly
Curtains are attached in order, following strict step-by-step instructions:
- Before hanging the curtain, the electrical wiring plan of the room is carefully studied. Familiarization with the wire laying project will help you avoid unwanted mistakes when drilling the wall - the electrical cable will remain intact.
Important! When choosing a height, consider the placement of electrical wiring!
- The height of fixation of the bar is determined. Professionals recommend placing it at least 10 cm from the ceiling - at the recommended distance the curtains will look proportional.
The distance from the window opening to the cornice is selected individually
Wall marking diagram for fixing the cornice
Important! Measurements are taken from the ceiling, not from a horizontal line. Rooms often have uneven ceilings, so the plank should follow the slope of the ceiling, visually leveling it.
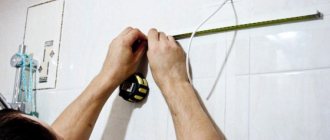
- Fasteners are applied to the prepared marks, and drilling locations are marked.
Mark the drilling points with a pencil
Carefully drill holes
Remove dust from the holes and hammer in the dowels
We fix the brackets and hang the curtain rod
The method of hanging the curtain depends on the design of the curtain rod and the type of curtain
Before hanging the curtain on the wall, you need to call an assistant - it’s easier to fix the bar together.
How to attach a curtain to a wall
Wall mounting is one of the most common mounting methods. You can hang round, rail, or telescopic curtain rods on the wall. We will analyze the process step by step using the example of a round type.
Important! Before starting the process, study the electrical wiring plan so as not to accidentally damage it.
Now let's get down to business.
- Take all the necessary tools and materials listed above, as well as the components of the cornice.
- Mark the attachment points with a pencil (above the window opening). This must be done using a building level.
- Drill holes at the marked points and drive dowels or moths into them (depending on the wall material).
- Using a drill, screw the screws into the dowels, tightening the fastening element of the bracket.
- Screw the base of the bracket onto the fastening element and then completely assemble it.
- Then attach the curtain rod and hang rings with hooks or curtain pegs.
After installing the cornice, you can hang the ironed curtain on the wall and admire the work done.
Requirements for installing curtains
When installing curtains, you must adhere to the following rules:
- Dowels (screws) are selected taking into account the wall material.
The distance of the cornice from the wall is determined taking into account the protruding part of the window sill (or radiator) and the depth of the curtain folds
The reliability of curtain installation depends on:
- cornice material;
- design configurations;
- installation locations;
- finishing the surface where the curtains are attached.
Before you begin installation of the structure, you need to pay attention to the following factors:
- Strength of the material (wood, string, plastic, metal). The curtain rods must support the weight of the curtains; accordingly, they are matched to the weight of the textiles.
For example, string curtain rods are designed for attaching only light curtains
Installation of cornice
Wall curtain rods come in double-row and single-row. Which option to choose depends on the functional purpose of the product. For light tulle without heavy curtains, a single-row design is suitable.
It is important to determine the locations for the holders based on the choice of curtain installation height and the distance between them. Next, you need to unscrew the supports from the base. Then you should attach the supports to the wall and make marks with a pencil through the holes. The next step is to drill the necessary recesses in the wall and attach the holders. In this case, you should use an installation kit, which includes dowels and screws. Selecting individual options will be difficult. After securing the dowels, you need to screw in the screws using a screwdriver.
You may also be interested in: Ceiling double-row cornice - selection and installation
By the same analogy, the second basis is established. Then you need to take an L-shaped wrench and loosen the fastening of the holder to the leg. Next, baste the bases onto the supports, carrying out manipulations clockwise. Then you should tighten them by hand.
The next step is to unpack the rings and put the hooks on them. Using an L-shaped wrench, you need to unscrew the locking screws from the head of the holders so that they do not interfere with the threading of the guides, but not completely.
If 3 clamps are used, it is recommended to divide the rings into 2 equal parts. If there are closed holders, then you must first put on the guides, rings, tips, decorative plugs, and only then carry out installation. For curtain rods with open clamps, they are secured in the bases by tightening the locking screws. Then you should insert the guides with the rings strung and the tips on into the holders. All curtain elements must be aligned with each other. The guides must be secured in the holders by tightening the locking screws in their head parts.
Next, you can put on tulle for a single-row design, and a double-row design can also be loaded with curtains. If installed correctly, the product will last for many years.
Video master class on installing a wall cornice:
Save
Save
Save
The influence of the weight and design of curtains on proper installation
The weight and design of curtains affect the installation of the device, so they must be taken into account when choosing curtain rods and curtains.
The curtain rod for heavy curtains must have a reliable design
- If the wall is made of fragile material, then the curtains are selected from simple, lightweight textiles.
- The supporting parts of the device will effectively fix dowels with a cross-section of 8 millimeters and screws.
- If the system is more than two meters, it is reinforced with auxiliary brackets, placing them taking into account the same load on the device.
- Proper installation of the curtain rod system should support heavy curtains.
- For fastenings on a plasterboard wall, it is recommended to use a butterfly dowel, which “spreads its wings” in the hole and is securely fixed.
Plastic butterfly dowel for fixing lightweight curtain rods to a plasterboard wall
Additional Information! If rotating parts are packaged with the system, then when marking the fastening lines, their dimensions are taken into account.
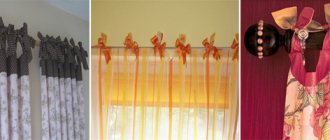
Examples and photos of correct installation of curtains
Properly executed hanging of curtains helps to better perceive the interior. The photos provided confirm this.
Exquisite, laconic curtains in the living room perfectly match the design, beneficially increasing the height of the window (door) opening.
To visually increase the height, fabric with vertical stripes was chosen
The kitchen will be decorated with curtains on a round system. A stylish curtain in combination with wood looks noble and elegant, combined with classic kitchen furniture. Securely attached curtains will last a long time, decorating the opening.
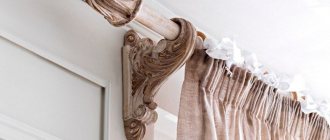
Cornices on forged or wooden brackets are suitable for a classic interior.
How to choose and hang a curtain for curtains on a bedroom wall is demonstrated in the following example. A metal structure is perfect for the Baroque style, giving the room an atmosphere of romance, wealth, and charm. Light, airy curtains fall down, giving the room an elegant nobility.
The cornices are highlighted in black, but their design is quite simple so as not to attract too much attention, because in Baroque the main thing is expensive furniture and rich textiles
When choosing a cornice for a bedroom, it is recommended to consider:
- cornice size;
- apartment size;
- the shape of the window system.
Types of curtains
Correct installation of a ceiling cornice is the main task after purchase, but first you need to learn about its varieties. Based on the material, the following are distinguished:
- Metal.
- Wooden.
- Plastic.
- Combined.
According to their shape , curtains can be divided into:
- Round, which can have one, two or even three pipes.
- Profile, having one, two or three rows.
- Strings, which were very popular before, but have now lost their primacy due to their simple appearance.
- Baguettes.
The photo shows how to hang the curtain on the wall
Installing curtains on the ceiling and wall - instructions, nuances and recommendations
The interior of no room can be called complete without curtains. To attach them, you will need to install a curtain. A professional needs no more than 15-20 minutes to do this; for a beginner, this is a more troublesome task. How are curtains installed, what types of fastening are there? Answers to these and other questions can be obtained by carefully studying the article.
Attention!
Installation of curtains can be carried out to the wall or ceiling. A separate group of curtain rods are universal - they can be attached to any surface.
The choice of curtains should be based on size. If you plan to install it above a window, then to measure it is enough to find out the width of the window opening and add an additional 0.4 m to the result obtained. If you plan to use the curtains for zoning the space, then measure the width of the room and select a cornice slightly shorter than this indicator.
Wall mount
Installation of curtains to the wall is carried out using the following tools and materials:
- Cornice. What size it will be and what length it will depend on the parameters of the apartment.
- Pencil, regular marker.
- Ruler, construction tape.
- Elements for fastening (for example, brackets, screws).
- Drill.
- Screwdriver.
Installation begins with preliminary marking. The central part of the wall is determined, from which the same distance is measured. It is important that the gap between the edge of the wall and the place where the bracket is planned to be installed should be from 35 to 40 cm. Otherwise, the curtains for the window will not cover it completely, and installation of the cornice is pointless.
Attention!
Maintain distance from the ceiling. It should be at least 10-15 cm, otherwise the interior of the room will look awkward.
The next stage is attaching the brackets. To do this, you need to set fixation points during preliminary marking (they are located at an equal distance from the central part of the wall). Using a drill, drill holes and then screw the brackets. Then all that remains is to insert the curtain into the brackets, having first hung on it the devices for attaching curtains.
There are several recommendations for installing curtains:
- The mounting points for the cornice need to be strengthened. You can use epoxy resin for this. It is inserted into the holes drilled with a drill, then brackets are inserted into them and wait until it hardens. After this, you can hang the curtains and fasten the curtains;
- The extreme brackets must be attached outside the window opening, otherwise the curtains, even when opened, will not cover it completely;
- The rings for fastening the curtains constantly slip off from some curtains. To prevent this, you can use decorative finials.
Typically, curtains come with fastening elements and rings for curtains, so there is no need to buy accessories separately.
Mounting the mount
Installation of curtains by an experienced builder will not take more than 15 minutes. For a novice master, this may take some time. To make the work easier, it is recommended to break it down into stages: measurements, markings, mounting to the wall. It is advisable to take an assistant as a partner. To hang the curtain correctly, you need to take the correct measurements.
First, its location on the wall is determined: measure the center of the window opening, find out the equal distance from the central point to the end of the length of the curtain or to the fastening of the brackets. It must be remembered that the brackets must be hung at a distance of 300 mm from the edge of the window so that when the tulle is assembled, the window opening is open. To properly hang curtains on the wall, you need to make notes on the location of the mount. To do this, you need to assemble the curtain, measure its length, and also calculate the distance from the center to the console.
Wall cornice installation diagram.
Apply a line mark with a pencil on top of the window opening. From this mark set aside the distance to the cornice on both sides.
Such manipulations should be carried out with an assistant, so that one person holds the structure at the middle mark, and the other hangs it.
So, one holds the cornice exactly in the intended middle, the other marks the attachment points for the curtains. Then you can drill the holes.
For concrete walls, a regular drill may not be suitable and will only ruin them. It's better to play it safe and use a hammer drill.
If the wall is covered with plasterboard, it is recommended to hang a lightweight curtain model on it.
All marks must be made parallel to the ceiling. If they are applied according to the horizon, the curtain will hang unevenly.
If the wall is loose, it is necessary to additionally strengthen the drilled areas with epoxy resin, otherwise the curtain may collapse under the weight of the curtains. You can cut out wooden plugs, hammer them in, then drill them, screw in screws, and secure the product’s bracket.
It is necessary to ensure that dowels, screws, and all fastening items do not dangle or unwind. If this happens, it’s better not to be lazy: take them apart again and tighten them more securely.
The extreme brackets must be mounted outside the window opening. To prevent rings or hooks from sliding off the base, you need to attach a decorative plug to the end of the product.
As a rule, all the bolts, brackets, and screws that are necessary for installation come with the curtain, so you don’t need to buy anything extra, but it’s still better to stock up on a few extra dowels.
What is important to consider when buying a baguette
Before you figure out how to install a curtain rod on a wall, we’ll tell you what to look for when purchasing a product. There are different designs on the market:
Each of them has its own advantages and disadvantages. They definitely need to be taken into account. But the installation is greatly influenced only by the type of brackets that come with the products. Depending on the material, there are several options:
- Plastic. The cheapest, but the most fragile. They are great for tulles and light curtains. When hanging a heavy canvas, the fastening sags and eventually breaks.
- Wooden. They help bring vivid design solutions to life. Their strength directly depends on the quality of workmanship. Therefore, components must be carefully inspected to ensure there are no knots, chips or cracks.
- Metal. The most reliable and durable curtain rods. If your budget allows, preference should be given to them.
Each option has its own design features. Many of them only affect appearance. But the type of mounting plate determines the reliability of fastening to the wall:
- Three-point. Makes it possible to firmly secure the structure and avoid turning the rod holder. This is ideal for installation in concrete and wood. If the holes are located close to each other, installation in porous materials becomes more difficult: aerated concrete, hollow brick and others. A fragment of the weakened surface may crumble or break off.
- Single point. The only hole for the dowel is in the middle of the installation “cup”. In this case, under the weight of heavy curtains, the bracket may tilt down slightly. But this makes it possible to firmly screw it to a surface made of hollow materials. It is enough to choose a dowel of the desired type and length.
If you have to attach a three-point “cup” to a hollow base, drive the load-bearing dowel only into the upper hole. We screw small self-tapping screws into the other two to avoid turning the bracket.
How to properly hang a cornice on a wall: step-by-step instructions
To learn how to properly hang a curtain on a wall, read the following tips:
- The first step is to mark the wall. This is an important stage, since the final result depends on its correct implementation. What could go wrong? Are you sure that the wall and ceiling meet at a perfect 90 degrees? This is usually not the case, so be sure to measure the mounting points from the ceiling.
When marking, you should not focus on the ceiling; to accurately determine the horizontal line of the cornice suspension, it is better to use a level
A wall cornice is usually hung at 1/3 of the distance from the ceiling to the window opening
To drill a concrete wall you need a hammer drill or hammer drill
Scheme for fixing a wall cornice
As the reader has already understood, an example of installing a cornice with one round crossbar was discussed above. To carry out the entire list of work, you will need marking and power tools, as well as fasteners.
- Pencil, chalk or marker.
- Meter construction ruler.
- Impact drill (hammer).
- Dowel-nails with plastic or metal sleeves (depending on the wall material).
When you order a curtain, do not forget to measure the distance at what height you hung the curtain rod from the ceiling. It is important to measure and write down this parameter, since when purchasing custom-made curtains, you must indicate the length to the floor.
Curtain measurement chart
Important! Measurements should be taken from the edge of the hooks (rings) to the floor. This way you will get reliable data.
Experts advise taking the length of the crossbar longer than the window opening by 30-50 cm on each side. If there is only one window and it is located in a short wall, you can install the crossbar almost along the length of the wall, leaving a gap of 5-10 centimeters.
A full-wall cornice will help visually adjust the proportions of the room.
Remember three main points:
- The curtain should not touch the open window.
- The tulle with the bottom edge from the battery should be at a distance of 5-8 cm.
- The length of the crossbar should ensure full opening of the window opening.
Usually, when purchasing curtains, the basic package includes brackets. Their length ensures the correct placement of the crossbar and tulle in the future. But it would be a good idea to first measure the width of the open window and the protruding heating radiator, and compare these data with the length of the bracket. If the length is insufficient, the fasteners must be replaced.
The length of the cornice determines whether the curtains will completely clear the window opening
Determining where to attach the curtain rod to the wall
Depending on the location of the baguette relative to the window, the same curtains may look different. With their help, you can emphasize the status of the interior or visually increase the height of the ceiling. But, before we talk about the design, we will give the minimum requirements for the location of the baguette. He must:
- Be no lower than 5 cm from the top edge of the window slope.
- Protrude to the sides outside the window by 30-50 cm.
- Place it away from the window opening so that the curtains do not catch on the radiators and window sill.
The listed criteria are based on ergonomics. You are getting:
- full opening of curtains with maximum light opening;
- the ability to place the window for ventilation with the curtains drawn;
- Convenience when curtaining curtains.
In addition to ergonomics, the location of the curtain rod affects the design of the room. Here are the three most popular options for its placement:
- According to the minimum requirements. Visually the window opening becomes smaller. Thanks to this, it does not draw attention to itself. This method is great when you need to focus on the decorative decoration of a room.
- Installation exactly in the middle between the window and the ceiling. This installation option looks best if the ceiling is higher than the standard 2.8 m. You carefully frame the window opening and do not hide the decoration of the room.
- Under the roof. You mask a narrow strip of wallpaper and visually increase the height of the ceiling.
Article rating:
Save to:
Installing curtains on the wall Link to main publication
Related publications
- What you need to know when installing plastic windows
How to mount to a wall
The repairman knows that poor fastening leads to the fact that the base falls along with the curtains, and the curtain does not look neatly hung. To avoid this, it is better not to hang heavy fabrics, such as velvet curtains, on drywall or against a loose wall. Hanging a ceiling curtain to a reinforced concrete ceiling would be a solution. You can install string, plastic, and profile curtain rods.
What you need for work
Before carrying out work, prepare everything necessary. In addition to the cornice there should be:
- pencil to mark the location of the holes;
- all measurements are taken with a tape measure and ruler;
- fastenings;
- drill or hammer drill;
- screwdriver, screwdriver.
Fastenings include dowels, brackets, and screws.
Attention! For durable fastening of PVC panels to drywall, use screws or butterfly dowels. Liquid nails are used for ceiling fastenings.
Mounting the mount
Before choosing curtains for a window, you need to take measurements. When buying a cornice, take it 30-40 cm larger than the window opening itself, on both sides. You can hang the curtain on the wall after marking the position and drilling holes for fastening. The distance from the side walls is not less than 5 cm, and from the ceiling - not less than 10 cm.