Holes
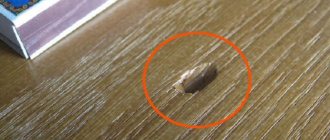
Repairing holes on the surface is quite easy, because most often they are not too deep.
They arise from sharp blows with a heavy object, for example, with a hammer when beating meat.
First you need to clean the hole with a file to make the wax stick better. Then properly degrease the top of the hole with solvent or alcohol.
A tabletop made of chipboard or solid wood can be restored with your own hands.
After the degreaser has dried, heat the wax until soft. To make the final stage of work easier, it is recommended to immediately select a filler that matches the color of the material.
We seal the hole with wax, leaving a little of this material on the surface of the countertop.
After hardening, use a plastic spatula to remove excess from the surface.
We polish the repair area well with a felt rag. If the texture of the wax after polishing matches the rest of the surface, we complete the work.
If additional coating with furniture varnish is necessary, we carry out such manipulations. Some time after the varnish has hardened (16-24 hours), we polish it again with felt.
The tabletop is covered with a layer of varnish to secure the result.
Video: Repairing a chip on chipboard
Due to the specific nature of their task, kitchen countertops are subject to intense wear and tear. They are affected by moisture, steam, and temperature changes. A countertop is a work surface on which food is cut, meat is beaten and hot pots are placed. All this leads to damage. Tabletops made of laminated chipboard wear out especially quickly.
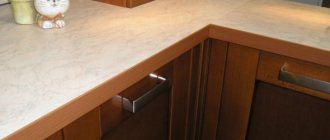
If signs of wear appear on the surface of the kitchen table, it is not necessary to look for a replacement countertop. In most cases, repairing the damage is cheaper than buying new furniture. Moreover, it is possible to repair a chipboard product with your own hands. How to do this - read on.
Scuffs
Scuffing is one of the easiest defects to eliminate. The depth of the abrasion is small, just rub the damaged area with a furniture felt-tip pen. You should not work it directly on the surface. It is recommended to first paint a soft cloth, such as silk, with it. And then use this rag to thoroughly treat the abraded area.
Before you begin repairing the product, you should conduct a small diagnostic and assess the nature of the damage.
In this simple way you can deal with shallow abrasions. If the size of the defect is too large, we paint the surface with a felt-tip pen of the appropriate shade, and then polish the resulting area with a piece of cloth.
Using this technique, it is possible to blur the boundaries of processing with new paint and smooth them out visually.
If it is necessary to restore a varnished surface, before painting, use fine sandpaper to thoroughly clean the area of wear, degrease it, and only then paint. After the furniture marker has dried, we coat the work area with varnish, which we also polish 16-18 hours after application.
To avoid new scratches, it is better to cover the surface with a protective compound or transparent film.
Folk remedies
Various products have become popular among people that also effectively eliminate damage to furniture. Most of the methods described do not require any special costs and are easy to use.
Walnut kernel
When rubbing scratches with a walnut kernel, the damaged area is gradually filled with mass and becomes almost invisible. The procedure can be performed several times in a row to achieve a better effect. It is possible to replace the kernel with nut oil and wipe the scratches by applying the substance to a napkin.
Mayonnaise
The effectiveness of mayonnaise is ensured by its strong penetration into the wood structure. Mayonnaise should be applied to the damaged area several times with an interval of 2 hours. After treatment, the wood will swell and the crack will fill on its own. This method can eliminate defects on any wooden furniture.
Vinegar with vegetable oil
It is recommended to treat light furniture with a mixture of olive oil and vinegar, using the components in a ratio of 5:2. The damaged area is wiped with the mixture and left for a day for complete absorption. Then the furniture is polished with a rag.
Sandpaper
Fine-grained sandpaper helps remove defects on steel furniture elements. The damage is smoothed over with sandpaper and, if necessary, treated with putty. After the material has dried, paint is applied to match the color of the product to mask the area.
Mastic
You can paint over small scratches on wooden products with mastic. The material is distributed on the surface and rubbed with a napkin. To make your own mastic, you need to melt 40 g of wax, add 30 g of turpentine and a teaspoon of alcohol, and then mix thoroughly.
Colored crayons
Colored crayons contain wax, which allows you to paint over scratches. To achieve the desired effect, you just need to choose the right color crayons.
Paraffin
Candle paraffin is kneaded, applied to the damaged area and rubbed until the defect is eliminated. When processing glossy furniture, you need to wipe the surface with a soft cloth after completing the restoration. It is enough to remove the remaining paraffin from the matte surface.
Eyebrow pencil
Applying an eyebrow pencil to scratches can visually hide them.
The disadvantage of using this method is that the pencil wears out quickly, which is why you have to constantly touch up defects on the furniture.
By mixing ground coffee beans with a small amount of liquid, you get a semi-thick substance to remove scratches. Apply the substance to the scratches using a cotton swab or disk. You can eliminate defects with coffee only on dark furniture.
Lemon juice and oil
A mixture of lemon juice with vegetable or olive oil in equal proportions is also suitable for treating damaged furniture. The mixed components are applied to a clean, lint-free cloth and the surface is polished, making movements in the direction of the scratch.
Chips
Chips occur quite often, because in the kitchen there are a lot of dishes and cutlery with sharp edges.
To remove the chip you will need wax. Here, too, the main recommendation is to choose a material that matches the color of the countertop, because painting the wax base can be quite problematic.
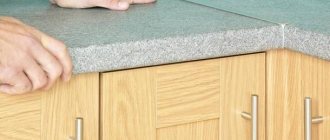
Such damage to the edges of the tabletop will require even more labor-intensive repairs.
We cut it off or thoroughly sand the chipped area, melt the wax and apply it to the problem area. We wait for it to dry completely, polish it - and you’re done.
The molten composition is applied to the damaged area and given the desired shape.
If you need to tint the repair area or varnish it, we complete the restoration process with such work
After the wax has hardened, the excess is cut off and sanded.
How to protect your kitchen surface from swelling and damage
To protect the laminated chipboard countertop in the kitchen from moisture, before installing sinks and faucets, all edges, cuts, and ends must be treated with sealing compounds. Protection is usually provided by plastic edges. Other options are possible:
- paraffin;
- antifungal agents;
- plastic skirting boards.
The joints with the sink are treated with paraffin. To do this, they are rubbed with an ordinary candle. The edge is then heated with a hairdryer so that the paraffin melts and is absorbed into the chipboard. After this, the surface is allowed to cool, and then the edge is rubbed again with a candle, this time without heating.
Treating with antifungal agents will help prevent mold from appearing. The composition treats not only the sink installation sites, but also the joints of furniture with the wall.
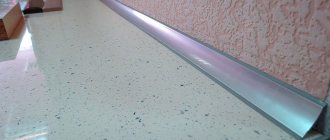
It is recommended to cover the places where the furniture is adjacent to the wall with a plastic baseboard. This will provide additional protection from getting wet and dripping onto the ends.
It is important for kitchen units to provide protection not only from water, but also from the heat emanating from the stove and ovens. To prevent the facades from being damaged by the oven, thermal insulation strips are installed on the edges of the frame of the compartment into which the oven is inserted. They take all the heat on themselves, making the facades simply warm. They do not need to be installed if the furniture is covered with enamel.
The base requires protection, especially if it is made of chipboard. It is dressed in a water-repellent profile for the plinths. The exception is the installation of plastic bases; they do not need to be protected.
Additional protection for the cabinet in which the sink is mounted can be provided with a hygienic tray. It is made of aluminum, it has high sides and a protective canopy, which make cleaning easier and prevent water and dirt from getting into the cabinet under the sink.
To protect drawers and cabinet bottoms from scuffs and wet dishes, you can lay down protective mats or films.
Scratches
Removing scratches from a surface is as easy as removing abrasions, and maybe even easier. Before starting work, degrease the surface. If the scratch is shallow, it can be quite simply rubbed with a piece of wax (often there is no need to even melt it).
If the scratches are deep, you can use soft wax.
If the scratch depth is more than 3 mm, we perform preliminary cleaning of the surface from dirt for better adhesion of the wax.
Then we polish the work area with a piece of felt. If necessary, tint with furniture varnish. It is recommended to use ear sticks for small scratches; for larger scratches you will need a brush of the appropriate width.
Finally, the tabletop should be coated with colorless varnish.
Note! If there are several deep scratches nearby, it is recommended to completely remove the surface layer of the countertop in this area. This will allow you to avoid repeated damage to the integrity of the treatment area due to exposure to moisture - even with the most painstaking work, microcracks will certainly remain and grow over time.
Wax is applied to the scratch using a rubberized spatula.
First aid
If there are various scratches and stains on interior items, do not despair, but immediately begin solving the problem.
You can do the work yourself. You can remove scratches from furniture at home using special products purchased in the store. Even if everything is in order with the furniture, it won’t hurt to buy similar “magic wands”. One of them will be a furniture touch. It is simply irreplaceable for removing scratches from both wooden and laminated surfaces. This item is affordable for everyone. Another advantage of the stroke is that it has a huge number of colors. Thanks to this, you can mask surface defects of any table, chair, cabinet or other furniture.
Just do not forget that its use is carried out exactly according to the instructions. Otherwise, improper use may result in a spoiled mood and the inability to restore the appearance of the property.
For defects on chipboard surfaces (which are not so rare), wax will work well. But here, as in the previous version, it is necessary to choose the right color. Before using the product, you should make sure that the surface is completely clean of dirt and dust. Only after this can you rub wax into the damaged area.
After this procedure, you need to level the surface using an edging knife. Then you need to wait for it to dry completely. After this, it is worth wiping the surface with a fluffy cloth specially designed for polishing. When lacquered furniture becomes scratched, wax can also come to the rescue. It will not only remove defects, but also give the interior item a radiant shine.
Cracks
Cracks on the surface of the countertop are the most common reason for its complete replacement. As the material most susceptible to negative influences, the top layer will certainly become unusable after some time. And the thinner and cheaper the material of the top layer of the countertop, the sooner it will begin to become covered with cracks.
If even small cracks appear on the countertop, urgent repairs are required - otherwise the crack may grow larger, and then the panel will no longer be repairable.
Before you begin work on restoring the countertop from cracks, it is necessary, in principle, to assess the feasibility of such work.
A wide crack in the top layer across the entire tabletop makes repair impractical. Even the most painstaking work will inevitably crack again after a while.
Glue is taken into the syringe and the crack is filled along the entire length. If it is very thin, a needle is put on the syringe for more precise coating.
If it is shallow and small, we proceed according to the standard scenario.
We clean, degrease, apply wax, polish. Additional painting and varnishing as needed.
It is recommended to immediately apply wax of a suitable shade; due to the large size of the cracks, even professionals are not always able to restore the uniform color of the surface.
A day later (after the glue has dried), the restored area is painted over in a suitable tone.
How to understand why the furniture is already swollen
First you need to understand why the kitchen is swollen or the countertop is swollen, this will tell you what to do. If the rules were followed, spilled water was wiped up immediately, overly hot pots and objects were not placed on the work surface, there was a high probability of defects. Then the solution is to contact the seller or manufacturer.
Due to poor quality material
If a chipboard kitchen swells too quickly, before the warranty expires, which usually lasts from 12 to 18-24 months, you can contact the seller or the manufacturer’s director by phone, or file and send a complaint by email. Reputable companies will offer free repairs, refunds or replacements. However, according to the law, manufacturers are not required to change furniture, since it is a non-food product that is not subject to mandatory exchange.
If a company or seller refuses to admit guilt, you need to contact an expert. The buyer or the seller (manufacturer) can hire an expert; the person who contacted the expert organization must pay for the service.
Algorithm of actions:
- the consumer writes a letter to the head of the expert institution, in which he asks to examine the set and the quality of its materials;
- the expert and the consumer agree on the time of the inspection;
- after the examination, the expert gives the client a conclusion;
- the buyer files a claim against the seller or manufacturer, attaching a copy of the report, and demands repairs, replacement of parts, replacement of the headset, or refund of money, depending on the expert’s verdict.
If the inspection was appointed by the seller or manufacturer, he also agrees on the time and place of the inspection. The buyer can attend the study and ask the expert about everything related to the quality of the product.
Due to a manufacturing defect
In case of a manufacturing defect, the algorithm of actions is the same: first, contact the seller or manufacturer under warranty, if there is no result, order an examination. If the expert’s conclusion also does not motivate the seller to take action, and he continues to ignore requests, you can safely go to court. For this, you will also need a copy of the expert review report.
If the inspection is ordered by the seller/manufacturer, the buyer has the right (and, perhaps, should, in order to avoid customized results) to ensure that:
- the expert has permission to conduct the research;
- the specialist gives complete answers to all questions asked;
- comments that the buyer makes during the study are included in the examination report;
- After the examination, the specialist issues an opinion to both the seller and the buyer.
Sometimes manufacturers conduct tests in their own service centers, presenting the results as expert ones. It is better to prevent such actions by, if necessary, going to court and hiring independent experts.
When receiving an inspection report, you need to study it carefully. The document contains:
- date, time, place of research;
- all information about the specialist - full name, age, education, information about permission to conduct inspections;
- information about the study participants - seller/manufacturer, persons present, buyers;
- a complete description of the headset, date of production, sale, warranty (or lack thereof), any damage or defects found;
- all questions and comments that were made during the inspection;
- expert conclusions;
- signatures with transcripts of everyone who participated in the inspection;
- seal of an expert organization.
Such completeness of the document will be more reliable evidence in legal proceedings if it comes to court. One copy remains in the expert institution, the second is given to the person who initiated the study. Copies are also sent to all interested parties who participated in the inspection of the furniture.
If the research results are not in favor of the buyer, they can be challenged in court. To do this, a claim with a conclusion is filed against the seller or manufacturer.
Wetting the tabletop
Soaking is another fairly common case of tabletop damage. The reason for its appearance is prolonged exposure to moisture, so most often the edges are subject to such defects.
If the wood chip layer is swollen under the laminated film, it will take some effort to correct the situation.
Soaking immediately attracts attention, so many people strive to eliminate this problem as quickly as possible.
Note! Fixing this problem often requires complete removal of the countertop.
First, you should thoroughly dry the countertop. Then mechanical cleaning of the soaking area from rotten parts is carried out.
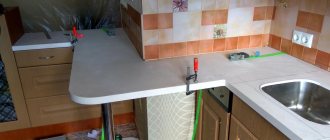
The restored area is covered with bars and clamped with a clamp. The product is left in this position for 24 hours until the glue dries completely.
After this, furniture glue mixed with sawdust is placed into the resulting cavity; you can even use the remains from the previous step.
Note! Now it is important to press the glued layers as best as possible on the wet side.
Leave the tabletop under load for at least 24 hours. The more pressure the load puts on the repair site, the smoother and more uniform the result will be.
Treating the ends with water-repellent sealant or silicone compounds will help prevent swelling of the wood-based base under the laminated film.
After the glue has dried, install the tabletop in place. It is recommended to treat the open and unprotected side surfaces of the tabletop with silicone sealant; it will protect against repeated damage.
Restoring integrity to a glass tabletop
If chips or other defects appear on glass furniture, then restoration on your own is impossible. To remove even the smallest scratches you will need professional equipment. If there is significant damage, the table cannot be “reanimated” and there is only one way out - replace the product with a new one.
To protect the glass from scratches, it is recommended to use fabric coasters or cover it with a tablecloth.
Damage to the countertops can be associated both with poor-quality material from which they are made, and with improper use. However, regardless of the reason, in most cases, there are ways to fix it.
Burns
Burn-through occurs when the surface is exposed to too hot dishes. Before you restore a kitchen countertop made of laminated chipboard, you need to get rid of the visible burn area. We work with sandpaper or a file, as necessary.
If the protective laminated layer is exposed to high temperatures, it will leave an unsightly burn mark.
And then we carry out the same algorithm as for a scratch - fill it with wax, sand it, paint it or varnish it.
By following our simple tips, you can easily, quickly, and most importantly, economically bring your countertop to its original form.
The best option is tabletops, the edging of which is made of aluminum tape.
Restoration of artificial stone countertops
Despite the strength of this material, flaws may appear on it and you can get rid of them at home. To remove a scratch from a kitchen countertop, a mixture of polyester resins is required, which makes even significant defects invisible.
The restoration proceeds as follows:
- around the damaged area it is necessary to clean the surface and degrease it;
- particles of material are removed from the recess, it is expanded and made deeper;
- the damage is covered with polyester resin and left to dry for 20 hours;
- Afterwards, the tabletop is sanded, first with an abrasive material and then with felt.
This kind of work is quite painstaking and requires certain skills in working with the tool. Therefore, if you have no experience, you can contact a specialist.
