Transformable bench - design description, operating principle
This bench for a country house is a fairly simple design that can easily be transformed into a table with two comfortable benches. And when folded, it is an ordinary bench with a back and handrails. It will not take up much space on the territory of the personal plot and at the same time will be able to perform all its functions in full.
Bench - assembled transformer for a country house
Functions and convenience of the bench
This is a compact and practical bench that easily turns into a fairly spacious table and two comfortable benches. Thanks to its high degree of mobility, it can be installed anywhere in the garden.
The only drawback of such a bench is its considerable weight, since it will take a lot of wooden boards to make such a complex structure, but it will be quite stable, reliable and durable if everything is done correctly and precisely according to the developed instructions in compliance with all technological processes.
Bench - disassembled transformer for a picnic
Master Class. Do-it-yourself wooden transforming bench for the dacha
Master Class. Do-it-yourself wooden transforming bench for the dacha
Author Nikolai Shaduro , built a gazebo at his summer cottage and decided to place garden furniture in it, but it should be compact and not take up much space inside the gazebo. I started searching for drawings on the Internet, as usual, it’s very rare to find something useful, there are a lot of sites, but there’s little use. In general, from everything that I found useful on the Internet, I had to think out a lot and customize it, and make up my own. The author's table turned out great, which he decided to generously share with us. I used different types of boards for the table: birch, pine, aspen, but it is best to take hard types of wood, such as birch, because the table and two benches are designed for 6 people, that is, the structure must withstand high loads. The advantage of this table is that it compactly folds into a bench with a backrest and back into a table with two benches; it takes up little space when folded. So, let's look at what exactly is needed to make a transforming table Materials: 1. 30x80 mm board of different species (it is better to take birch boards) 2. metal corners 3. wood screws 4. wood glue or liquid nails 5. varnish 6. stain 7. M12 bolts 8. nut 9. washer 10. nails Tools: 1. hacksaw 2. screwdriver 3. drill 4. hammer 5. ruler 6. pencil 7. tape measure 8. protractor 9. corner 10. brush
Step-by-step instructions for creating a table - DIY transformer:
As mentioned above, the author first built a gazebo on his summer cottage and decided to acquire garden furniture.
After a long search on the Internet for a suitable drawing, I got to work, first of all I drew templates for the legs directly on the floor, you can also use a sheet of plywood.
Next, he saws the boards according to size; the author used different types of wood: aspen, pine, birch, but it is best to use hard wood. Please pay attention! There will be two benches, namely internal and external. First of all, the master makes an external bench; he showed us all the detailed dimensions directly in the photographs, which, mind you, is very convenient. The height of the legs is 440 mm, the width of the legs at the bottom is 400 mm - this is very good for the stability of the bench. Attention important point! The length of the internal crossbar is 150 mm, we remind you once again that the crossbar is located inside.
The length of the outer bench is 1380 mm; before direct assembly, all workpieces should be thoroughly sanded and be sure to chamfer so that the surface is smooth, even, as they say, “Without a hitch.”
The bench turns out to be simple, and the master makes the fastening using wood screws, wood glue and, for greater reliability, adds metal corners, since the structure must be extremely strong.
So, let's move on) Now you need to assemble the Inner Bench. Please note! The height of the legs on both benches should be strictly the same, but the crossbar that fastens the legs is moved outwards and its length is accordingly increased to 400 mm, the length of the top bar is 350 mm where, at a distance of 40 mm from the edge, a hole is drilled for an M12 bolt and drilled out to recess the bolt head into cavity of the board so that nothing protrudes. The author indicated all the necessary dimensions directly in the photographs.
The length of the bench is 1440 mm, but in each individual case the dimensions may vary, because everyone makes it for themselves, but as a standard we use the dimensions presented by the master.
Holes are drilled in the top bar.
After both benches are ready, you need to try them on and one should fit into the other with a small gap (see photo)
That is, two benches when folded should create one whole.
This is exactly what should happen in the end.
We've sorted out the benches a little, now let's move on to considering the author's further actions, namely the manufacture of brackets from timber. The angle of connection of the two bars should be about 100-1050 (see photo) where beam “A” is responsible for the width of the tabletop, and beam “B” is the height from the top of the bench to the tabletop.
The author indicated all the necessary dimensions in the photographs.
A hole is drilled in timber “B” for an M12 bolt and drilled out to recess the head into the cavity of the wood.
After that, the resulting brackets should be connected to the inner bench; we place a washer at the connection point so that there is no mating.
The head of the bolt is recessed into the drilled hole.
The same is true on the opposite side.
In general, 2 brackets are fixed in this way, which are responsible for the height and width of the tabletop.
Then you should align both brackets evenly.
And now the fun part begins, you need to connect the tabletop with the outer bench, this is done using a straight plank, its dimensions are indicated in the photo.
These strips need to be made in 2 pieces, the author struggled for a long time to get the exact size during the fitting process, so in each individual case there may be errors. To begin with, the master drove nails along the edges of the planks and made a mark with them, that is, he drove a nail so that it stuck out a little on the other side and made a mark, and then drilled a hole for an M12 bolt
Everything must first be carefully adjusted, and then drilled calmly, as they say, “Measure twice, cut once.”
It is imperative to make a limiter on this bar so that your tabletop does not move apart; for example, the author’s one looks like this.
That is, when unfolded, it will fix the tabletop in a level position and will not allow further movement.
As you can see, everything is quite simple, a piece of board is cut at a certain angle and attached to the plank using 2 self-tapping screws.
For complete symmetry, everything is done the same on the second bar.
This is what actually results from the author’s work. This transforming table is compactly placed in the corner of the gazebo when folded.
Actually, what happens is that the tabletop turns into a backrest, and two benches are connected into a single whole by inserting into each other.
And if you need to set the table and arrange a “Feast on the Mountain” - just pull the bench and the table unfolds.
Voila)) and everything is ready.
The undeniable advantage of a transforming table is, of course, its compactness. The author advises using hardwood, for example birch, to make the table. This design is designed for 6 people when unfolded, so everything should be extremely reliable. The joints are additionally reinforced with metal corners. Of course, making such a wonderful table is quite difficult, but you are presented with all the necessary dimensions and description, which the author did not have and he collected information all over the Internet.
Author: Nikolay Shaduro
15.09.2018
See also:
- Transformable bench on a metal frame (drawings)
- Cool transforming benches for the dacha (drawings, project)
- Homemade folding furniture from slats from packaging
- DIY country bench
- DIY bench on concrete supports
Rate a homemade product, a master class, an idea. Comments
Preparation for construction of the structure: project drawings with dimensions
Before you start building a transformer bench, you need to prepare all the materials and tools, as well as draw up a good drawing or find it on the Internet.
We offer you a standard drawing - a diagram of a bench - transformer with the dimensions indicated on it. The most difficult step is creating a moving mechanism, so initially it is necessary to prepare all the blanks, which will then be assembled together into a single transformation structure.
Drawing of a set of wooden elements for making a transformer bench
Typical drawing of a bench-transformer
LiveInternetLiveInternet
Quote from svetlana-sh
Read in full In your quotation book or community!
We make a folding sofa for a narrow hallway ourselves.
Very convenient for apartments with a narrow hallway. It is made foldable, the protruding elements (side supports and seat) are attached to the wall on hinges. When folded, this sofa protrudes only the thickness of two boards. Of course, sitting on a sofa whose back is set vertically is not very comfortable. But, in the end, it is not intended for relaxation.
Materials:
From pine furniture board 22 mm thick:
1- backrest dimensions 450x1350 mm - 1 w;
2- seat dimensions 350x1350 mm - 1 pc.;
3- side seat support with dimensions 350x350 mm - 2 pcs;
4-rail-spacer dimensions 40x1350 mm - 1 pc.
In addition: wooden block (5) with dimensions 35x35x450 mm - 1 piece; door hinge (6) - 6 pcs; self-tapping screws; dowels; double-sided self-adhesive tape; semi-matte varnish.
Having prepared the necessary materials, you can start working on the sofa.
1. On a furniture board intended for making the back of a sofa, using a pattern or a pre-prepared template, mark the upper curly edge.
2. According to the markings, cut out the upper edge of the back and the diamond-shaped opening using a jigsaw. To cut out the latter, holes are pre-drilled in the shield for a jigsaw file. It is advisable to make two holes near the obtuse corners of the rhombus. In this case, you will not need to turn the jigsaw blade in sharp corners. After cutting, traces of the cutting tool are removed from the edges of the cuts.
3. Having cut out the remaining parts from the furniture board, all their surfaces are carefully polished. When performing this operation, it is necessary to firmly fasten the workpiece. To do this, it is pressed with a clamp to the workbench board.
4. The front edges of all parts of the sofa are rounded using a milling machine using a suitable profile cutter.
5. Finished parts are tinted if necessary. The color of the impregnation is chosen in accordance with the overall decorative design. Then the parts are coated with wear-resistant transparent varnish.
6. Attach a wooden support block to the wall. The seat mounting height is determined based on the ease of use of the sofa. The height of the folding side supports of the seat must also be selected in accordance with this height. First, attach the block in the middle to make it easier to place it in a horizontal position.
7. Level the block horizontally, slightly turning the latter around the central fastening screw that is not fully tightened, and then secure the block along the edges.
8. A wooden spacer strip is placed on the support block (the folding seat is then hung on its hinges) and screwed from below with self-tapping screws to this block. It is quite clear that holes for self-tapping screws in the block must be drilled in advance.
9. Now the position of the hinges for hanging the inward folding seat supports is marked.
10. According to the markings, drill holes in the frame for dowels and fasten the hinges with screws.
11. Having installed all the hinges, hang the side supports of the seat on them.
12. It remains to install the back of the sofa. Since it does not carry a power load, it can be secured using double-sided self-adhesive tape. This is done quickly and does not leave any traces of fasteners on the outside.
13. It is advisable to complement the back of the bench with a thin foam rubber element in a beautiful case. This will not only give the sofa additional charm, but will also make the person sitting on such a sofa somewhat more comfortable.
Source: “Your Own Master” magazine, No. 12, 2010.
Selection of material for manufacturing, advice on selection
To make a transforming bench , you will need to purchase planed edged boards and timber. Larch, birch, pine, beech, ash or oak (if possible, since it is very expensive) are best suited for such a design.
The board must be well sanded, of high quality and meet all compliance standards. If you buy a board at a sawmill, be sure to inquire about the availability of a quality certificate for their product, since under the guise of an edged oak board they may sell you a completely different product, and if you are not well versed in wood, then it is best to take a carpenter with you who understands the types boards and its quality.
Materials
As we said above, the service life and overall strength of the structure depend on the correct material. Let's list what is used most often.
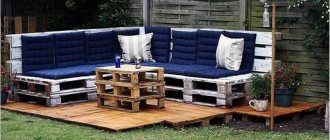
- Tree. Boards and timber are the most common material for such country furniture. The boards are easy to work with and can be given any shape and configuration.
- For rustic-style furniture with a deliberately rough finish and texture, pallets are more suitable. They are sanded, primed and varnished. It is important to use only those pallets that do not have a toxic mark and do not emit an unpleasant odor.
- Metal. The most durable option for benches is welded. They can be decorated with forging or left as is, emphasizing the negligence a la loft.
- Remains of building materials. Want to save money? Rummage through the barn; you probably still have some old furniture: chairs, bedside tables, doors. Anything will do. The main thing is to turn on your imagination.
Instagram @funmebel.rf
Material calculation and tools
To assemble the transformer bench we will need:
- Two beams with a section of 90x45x1445 mm;
- Five bars with a section of 90x32x1480 mm;
- Two beams with a section of 90x45x1445 mm.
To work we will need the following tools:
- Grinder or sharpened hacksaw for wood;
- Universal screwdriver or screwdrivers of the required diameter;
- Electric drill;
- Construction level, square, hacksaw, chisel;
- Sandpaper (320) or sander;
- Self-tapping screws, bolts, nuts and other fasteners;
- Electric or gasoline saw;
- Paint or varnish, brushes or roller.
Fasteners for making a transforming bench
Deciding on design and construction
The transformer can be equipped with one or two benches, with or without backs and armrests. Their sizes will also be determined by the home master, based on the needs of the family and his own creative vision.
It is best to use graph paper: on it the diagram of such an unusual product will be made most accurately.
To make the product strong and durable, you need to choose the right lumber.
To work you will need:
- edged boards;
- wooden beam.
The product is compact and takes up minimal space, which will be an additional advantage in small areas.
At the same time, experienced owners claim that beech, ash, oak or birch wood would be suitable. You can also use pine, but you will have to choose very carefully, avoiding blanks that have a lot of knots.
Prepare your tools
Universal in use, as it turns into a kit for wide use.
In order for things to move without stopping, and time to be spent as efficiently as possible, it is important to prepare the tools, not forgetting any little thing:
- tabletop cross-cutting machine: will greatly facilitate the work; You can perform operations manually with a fine-toothed hacksaw, and use a protractor to apply markings;
- electric drill and drills;
- plane or milling machine for chamfering;
- Phillips screwdriver;
- small sanding unit or block with sandpaper;
- rasp.
The transformer can be equipped with one or two benches, with or without backs and armrests.
Additionally, PVA glue and wood screws may be useful.
Decorating Tips
The transformable bench can be covered with stain and then with water-repellent varnish, which is used to paint yacht decks. The varnish dries in about 36 hours. But still, it is not recommended to keep a bench coated with varnish outside in the rain and snow.
If you still plan to install it in a permanent place on your garden plot, you can paint the structure with waterproof paint, which will dry for about a day. Once every few years, the paint must be renewed so that the wooden elements do not begin to rot, become moldy, and various parasites do not infest them.
If the design is done correctly and you take care of it, it will serve you for at least 20–25 years. Very often craftsmen replace wood with metal, which does not look as beautiful and aesthetically pleasing, but the service life increases significantly.
We paint all the elements of the bench with stain
Manufacturing process: step-by-step instructions
The strength and durability of operation depends on the accuracy and consistency of execution.
The design idea can expand widely when it comes time to decorate; the backs of benches and seats are especially convenient for this.
To ensure that all parts of the product are at hand, the craftsmen recommend that before starting work according to the drawing , where its elements are indicated, immediately prepare the legs (8 pieces) up to 70 cm long, making oblique cuts on them at the bottom and top.
The strength and durability of operation depends on the accuracy and consistency of execution.
The next step will be making the countertop. You will need five boards with the dimensions specified in the drawing .
There are many ways to make a homemade design incredibly attractive and original: it all depends on desire and effort, and success will definitely come!
They need to be sanded and connected with strips eight centimeters wide. Two connecting parts are enough.
Connect everything with self-tapping screws.
When the bench is ready , the tabletop is screwed to it.
To ensure that all parts of the product are at hand, craftsmen recommend that before starting work, use the drawing, where its elements are indicated.
If a design with two seats is proposed, you can begin manufacturing the first one; its value depends on the general parameters of the product; according to the drawing, it is made of boards (1-2 pcs.); their number correlates with the width of the bench.
- The seats are screwed to the legs;
- They are reinforced from below with spacers.
The next step will be making the countertop.
The second bench is made similarly:
- the legs are made from 40x40 bars; they are attached to the seat in the shape of the letter “A”;
- parts of the bench are connected with timber, strengthened for strength with wood glue and self-tapping screws;
- if it is assumed that a backrest will be attached to the bench, it is made of boards, reinforced with bars, spacers, wood glue and self-tapping screws.
The next step is assembling the prepared parts of the product.
The next step is assembling the prepared parts of the product. To avoid unpleasant surprises, you need to assemble a transforming table by connecting the elements one by one and checking the drawing.
The design idea can expand widely when it comes time to decorate; the backs of benches and seats are especially convenient for this.
A nuance that attracts attention is maintaining the same height of the parts. If everything is done correctly, in accordance with the drawing, after finishing the work you will see a lovely sofa.
If everything is done correctly, in accordance with the drawing, after finishing the work you will see a lovely sofa.
The backrest needs to be securely strengthened; To do this, holes are drilled at the joints into which furniture bolts are screwed.
If it is expected that the transformable table or bench will be located outdoors, it is worth painting and varnishing to increase strength and longer service.
Then check the correct manufacturing and strengthening of the backrest-table top . A simple reliable way to check is to open and fix it using a regular stick.
Then check the correct manufacturing and strengthening of the backrest-table top.
If everything opens and closes smoothly, without much effort, the benches are connected to each other.
They are fixed with wooden dowels or glued with wood PVA.
For complete convenience and comfort, you can install armrests. To make them you need:
- two boards for stands;
- four - for fastening to the seat.
If everything opens and closes smoothly, without much effort, the benches are connected to each other.
They are fixed with wooden dowels or glued with wood PVA. To complete this part of the work, you need to make a kind of lever that allows you to freely fold and unfold the transformer . You will need a beam secured with furniture screws and nuts, and it is connected to the armrest with self-tapping screws.
Additionally, PVA glue and wood screws may be useful.
If the calculations are done correctly and the parts are connected correctly, you will get a wonderful table with two attached seats that is easy to disassemble and assemble.
You will need a beam secured with furniture screws and nuts, and it is connected to the armrest with self-tapping screws.
The second version of a transforming bench made of metal profile and wood
Materials and tools for construction
A transformable bench made of a metal profile is made similarly to a wooden one, but only with some changes.
Drawing of a metal bench - transformable with wooden seats
To make such a bench we will need:
- Square metal pipe with a cross-section of 25x25x1.5 mm (4 pieces of two meters and 2 pieces of 1.5 meters). This way we can save money and have minimal waste.
- Wooden boards - about 8 pieces.
- In addition to the basic tools, we will need a welding machine and a set of electrodes.
- Bolts, nuts, washers.
- Metal paint or water-repellent varnish.
- Antiseptic impregnations for wood.
- Sander.
Metal profile for making a transforming bench
Drawings, dimensions with descriptions and assembly diagrams of the transforming bench
At first glance, the structure of the bench seems so complicated that to assemble the furniture you must use drawings and a detailing diagram. Formally, this is true. If you make a transformable iron bench with your own hands in a private house, then the drawings can be successfully replaced with several sketches. It’s another matter if the parts for making the bench have to be ordered from a locksmith workshop. In this case, it will not be easy to assemble a transformer bench without details, drawings and dimensions.
Drawings of the most successful model of a transformable metal bench for a summer residence
According to the scheme, this design is no different from the rectangular options, but there are practically no welded joints, which means that most of the parts can be made using a homemade method. You can make drawings of a transformable bench from a rounded profile pipe yourself or use the bench dimensions given below.
Despite its decent size, this transformer circuit is rightly considered one of the most reliable and safe to use.
The only exceptions are the arches of the right bench and the base of the backrest. Additional bushings will need to be welded to the arcs to install the bolted connection. Few people pay attention in the drawings of a transformer - a bench made of a square pipe - to the presence of additional welded elements - bushings. Most people make the grave mistake of trying to drill holes directly into a square pipe. Due to the small cross-sectional size of the material, this is strictly forbidden, otherwise the profile may burst under load. If it is impossible to weld the bushings, for example, there is no welding, then it is better to find drawings of a transformer on a round pipe.
The table, also known as the back of the transformer, is assembled in a frame made of a metal profile, therefore, despite its small size, the strength of the tabletop is quite large.
Important! Unlike other models of benches, the size of which rarely exceeds 150 cm in length, in this scheme it is 180 cm, so vertical supports made of a round pipe are used.
This means that the transformer can withstand a significantly greater load than models with rectangular supports.
Drawings of a transformable garden bench made of wood
Building a bench out of wood may seem more complicated, but this is not entirely true. If you take a closer look at the drawing and detailing below, it turns out that the structure is simply planned out of more elements.
This is what a drawing of a classic transformer looks like - a bench made of wooden slats.
Diagram of a transformer with an attached bench. The dimensions of the structure can be changed, since the seat width of 183 mm is not enough for an adult
In fact, the most difficult stage is assembling the frame of the benches; it has to be done according to the details given below.
It is best to press steel bushings at the hinge points, and a bolt with a nut will be used as a rotary axis.
Bench decoration
Then we saturate all the boards well with an antiseptic and fire retardant and let them dry. We paint with water-repellent varnish, oil or acrylic paint. Apply varnish or paint in several layers.
we paint the boards for the seat and back with stain or varnish
Metal elements can be painted with special enamel using a spray gun. Before painting, all seams must be sanded well so that no joints are visible.
We paint the metal elements of the bench structure with black enamel
Main stages of work
First of all, the author dissolves the plywood into sheets of the required size. From these it will be necessary to assemble a rectangular box. Then the author cuts the box lengthwise into two equal parts using a hand-held circular saw.
The next step is to make folding drawers. To do this, the author connects two pieces of plywood using loops. In total, you will need three drawers: two are installed on the sides, the third in the middle.
We screw the two side drawers to the bed frame. The third drawer is installed when the bed is unfolded and serves as additional support.
The author connects the wooden slats that serve as supports for the mattress using two belts. This way the base can be easily removed when you need to fold the bed. These slats are also stored inside the frame.
After this, the author screws on the upper part of the frame (lid), installs the support posts and makes a backrest, which also serves as the head of the bed.
The final touch is sanding and coating the surface of the plywood with wood varnish. Instead of varnish, you can use mineral oil or a combination of stain and varnish. You can simply paint the frame in your favorite color.
For details on how to make a transforming bed for a summer house with your own hands, we recommend watching the video on our website.
Rate this post
[Votes: 3 Average rating: 4.7]
Video: How to make a transforming bench with your own hands
Whatever version of the transforming bench you choose, it should be noted that it can be useful in any occasion. In the spring or summer, you can gather your friends in your backyard and have a wonderful “feast” with barbecue, and a folding bench will easily accommodate about 6-8 people and everyone will be comfortable. And on ordinary days, you can fold it up and simply use it to relax after hard work in your garden. You can also be proud of your work and be confident that the structure, assembled with your own hands, will serve you for many years.
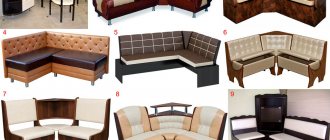
Varieties and interesting design options
To choose a suitable transforming bench, you need to take into account the number of people who will sit on it. The number of seats depends on the type of structure:
- Bench-table with benches. This variety is the most common. With the help of simple manipulations, the model turns from one bench into two with a table. Advantages: accommodates up to 6 people, does not clutter up the space. The disadvantage of the bench is that it does not look very attractive when folded.
- Designer bench. When disassembled, it provides seating for up to 6 people, when assembled – for two; complemented by a tabletop. Advantages: ease of use, functionality. The disadvantage of the bench is that it has more modest capabilities compared to the previous option.
- Bench-flower. It is similar to a construction set, but there are differences - when assembled, it has the shape of a bud. Advantages: adjustable backrest elements, accommodates up to 5 people. The disadvantage is the recesses and cells on the seats.
There are other transformer options. The model with two benches is characterized by simplicity of design and manufacture. A corner product can include a different number of turns and provides a large number of seats. The option in the form of a coffee table has an original design, suitable for relaxing, reading, or working on a laptop. The hexagonal bench table is an eye-catcher and seats up to 8 people.
Connoisseurs of non-standard solutions will like the model of two chairs, which transforms into an ordinary bench, a bench for placing a couple opposite each other, as well as a product with a side table.
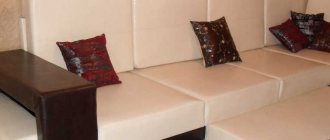
Bench-table with benches
Constructor
Hexagonal bench