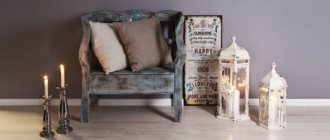
Features of the Provence style
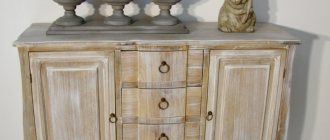
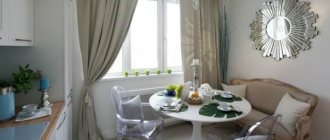
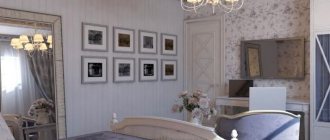
Provence is a more sophisticated analogue of American country. The style of the French countryside is distinguished by both simplicity and sophistication, elegance and modesty, an affinity for vintage furniture, naivety and idyllic tranquility. It is sincere and cozy, like a grandmother’s village house from childhood memories. It is especially common in kitchens, but can also decorate other rooms: living rooms, dining rooms, bedrooms.
Rare or antique furniture is very elegant and beautiful, but not everyone can afford this pleasure.
Style Features:
- Antique or artificially aged furniture.
- Natural flowers.
- Decoration with floral and rustic ornaments.
- An abundance of things from the “good old days,” from grandma’s box to antique trinkets bought at a flea market.
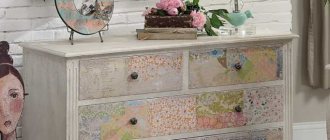
- Decoupage, sewing, ruffles and other handmade decor, made with your own hands.
- Softness, naturalness and variety of materials.
Slightly “faded” and dull colors, rustic but practical and high-quality things, rough plaster and natural textiles - this is interior design in the spirit of “French country”. There is no place for pomp, deliberate pretentiousness and arrogant luxury. The cold shine of metal, polished surfaces and modern furniture “monsters”-transformers are inappropriate. Everything is homely, cozy and modest, but at the same time subtly elegant.
Before you start aging furniture on your own, it is necessary to thoroughly prepare all wooden surfaces that will be processed.
The advantages of doing it yourself
Before we figure out how to paint furniture in the Provence style, how and in what ways to decorate it, let’s decide why this is needed at all. So, what are the advantages of restoring furniture and decorating a room in the spirit of the French countryside:
- Saving. Provence is much cheaper than classic, high-tech and most other styles.
- You don't even have to buy furniture. An existing one, artificially aged and restored, will do.
- Possibility of using old interior elements.
- Moral satisfaction, pride in what you have done with your own hands.
To make your furniture look shabby and worn, you can use the painting technique.
Differences in designs for different rooms
The design of a Provencal chest of drawers largely depends on the purpose and location. Various functional areas of a house or apartment influence its design and purpose.
The purpose of this piece of bedroom furniture is to store things and linen. Therefore, the design usually includes five to six longitudinal drawers, sometimes two more small drawers on top. For easy storage of small items and accessories, the drawers can be divided into many internal sections. To perform the function of a dressing table, the tabletop is complemented by a large wide mirror in an elegant frame, decorated in a Provence-style decor. If there is a lot of things, a tall chest of drawers can be complemented with opening doors. Functioning as a bedside table, this piece of furniture is compact in size, and usually only has one or two small drawers.
In the kitchen, this piece of furniture is designed to store cutlery, napkins, and other serving items. Moreover, its design can consist of many small boxes. If the function of a sideboard is performed, that is, furniture for storing dishes, the chest of drawers is necessarily complemented by glass doors, behind which several shelves are hidden. The shelves can also be open. Moreover, this furniture is quite tall. When placing such furniture in the dining room, the tabletop can serve as a serving table. In addition, furniture for storing wine bottles would be an interesting interior solution. This type of design includes open shelves with special recesses for storing bottles in a horizontal position.
A sideboard for a living room, as a rule, performs more of a decorative function than it has practical value. In this case, the chest of drawers should be small in size, and also be combined with all other pieces of furniture in the living room. Under the window you can place a low, long chest of drawers with two or three drawers or doors. It will expand the area of the window sill to accommodate decorative accessories, and also create a storage system for all sorts of small items in the living room.
A chest of drawers for a hallway should be designed so as not to take up much space, and the tabletop should have enough area to accommodate a small mirror, gloves, keys and small accessories. A chest of drawers made in Provence style is ideal for placement in a children's room, especially for a girl. The design of a children's product should be such as to accommodate a large amount of children's clothing and toys.
The bright decoupage technique will perfectly complement a children's closet, and the presence of sides on the tabletop will make it a changing table.
For your office, you need to choose a cabinet for storing business papers, filing cabinets, and books. It should have a simple design with no frills in appearance. It is better if it is coated with colorless varnish so that the furniture has the color of natural wood. Its design should be such that it is possible to organize business papers, for example, contain many small boxes, the facades of which can be beautifully decorated with information about the contents. Such an example is shown in the photo.
DIY furniture aging techniques
You can “age” a chest of drawers or sideboard in different ways. Let's look at the basic techniques.
Regular painting
- Preparatory stage: remove the old varnish with coarse-grain sandpaper, sand the surface with fine-grain paper.
- Painting. Pastel colors predominate in Provence. We choose the paint accordingly.
- Use iron wool (an abrasive material sold in hardware stores) to dry the surface until dark lines and spots appear.
- Paint the fittings with the same paint, dry, then clean with a wire brush.
New elements of fittings also need to be aged - after all, they can give away your trick with furniture.
Paint and paraffin
The aging effect can be achieved with ordinary paraffin. To do this, the coating is removed in some places with sandpaper. Then the working areas are rubbed with paraffin, and paint is sprayed on top using an aerosol can. It’s not scary if the coating is uneven - such negligence is quite consistent with the spirit of Provence.
The combination of a rich base and a light second layer will create the effect of faded paint.
Cleaning and bleaching
Whitening can be done either with a special whitening paste or by grinding. The paste is only suitable for porous wood. For example, oak or ash.
To consolidate the effect for a long time, coat the finished furniture with clear varnish.
Whitening:
- Thorough surface cleaning. Removing the varnish and sanding first with coarse sandpaper, then with finer-grain paper.
- The “aging” areas are covered with blue or brown paint, dried, and rubbed with paraffin.
- Paint the furniture by applying several layers of white paint.
If the base paint or wood is dark in color, use nitrocellulose varnish. For light breeds, a water-based varnish is suitable.
Patination at home
Patination can be carried out in dozens of ways and materials. At home, the easiest way is to purchase a patination composition. You can find it in any construction supermarket. First, the surface is prepared, painted, and varnished. We sand the dried furniture with 240-280 grit sandpaper. Then a patination preparation is sprayed onto the surface from a can. After this, the patina is removed with iron wool, remaining only in the recesses.
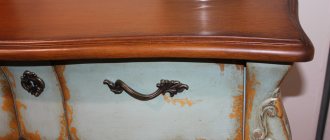
Patina appears on the surface as a result of many years of oxidation of paint, varnish or metal and is especially valued by connoisseurs.
Using craquelure varnish
Craquelure varnish is a varnish used to make craquelures. Unclear? It’s simple: craquelures are decorative cracks that create the effect of furniture cracked by time. The method is quite complicated and requires certain skills. Not for beginners.
Create an imitation spider web from cracks in an old protective coating on a dresser.
Preparing the structure
First, you should remove the glass from the furniture, if any. You also need to remove drawers, shelves, and remove all handles. If desired, you can unscrew the hinges and remove the doors to make them easier to handle. After this you need to do the following:
- carefully treat all surfaces with coarse sandpaper, especially for polishing - there should be no gloss left;
- walk with a damp cloth, let dry and repeat the procedure with fine-grain sandpaper;
- degrease with white spirit or acetone;
- coat with ready-made primer or water-soluble glue;
- After a few hours (from 2 to 5), when the surfaces are dry, cover them with acrylic paint.
Purpose, features of basic types of furniture hinges, installation nuances
If one layer is not enough, you can apply a second one. In this case, it is recommended to create the look of careless painting with stripes, as if it was done with a rough, hard brush at the beginning of the last century in Provence. In some places you can leave islands that are not completely painted. Painting can be done using a foam sponge or roller.
The priming brush should be placed in a jar of water to prevent it from drying out. If the paint is thick, it can be slightly diluted with water (up to 5% of the total volume).
Clean the surface of the product with sandpaper
Degrease with white spirit or acetone
Treat with primer
Cover with acrylic paint
What tools and materials will be needed
We will combine several techniques in one master class. To decorate furniture in the Provence style with your own hands, we will need the following tools and materials:
- Brushes, wide and narrower for “spot” painting.
- Acrylic water-based paint.
- Patination composition (in our case – bitumen varnish).
- Paraffin.
- Putty.
- Hairdryer (to speed up drying).
The set will depend on what kind of item is being aged and what method is used.
How to decoupage a bedside table in Provence style
For decoupage in the French country style, a bedside table with carved fronts and drawers is best suited, but if the lower part of the module is represented by a door and the fittings have a simple shape, it doesn’t matter. To decoupage a bedside table, we will need napkins with floral patterns, primer and glue for decoupage, two-step craquelure, acrylic paints, wide brushes, matte aqualac, baguette paste, and a foam sponge. Before decoupage, you need to thoroughly sand and degrease the wooden surface.
We design the bedside table step by step:
- We coat the surfaces on which the pattern will be applied with a primer (in our case, these are the tabletop, drawers, opposite corners of the sidewalls).
- Paint the chest of drawers with beige paint.
- We glue the patterns using decoupage glue and, after they dry, lightly sand the patterned edges.
- We outline the sides and drawers with gray paint.
- Apply craquelure to beige paint in two layers with intermediate drying.
- We drive gold pigment into the cracks formed.
- We cover the finished product with matte aqualak.
- We draw monograms along the contours of the drawers and sides using baguette paste. You can first outline the drawing with a pencil.
- Afterwards, we cover the monograms with gold paint and, using a sponge, add a mixture of gold, green, brown and black paints to the corners and edges of the chest of drawers.
- We cover the product with a finishing layer of varnish.
For decoupage of a bedside table in Provence style, furniture with carved facades and drawers is best suited
The Provencal style bedside table is ready! This design, of course, requires time and perseverance, but the result is undoubtedly worth it!
Step-by-step master class on aging furniture
- Applying a base coat of paint.
- Drying. You can use a hair dryer to speed up the process.
- Treatment of aging areas with paraffin.
- Adding putty for relief and creating the effect of a multi-layer coating.
- Creating a worn effect. This is achieved by friction with sandpaper, a stiff brush or iron wool... or by applying paint with a sponge, then the previous layer will be perceived as abrasion.
- Painting in several layers.
- Sanding.
- Patination.
- Drying.
After complete drying, you can begin sanding the area to be treated, then begin decorating.
If you have decorating skills, you can additionally paint furniture in the Provence style with your own hands. Floral ornaments and images with rural motifs will look especially organic.
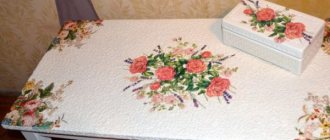
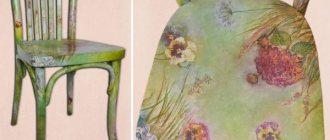
You can use decoupage napkins with designs in the Provence style, which are transferred to furniture.
Decoupage of kitchen furniture in Provence style
Kitchen furniture consists of wall-mounted modules and lower cabinets with pull-out cabinets. Often, the upper modules of kitchen fittings in old sets have glass inserts. We will learn how to decorate just such a cabinet, because it suits the Provencal style like nothing else. For decoupage we will need two-step craquelure, napkins with a delicate floral print, a primer, beige and rich acrylic paint to match the print, gold pigment, matte varnish.
Decoupage of kitchen furniture looks quite interesting and varied
In order to decorate a cabinet in Provencal style you should:
- Sand the wooden surface and coat it with several layers of primer.
- Paint the cabinet with neutral paint.
- Use rich acrylic to decorate the glass frames and carved elements on the front cover of the module.
- Distribute the napkins evenly over the surface of the cabinet and secure them, applying glue from the center to the periphery.
- Apply craquelure in two layers and drive gold pigment into the cracks that appear.
- Coat the finished product with varnish.
In order to hide the dishes on the shelves, the inside of the cabinets can be decorated with curtains: such a solution will be practical and will emphasize the character of French country style.
The color of the curtain for a beige kitchen can be rich, for example, emerald, for colored modules, or, on the contrary, neutral, for example, peach.
Ready-made examples of aging different furniture with your own hands
The chest of drawers “aged” using the reverse patination method looks good. In this case, abrasions are achieved not by rubbing off the patina, but by rubbing away the underlying layer of paint.
An old Soviet cabinet restored in Provence style with an attached additional storage system in the form of a bookcase.
If the work is done correctly and in compliance with the appropriate instructions, furniture made in this style will give the room a feeling of comfort and coziness.
Rack and shelf, aged with patina.
Provence creates a lovely homely coziness and a comfortable indoor environment.
In addition to aging furniture, the Provence style can always be complemented by decoration using decoupage techniques and other types of painting. Antique trinkets, handmade souvenirs, and fresh flowers will look great in this interior.
Any antique item can be restored, repainted and given a decorative role in the Provence style.
Step by step guide
A master class on decoupaging furniture in the Provence style with your own hands includes the following steps:
- First, take napkins or decoupage cards, crop the picture, removing all unnecessary (if necessary). The resulting element is not delaminated - otherwise the design will crawl.
- The white edge of the multifora is cut off - you get 2 films.
- The place where the decoupage element will be located is coated with a thin layer of PVA with a small brush. PVA can be diluted in this case.
- Place the picture face down on half of the multiphore and moisten it with a spray bottle.
- Place the second part of the multifora on top and wipe with a soft cloth. As a result, all wrinkles will disappear, the picture will smooth out well.
- Carefully remove the top film, and apply the picture along with the bottom film to the place that was smeared with glue. Carefully rub the element onto the furniture with a soft cloth over the film.
- Remove the multifore starting from the corner.
- Any moisture around the picture is removed with a rag and, without allowing it to dry, is covered with a thin layer of diluted PVA.
- When the glue in the drawings has dried, the piece of furniture is completely varnished. The layer should not be too thick.
Before starting work, you can practice on a cutting board using one napkin.
If additional aging of furniture is required, then at the final stage the usual acrylic varnish can be replaced with craquelure varnish. Then, when dry, all surfaces will be covered with a network of cracks. In order for the furniture to match the Provence style, abrasions or patination are created on the curves and edges.
Choose napkins with the design you like
Clean the surface
Trim off excess and visually determine the location of the pattern on the furniture
Glue the picture and cover it with a thin layer of diluted PVA glue
When the glue on the drawings has dried, completely cover the surface of the furniture with varnish.
In modern furniture, transparent and smooth glass is installed on the facades, which does not suit the Provence style. Therefore, it makes sense to replace them with matte ones or create an opaque layer yourself. The simplest option is to apply a matte film. In addition to this, you will need to purchase glue in an aerosol can, then proceed as follows:
- wash the glass with detergent and wipe dry;
- cut out a piece of film according to the size of the glass or in the form of separate elements for decoration;
- Carefully remove the protective coating from the film;
- moisten the glass surface and film with a soap solution from a spray bottle;
- Apply the film to the surface and straighten it, expelling air bubbles with a soft cloth.
It is more convenient to glue individual elements one by one.
Wash the glass with detergent and wipe dry
Cut a piece of film to the desired size and carefully remove the protective coating
Moisten the surface and straighten the film
Another matting option is to imitate frost using waterproof acrylic paint in an aerosol can. This method is convenient for applying drawings or patterns using a stencil:
- reusable - it is applied using water-soluble glue;
- disposable - self-adhesive;
- made independently on paper - you will need to transfer it to film, then cut out the desired pattern.
Review of furniture LED lamps, methods of placing devices
Frost can be removed at any time with acetone. There is another fairly simple method to achieve a matte effect using the following components:
- silicate glue, slightly diluted with water;
- tooth powder to give the consistency of homemade cream;
- water-soluble paint (optional).
All ingredients should be thoroughly mixed until smooth and carefully applied with a roller to the glass to avoid drips. After drying, apply a second coat, and after drying, rinse the glass. With this method, you cannot use a stencil, since during polymerization the composition solders its edges to the glass. There are also various ready-made pastes for chemical etching - they are applied with a spatula to a fat-free, dried surface in a thick layer. Then rub it into the glass, let it stand for 10 minutes, remove the residue, and wash the surface with a sponge.
Imitation of frost with waterproof aerosol acrylic paint
Frosting glass with silicate glue
Tips for care and use
Furniture coated with acrylic varnish does not require special care. Dust can be removed with a soft damp cloth, such as microfiber, followed by wiping dry. At the same time, no streaks should be left. Although primer, paint and varnish provide some protection, large amounts of water can ruin the wood and decorative elements. Grease stains can be removed using a small amount of dishwashing detergent.
It is unacceptable to use abrasive materials or hard brushes when caring for furniture after decoupage to avoid damaging the integrity of varnish, paint and applications. Also, do not use aggressive liquids such as acetone, kerosene, or thinner. If the varnish on individual parts (drawers, doors) wears off over time, it needs to be reapplied. With proper decoupage and careful care, the furniture will last for many years.
If the furniture is coated with acrylic varnish, it does not require special care
When caring for furniture with patterns, you should not use abrasive materials or hard brushes.
With careful care, furniture decorated using the decoupage technique will last for many years.
