20641
With the arrival of a small child in the family, a new life begins, full of joy and pleasant troubles. The baby needs not only love and care, but also the creation of favorable conditions for full development. Healthy sleep is of great importance for the baby, so after purchasing the appropriate furniture, a logical question arises - how to assemble a children's bed, doing it correctly, taking into account the specifics of its design. Of course, the easiest way is to turn to the help of professionals, but not all families have access to this service. And sometimes such an opportunity is simply brushed aside by a man, because self-assembly is direct proof that “dad can do anything.” Despite the laboriousness of the process, the task is quite feasible; the main thing is to follow the sequence of steps laid down in the instructions.
What is it and how does it work?
Pendulum cribs are a type of children's furniture that allow you to rock your baby back and forth or from side to side. The main advantage of such models is that they allow the baby to quickly get used to his new place. After all, motion sickness occurs right in the sleeping place.
Round crib pendulum made of wood
White crib pendulum
Among the disadvantages, the high cost compared to other models is noted. It will be easy for the child to get used to motion sickness and subsequently, without it, it may be difficult for him to fall asleep or calm down.
If the pendulum system is fixed poorly or incorrectly, this will lead to injury to the baby. It is important to take this into account when assembling a crib.
White crib pendulum
Functional crib pendulum made of wood
This type of furniture is made from natural wood. It is coated with water-soluble varnish. The main functional part of the entire structure is the pendulum mechanism. In order for the pendulum crib to stop moving, it is necessary to secure the mechanism using special clamps.
Beautiful crib pendulum made of wood
Pendulum crib with shelves
Bright crib pendulum
Types of children's beds
Furniture of this type is divided into ordinary and multifunctional: a transforming crib, a pendulum crib, with drawers, with a chest of drawers, with a changing table, with wheels and a rocking crib. The main ones will be discussed in detail below:
- Transformable children's bed. It combines several elements and is suitable for a long period of time. One of its functions is transformation from a cradle to a sleeping place for an older child. Part of such furniture includes attributes for the convenience of caring for a newborn - drawers or a chest of drawers. They can also serve as a place to store toys and things for an older child. Manufacturers most often equip such cribs with a rocking mechanism, music and lighting. The disadvantages are the high price.
- Pendulum. It has a convenient design and takes up little space. It is divided into several types - according to the mechanism of motion sickness. The advantage of the longitudinal mechanism is the similarity of its vibrations to the natural movements during motion sickness. A baby in such a crib should calm down and fall asleep faster. The transverse pendulum moves left and right, but, according to some reviews, not all children like this method of motion sickness. In order not to make a mistake in choosing, it is best to purchase a universal mechanism. In this case, if your baby does not like the type of rocking, you can change it to another. Many models have the function of changing the height of the bottom of the bed. They can be equipped with electronic controls and removable walls, which is very convenient for mothers who want to place their child’s bed next to their own.
- Rocking bed. In terms of functionality, it is no different from a pendulum cradle, only it does not have automatic functions. This type of furniture is more environmentally friendly compared to other types.
Necessary materials
To assemble a crib of this model, you need the following materials:
- frame;
- crib backs;
- place to sleep;
- supporting elements (legs);
- pendulum mechanism.
All listed materials and elements are included in the bed set. There are models additionally equipped with drawers, chests of drawers and height adjustment mechanisms. This crib model helps to save space in the room and do without additional cabinets.
Baby crib pendulum made of wood
Pendulum crib with chest of drawers made of solid wood
White crib pendulum
How to assemble a transforming children's bed?
A transformable bed allows you to increase the sleeping area depending on the age of the child. The bedside table, which is part of this design, can be eliminated. This increases the size of the bed.
When assembled, the transformer is a sleeping place that is connected to a changing table, cabinet or chest of drawers. When the baby gets older, the structure can be separated and made into a bed for a school-age child and a small locker.
The transformer assembly process is as follows:
- First you need to assemble the frame of the crib; it consists of lower sides and a backrest. After this we install the slats for the bottom.
- We attach the middle bottom to the slats. Then you can begin assembling the chest of drawers or cabinet (this element depends on the modification).
- We attach the chest of drawers to the back of the structure with screws, and install shelves inside.
- We install side grilles, top bottom, and headboard.
- After assembling the upper part of the structure, we proceed to install the lower part. In most cases, it is a rectangular container with an open top. Installation is carried out using screws.
So, congratulations to your family! All members are in joyful anticipation of a miracle. But, despite the anticipation of the holiday, someone close to you should take care of preparing a comfortable sleeping place for the newborn. Grandmothers can buy or sew bedding sets, grandfathers, uncles and aunts can give toys and clothes, but, of course, the future dad should make a crib for the baby!
This process will be both pleasant and useful, and will also help save financial resources for a young family. Convenience, environmental friendliness and safety - that’s what makes . The pendulum in her device will add functionality and comfort.
Required Tools
To assemble a crib, you should prepare the following tools:
- screwdriver;
- screws;
- plugs for screws.
In addition, you need to place the assembly diagram, which is included in the kit, next to it.
Baby crib pendulum made of solid wood in the room
Crib pendulum in the interior of the room
Pendulums for rocking a crib: types
The creators of pendulum cribs offer three possible pendulum mechanisms:
Baby crib with a longitudinal pendulum. The swing occurs back and forth.
Baby crib with transverse pendulum. The swing occurs left and right.
Universal. Allows you to create a swing at the discretion of the parent.
Many mothers are interested in the question: which crib is better - with a longitudinal or transverse pendulum?
Let us dwell separately on this point.
What are the advantages of a crib with a longitudinal pendulum?
It is natural for a newborn to rock back and forth (longitudinally), this is how his mother rocks him in her arms, this is how he rocks in a stroller. According to mothers' reviews, babies fall asleep faster in a crib with a longitudinal pendulum. In addition, rocking such a crib is easier for mom than a cradle with a transverse pendulum.
However, it is worth considering that a crib model with a longitudinal pendulum requires more space in the room, because some distance must be left to the wall.
What are the advantages of a crib with a transverse pendulum?
For many mothers, it is easier to swing the crib with a pendulum with a transverse mechanism.
Another plus is that the baby, tossing and turning in his sleep, can rock himself to sleep, because the crib will sway from his “fussing.”
The crib does not require any additional distance to the wall.
Doctors agree that the baby’s vestibular apparatus has not yet developed and therefore longitudinal swinging will be better for the baby, although we are all accustomed to considering right-left swinging to be better.
Also, pendulum beds can be divided according to the swing method into:
Manual. Make movements when pushing with your hand, allowing you to continue your swing for up to 10 minutes.
Automatic. To start the oscillations, an electric motor is used in the drive unit. Consumes electricity, but can be controlled remotely using a remote control. There are models that respond to the crying of a child. After a reaction to the voice, a pendulum mechanism is started, which does not stop moving for 10-15 minutes.
By the way, you can buy a pendulum for a crib separately and, with the proper skill, make a pendulum crib for a regular cradle yourself.
Where to begin
It is recommended to begin assembly by preparing the place where the work will be directly carried out. The space where you plan to assemble the crib should be covered with a large piece of light-colored fabric or replaced with plain paper. This will prevent damage and scratches that may occur on structural elements. Also, if any bed screw gets lost, you can easily find it on a light-colored canvas.
Next, it is recommended to lay out in front of you all the parts of the crib with a pendulum, the necessary tools, so that everything is located nearby. Place the diagram from the kit next to it.
Beautiful pendulum crib made of solid wood
Pendulum crib with chest of drawers made of solid wood
Pendulum crib with chest of drawers
Tell me, are all beds with a pendulum fixed so they don’t swing?
Girls, tell me, are all beds with a pendulum fixed so they don’t swing? Or are there some that don’t have a lock?
18 comments on “Tell me, are all beds with a pendulum fixed so they don’t swing”
Yes they should be recorded. We just remove it
Ekaterina, how is this? Can I have a photo?)
Dasha, this is what we have. They just removed the pendulum and that's it. It’s also possible to fix it somehow, but we didn’t succeed)
There are special bolts there. Which are recorded.
Ekaterina, I have a drawer below
Available without lock
We have it fixed so that it doesn’t swing, but we have a pendulum that swings along the wall, a very convenient thing by the way, we are now a year old and the baby sometimes sticks his legs into the bars and swings like on a swing
My husband and I looked all over, as it was fixed, we couldn’t find it ((
Elena, this is what we have
Olesya, we have something like this
It seems to me that you don’t have one... my daughter is sleeping, I can’t see how it works yet... try to see the reviews about the crib, they may say whether it’s there or not
Dasha, I have this one
Julia, do you have holes on the side in this place? If you pull out the bottom drawer from the chest of drawers
Olesya, It seems not, but do you have the same one?
Julia, well, almost. I have a pendulum fixed in that place with bolts
Olesya, I’ll come home from work and have a look)) Thanks for the information
Julia, no need. I can send you a photo in the evening, I’m just not at home right now and I can’t find it on the Internet
Olesya, I will be very glad) It’s just that when I bought the bed they didn’t give me any bolts (
Source
Assembly process: step-by-step instructions
You can assemble a crib with a pendulum-shaped mechanism using the following instructions.
- The fixed rear part is screwed to the side elements of the crib using screws. It is enough to take 4 screws, placing 2 on each side. It is important at the time of connection not to confuse the upper and lower parts at the back wall of the bed. In the case of side panels, it is simpler; there are legs on them, which allow you to accurately determine what should be at the top and what at the bottom.
Pendulum crib with chest of drawers - After the frame has been formed, you should proceed to installing the sleeping area of the baby's crib. It can be in the form of a solid element or look like transverse boards that are held in place with a cord. It is not recommended to secure the baby's crib bed too tightly. To begin with, it will be enough to “tighten” the structure with the required number of screws.
Baby crib pendulum made of solid wood - The side parts have special guide grooves. The front wall of the bed should be secured to them. After this, you can begin to secure the screws more firmly in the bed of the crib.
White crib pendulum - Turning the entire structure over, you can completely notice the presence of metal grooves into which the wheels are inserted. If you want to roll the bed, you should install them. If you plan to rock the structure with the child on the side elements in the shape of arcs, then the crib does not require wheels.
Baby crib pendulum - Before installing the pendulum, attach the linen rack (if available). After this, you can proceed to securing the front side part.
Solid wood pendulum crib - To place the bed on the pendulum, you need to attach the plates to the side parts of the structure.
White crib pendulum - Then the bearing systems are installed. Upon completion, clamps are placed on the crib to avoid injury to the child.
Beige pendulum crib made of solid wood
Assembling a bed with a similar mechanism is quite simple. To prevent the screws from sticking out and spoiling the appearance, they can be hidden behind special plugs.
Procedure and necessary tools for making a crib yourself
Bed headboard size chart.
Before you begin making a crib, you need to evaluate your existing toolset. And if something is missing, it is better to take care of purchasing them in advance.
- Hammer.
- Roulette.
- Level.
- Jigsaw, the best option would be the electric one.
- Sander.
- Rasp.
- Woodworking tools.
- Any version of a milling machine and a set of cutters for it.
- Electric drill and drill bit set.
- Weight - will be needed to fasten the parts of the crib.
That's all for construction tools, but there is a separate list for materials. It includes:
- Edged board (40 mm). It is better if it is a coniferous tree.
- Beam (50x30 mm).
- Oak or beech slats (20x20).
- Glue, preferably epoxy.
- Self-tapping screws.
- High quality varnish for covering furniture and stain.
- Plugs.
- Corners for furniture.
- Plywood (3-4 mm).
- Nails.
If you have already purchased all this, then you can start making a crib with your own hands.
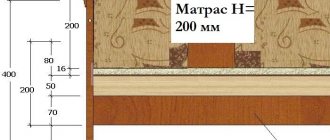
To determine the size of your future crib, you need to focus on the mattress.
Tools for making a baby crib.
The standard size of a mattress for a crib is 1200x600 mm.
This means that the sides of the crib will be located at a height of 900 mm from the floor. The back of the crib will be slightly higher – 1100 mm. So that the child, when he grows up, can climb into bed independently, the height of the sleeping place should not exceed 340 mm. And one more important point: the vertical slats of the end and side walls of the crib must have a gap of more than 120 mm. Only in this case will the child be safe, since he will not be able to put his head between the slats.
The process of making a children's bed begins with the manufacture of strapping parts for the transverse side and end walls. The boards are processed using hand tools or on a woodworking machine. Their width should correspond to 7 cm and thickness 3.5 cm.
- the frame for the mattress will be made of bars. For a standard size, you will need 6 cross bars;
- it is necessary to glue the frame parts using a clamp, and it is very important to ensure its squareness;
- Then you can start making the backrest for the crib. Its size is calculated using the following formula: to 60 cm, add the value of the double thickness of the side parts and plus another 2 cm. Everything is quite simple. Next, the back frame is assembled onto a 3.5 cm spike;
- to calculate the length of the transverse parts of the backrest, it is necessary to subtract the width of the bed leg multiplied by 2 from the width of the backrest, and then add double the size of the tenon;
- to make slats for the crib, use slats. As noted above, it is very good if they are made from wood such as oak or beech. Next, the planks need to be connected to the transverse parts using a blind single tenon;
- After the headboard frame is assembled (without using glue), you need to measure the length of the slats. To the length that we got, we need to add 2 more values for the length of the spikes.
Please pay attention to the requirement for the quality of the crib, such as the absence of sharp parts, corners and burrs. Grind the rods very carefully, and all corners must be rounded using a special cutter. All these steps must be completed before you begin assembling the bed parts.
