Some people simply love to make furniture, various “conveniences,” and innovations for their home with their own hands. This is the only way to turn all your ideas into reality and make really high-quality furniture with your own hands. Wardrobes are no exception.
Thus, a cabinet made from furniture panels is not just an economical, but also an environmentally friendly solution that has many advantages over standard options. Let's figure out how to assemble a cabinet from furniture panels with your own hands, and what you need for this.
Advantages of a hand-assembled cabinet
A homemade “thing keeper” has the following positive aspects:
- you don't need to spend a lot of money on materials;
- you can create exactly the furniture you dreamed of;
- such a cabinet may have a non-standard shape and design features;
- only a cabinet assembled by yourself can fit perfectly into any interior;
- For this furniture, you can choose the necessary fittings yourself and organize as many shelves as you need.
Now let’s take a step-by-step look at the main question in detail - “How to make a cabinet from furniture panels?”
Features of door installation
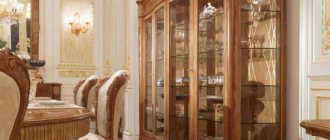
The method of installing doors depends on their material and design. Before making a cabinet, you need to think about the structure and appearance of the facade. This is the only constantly visible element that determines the appearance of all furniture. Some craftsmen use a combined method - the internal filling is made of chipboard, and the doors are made of natural wood. For installation on the cabinet, 2 door designs are used:
- Swing. They move around a vertical axis and are attached to 2-3 hinges. You can use standard furniture fittings or use more traditional varieties. The choice depends on the style and appearance of the item.
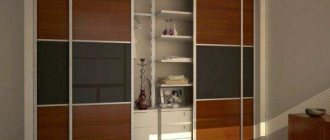
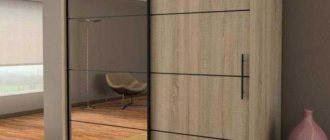
- Sliding (compartment doors). They move along rails in the frontal plane of the cabinet. For this purpose, special guides are used, and rollers are attached to the top and bottom of the back side.
How to make a doll closet yourself, tips for beginners
Swing
Sliding
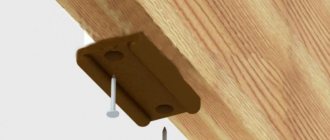
To install sliding doors, first install the upper guides using self-tapping screws and a drill, then install the lower ones. After this, the doors are secured; it is advisable to do this together, as it will be difficult for one person to handle it. To prevent the door leaf from sliding, install a lock and make adjustments.
Installing the Top Rails
Installing the Bottom Rails
Installation and adjustment of sashes
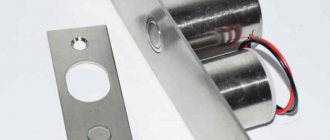
When installing swing doors, adhere to the following sequence of actions:
- attach the hinge to the sash;
- place the door against the cabinet body, make marks in the place where the strike plate will be installed;
- drill holes;
- install the counter plate with screws;
- connect both parts of the hinges, adjust the correct position of the door.
Both options have their advantages and disadvantages. Hinged doors allow you to better view the contents of the cabinet. At the same time, they require space for movement and cannot be too heavy. Sliding doors can support massive mirrors, but provide fewer opportunities to find the things you need in the closet. Choosing the best option is the prerogative of the owner.
Apply marks
Drill holes
Install the strike plate with screws
Connect both parts of the hinges, adjusting the correct position of the door
Stage 1: preparation of materials
Shields
The most important stage of assembling a cabinet with your own hands from furniture panels. What is a “furniture panel?” This is a material based on natural wood, which is pressed. As a result, all the bars are glued together almost perfectly.
You can purchase furniture panels in a wide variety of variations. They differ in size, thickness, wood type, etc. The most popular and practical are pine, spruce, birch or oak panels. They are easy to process, strong, and durable.
Advantages of furniture panels when creating a homemade cabinet:
- The materials contain absolutely no impurities that could pose a danger to human health.
- Furniture panels are easy to work with, which allows you to create a very bright, non-standard design.
- The price of the shields is extremely low, along with durability and naturalness.
- From such material you can really create an attractive and unique piece of furniture.
To implement the planned cabinet project, it is necessary to prepare the following consumables:
- furniture board. It is better to take options with a thickness of 20 mm, since it can be used not only to create a base, but also as a body;
- plywood. Various shelves and internal partitions are made from it. The optimal material thickness is 12 mm. The remaining sheets of plywood should be 6 mm. thickness. They will be used to form boxes (if there are any in the plan);
- furniture rod and accessory holders. They will allow you to distribute the space in the furniture as freely as possible. Clothes will be hung on them, any accessories will be attached, etc.;
- accessories. This includes all kinds of hinges, handles, guides, and other parts for convenient operation of the cabinet.
To make the lid and bottom, you can also use furniture panels. If necessary, cutouts for lighting are pre-designed in them.
Now let's move on to the tools that we will need to create a cabinet from a furniture panel with our own hands.
Required materials and tools
To make furniture with your own hands, different materials can be used:
- Natural wood. This is a traditional option for a classic interior. DIY wooden cabinets have many advantages. They are visually attractive, made from environmentally friendly material, and can withstand significant loads. The difficulty with this option is the need to coat the cabinet with varnish or paint, which is not easy to do in an apartment.
- Chipboard. The most common material. It is characterized by low cost and durability, allowing you to obtain different types of construction. Almost all furniture fittings are made for it, so a do-it-yourself cabinet made from chipboard is the simplest and most attractive option.
- Plywood. A high-quality material with top layers of birch, beech or valuable species (walnut, oak, ash) is required. The result is very durable, strong furniture. Do-it-yourself plywood cabinets are made using the same technology as assembling furniture from chipboard. The only problem is the finishing - it’s difficult to paint or varnish an apartment. In addition, getting high-quality plywood from good veneer is quite problematic.
- MDF. This is a modern modification of fiberboard. It is believed that MDF is able to easily absorb and release moisture without losing its performance qualities. In practice, this is very far from the truth. The main advantage of the material can be considered resistance to loads, it crumbles less and shows high mechanical qualities.
The most popular option is chipboard. In addition, you can purchase laminated chipboard (LDSP), which does not require finishing. The craftsman himself will only need to cut the material, cover the ends with an edge and connect them in the required order. This ease of assembly combined with factory quality has made laminated chipboard furniture very popular.
Natural wood
Chipboard
laminated chipboard
Plywood
MDF
The following tools will be required:
- circular saw or jigsaw;
- electric drill with a set of drills;
- ruler, square, tape measure;
- pencil;
- screwdriver with a set of bits, screwdriver;
- set of accessories: ties, hinges, handles, supports, hooks and rods.
Often those who like to work with natural raw materials use various lumber. Assembling a cabinet from boards will require surface treatment - you need to plan and sand them, and for this you will need special equipment.
Many people use ready-made cladding as a raw material for wooden products. For example, this way you can make a cabinet out of clapboard with your own hands. The material is pre-processed and allows you to obtain an original filling of the planes. The disadvantage is the large volumes of sanding and finishing, which create a lot of dust and a strong smell of paints and varnishes. Other options can be used that will suit the master’s taste. It is necessary to take into account that making furniture from scrap materials will require a lot of effort during processing.
Types of furniture staplers, their features and scope of application
Circular Saw
Jigsaw
Electric drill with a set of drills
Measuring tools
Screwdriver
Furniture fittings
Stage 2: choosing a tool
Having special tools makes the job much easier
When you decide to assemble a cabinet, you need to be equally attentive to the selection of tools. So, first of all, we need:
- varnish for wood coating;
- wood screws for securing various elements;
- screwdriver with various bits;
- drill with drills;
- chisel, tape measure, pencil, and hacksaw;
- grinder for processing materials.
These tools are easy to use, and in most cases they can be found in the drawer of every home handyman - a man who does housework.
Let's move on.
Stage 3: finding or preparing a drawing
To assemble a cabinet (and indeed any structure made of wood), we need to find drawings on the website or develop them ourselves. But first you need to understand the main features of the furniture, that is:
- height, width and depth;
- number of doors, drawers, compartments, etc.;
- the height of the mezzanine, if provided;
- filling the closet. Here it is important to take into account exactly how many shelves, partitions, rods, holders, etc. there will be inside the structure.
As soon as you understand this point, you can start sketching a sketch of the interior element - that is, creating its drawing. The easiest way to do this is on paper (if you have experience), or seek help from special programs that are freely available.
1
2
The second option has a lot of advantages, since all you have to do is enter the required numbers, then correct and print the resulting drawings. It is on them that we will rely when assembling the cabinet.
Why is drawing so important? Here are just a few arguments in its favor:
- All elements are as detailed as possible.
- You will clearly see how much material is required.
- There will be an understanding of how thick it is worth buying furniture panels.
- You will see a simple cutting of all materials.
Often new cabinets are made to “replace” old designs. If this is your case, implement a similar cabinet by taking measurements of the old one. As soon as the diagram is ready, study it again, and as carefully as possible, and then think about what you can add/remove.
Let's look at examples of drawings of cabinets made from furniture panels, and move on to furniture assembly technology.
1
2
These photo drawings are approximate. That is, if you, for example, decide to assemble a wardrobe or a chic wardrobe, then you should go either to our website or to professionals for drawings.
Installation
Installation of a kitchen from furniture panels in stages. First, assemble the lower cabinets. All elements of the cabinets are pre-cut to size and processed. The bottom, back wall, sides, doors and parts for drawer cabinets are sanded.
The elements are connected using dowels or confirmations. To avoid mistakes, holes are cut out at the ends. The process is quite complex; accurate calculations and measurements are important. Then dowels are inserted into the prepared holes, and the parts are connected.
The back walls can be made of plywood or fiberboard. They are attached to the finished box with staples or small nails. When the cabinets are completely ready, you need to check the accuracy of installation. Next, install the fittings - hinges and runners for pull-out shelves and drawers. This task is performed using self-tapping screws and a screwdriver.
When installing a countertop from a panel, you need to double-check that the parameters of the slots for the sink, hob and other built-in appliances are correct. When placing hanging cabinets at the preparatory stage, you need to make markings for future fasteners and drill holes for anchor bolts. During the installation of facades and built-in appliances, doors and shelves are mounted on fasteners.
Prepare facades
Install the countertop
Assemble first the lower, then the upper cabinets step by step
Finished kitchen
Technology for assembling a cabinet from furniture panels
The stages described above are preparatory. After this, you can begin directly assembling the cabinet. To assemble the structure as quickly and easily as possible, follow the simple instructions. Let's get started!
Assembly
When assembling a closet for the first time, it is better to start by creating a simple structure - a double-leaf piece of furniture that does not have a large number of internal elements.
Jigsaw
To create such a “home friend” you will still have to cut out some elements. To do this, it is best to take a jigsaw, which allows you to make perfectly even cuts.
What can be cut with a jigsaw:
- A pair of side-mounted walls.
- Bottom (it’s important to remember here - when the closet is intended to store a large number of things, the bottom material must be durable).
- Cover. It “Must” be light, and a little larger in width than the base of the cabinet, which will add attractiveness to the interior element.
- A plinth covering the free space between the bottom and floor of a building.
- A couple of doors.
- The back wall (made from both furniture boards and plywood).
- Shelves. Their number is determined at the design stage.
It is best to make grooves for the baseboards at the bottom of the sidewalls. They can be made either round or rectangular, depending on the type of room. This will allow the cabinet to be pushed as close to the wall as possible.
Shields must be varnished
Before starting assembly, it is better to varnish each piece of furniture. Optimally - in two layers, so that the coating is as beautiful and durable as possible. As soon as the first layer is applied, all elements need to be sanded, and it is better to apply the second layer after all the elements have been installed.
The assembly itself is a painstaking process, and it is implemented in the following sequence:
- The holes for fittings and fasteners are marked.
- Holes are made in pre-marked places.
- It is important to remember that all hinges at the top and bottom must be fixed at a distance of 100 mm. If the doors are heavy, you need at least three hinges.
- The side walls and bottom are fixed with self-tapping screws.
- The base is fixed.
- The cover is mounted (using a building level).
- The back wall is fixed (furniture nails are used).
- Doors are installed in pre-made hinge bowls, the hinges are fixed with self-tapping screws.
- The handles are attached to the screws.
- The doors are hung and adjusted using a specific tool, depending on the type of fittings.
Assembling the cabinet is a fairly simple procedure that you can do yourself. The main thing here is to carefully carry out a clear sequence of actions and constantly check the work.
If everything is done correctly, you can move on to filling the cabinet.
Entrails
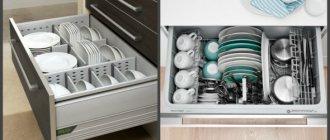
The placement of the shelves is a very important decision.
It doesn’t matter what exactly you want to make: a do-it-yourself wardrobe or an ordinary chest of drawers. In any case, such a design should have drawers, compartments and rods for maximum ease of use of the furniture.
Boxes must be implemented in the following sequence:
- Markings are applied to the plywood sheet.
- All necessary holes are drilled. (Important! There is no need to make slits at a distance of less than 100 mm.).
- The drawer fronts are made from an attractive material.
- All elements are firmly connected to each other.
- Special guides with “closers” are mounted on the drawers for more comfortable use of the furniture.
In addition to drawers, each furniture closet should have a clothes rail on which jackets, jackets, dresses, etc. can be hung. It is fixed using special elements to match the diameter of the rod pipe.
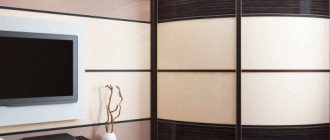
Facade
The cabinet facade should please the eye
Once assembled, the cabinet should not only be durable, but also beautiful. Moreover, it must fit perfectly into all the design solutions of the room. To implement this idea, you can use several methods.
First, all elements must be varnished so that the coating is as protected and durable as possible and does not lose its attractive appearance. Then, the following technologies are used to decorate the facade:
- painting in various colors using special paints;
- carving creation;
- gluing films;
- artistic painting;
- installation of special fittings.