It's better to reupholster an old sofa yourself than to buy the same new one
With old furniture, something is always wrong: the upholstery on the sofa wears out or the springs burst; in general, it needs to be updated, that is, re-upholstered.
You can order this service, specialists will come to you and do everything right, but it will cost about the same as buying a new sofa in a store.
Almost every one of our compatriots could easily cope with this task themselves if they knew how to reupholster upholstered furniture without outside help. This is not an easy task, but it is quite feasible even for someone who has never done anything like this before.
In order to successfully repair your sofa or chair, you need to stock up on the necessary materials and tools. The weakest point of all old sofas are the metal springs, which are constantly exposed to the weight of the bodies of people sitting on it.
How reupholstering upholstered furniture saves you time and money
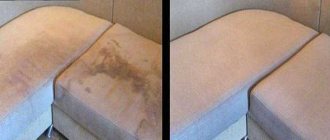
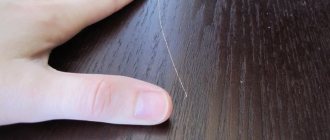
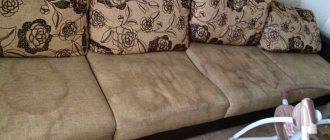
It often happens that after a certain time, your favorite chair or sofa loses its original appearance and some damage appears. This may include wear and tear of the upholstery during operation and mechanical damage to structural elements. In any case, the right decision would be to repair and reupholster the upholstered furniture. This procedure will breathe new life into your chair or sofa and allow it to delight you for many years to come.
What are the advantages of reupholstering upholstered furniture:
- Saving money on buying new furniture;
- Saving time on selecting replacements for worn-out furniture;
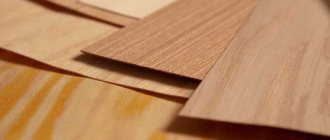
- Large range of upholstery materials;
- The ability to choose from a variety of color schemes for upholstery materials, thereby creating your own design.
Materials needed to repair a sofa
The springs become deformed and even break, piercing the foam rubber and fabric covering of the sofa. As a result, its owner has only two options: take it to a landfill or repair it. To repair a sofa you will need the following materials:
- spring block;
- foam;
- textile;
- threads;
- paper for patterns;
- a piece of chalk;
- paper clips and bolts, nuts and washers.
Sometimes you have to replace individual wooden parts of the frame, so it’s a good idea to stock up on them as well. As for replacing broken springs, it is really advisable to replace them as a whole unit at once, since replacing the entire spring unit is much easier.
No one can guarantee that after replacing several springs of the old unit, others will not break after a while, because they are also quite worn out.
Repairing spring upholstered furniture: the best way
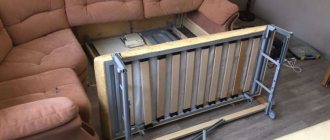
This method of repairing a spring sofa or chair is considered the most reliable of all existing ones, although it is time-consuming. Let's look at its implementation step by step:
- Make sure you remove all trim, staples, and nails from the frame. In this case, the furniture body was already completely ready for installing the seat (cleaned, sanded, washed, painted). The springs were removed and set aside for later use. Before this, the master took several photos so as not to forget how they were located.
- Install straps (slings) to secure the springs on the lower part of the seat. The more strips you install, the stronger the seat will be. Secure them with a stapler, leaving a couple of centimeters of material on each edge. The tension should be moderate so that the sling bends slightly when pressing on it.
- The extra centimeters on each edge should be folded and also attached to the frame with a stapler. Repeat these steps until you have installed all the vertical lines, then move on to the horizontal ones. Don't forget that they should intertwine with the vertical ones, and not just go under them.
- Reinforce the strength of each strap with three small upholstery nails. This is what this whole process of upholstered furniture repair looks like in the photo:
5. Now you can proceed directly to installing the springs. You can use an old photo or just distribute them evenly on the sling support. The end of each spring should "face" in the same direction as all the others.
6. The springs are attached to the straps either using a special tool or with a thick strand of twine and a special button. Each spring must be secured at three points.
7. Drive 2 nails into the end of each vertical and horizontal row of springs.
8. Measure the length of the twine, which will be 2 times the length of the seat plus 40-50 cm. Fold the piece in half and create a loop around the nails, as shown in the photo below. After this, pulling the twine taut, hammer in the nails with the loop to the very end.
9. Now our goal is to intertwine the springs together to form the seat and connect all the springs into a single unit. Start and finish tying knots at each end on the second “ring” from the top, then immediately move on to the top rings. This will allow you to get a dome-shaped seat.
10. Once you have tied all the springs together, wrap the twine around the nail and hammer it in until it stops. Secure the free end of the thread with a stapler.
11. For the second thread from each secured loop, repeat steps 9 and 10, but it should be tied exclusively on the upper rings, without “falling” to the second level from above.
12. Knit all the vertical rows like this, then the horizontal ones, and to be sure, you can also go diagonally. As a result, none of your springs will be able to move separately from the rest. Follow the step-by-step photos to secure the springs in the seat of upholstered furniture:
Finally, all that remains is to reupholster the finished seat. In this case, the craftsman simply sewed on the fabric (which could also be done using a stapler), and masked the seams with ribbon.
Tools needed for reupholstering furniture
Regardless of whether you are going to reupholster the sofa yourself or plan to invite specialists involved in reupholstering upholstered furniture at home, it is better to stock up on all the necessary materials in advance.
If you plan to entrust the work to invited specialists, then they should have all the necessary tools with them.
If you are determined to do this yourself, then you need to acquire the following tools: a pair of screwdrivers (flat and Phillips); set of wrenches; roulette; stapler (preferably pneumatic); tailor's scissors.
If someone in your family knows how to sew, then a sewing machine would be useful. Having prepared everything you need, you can begin the process of restoring upholstered furniture, that is, your sofa.
Materials and tools used
Despite the general complexity of the processes, to remake old furniture with your own hands, as a rule, you do not need to purchase complex, expensive equipment. Moreover, these works are carried out with a minimum set of tools. The exact configuration depends on the type of operation being performed.
| Type of work, restoration equipment | Standard set of tools | Materials used |
| Removing old paint and varnish materials, sanding surfaces | Construction hair dryer (an alternative for small processing areas - iron + foil), scrapers and spatulas, grinder or drill with special attachments, sandpaper | Solvents for removing paintwork using chemical methods, rags |
| Renewal of paintwork | Paint brushes (flat brushes, radiator brushes, round brushes, fluff tip varnish brushes), regular or embossed rollers, clean trays and containers | Primers, paints, varnishes, tape, films for covering surfaces, water or solvents |
| Upholstery of upholstered furniture, decoration with fabric | Furniture stapler with staples, tailor's scissors, chalk or soap for marking textiles, pliers for removing old fasteners | Foam rubber, furniture textiles |
| Restoring or strengthening old structures | Screwdrivers, knives, chisels, wood saw, screwdriver, grinders | Wood putties, restorative varnishes, beams, furniture panels, wood tile materials, new fasteners, fittings |
| Pasting with film | Sandpaper, other abrasive tools for cleaning and polishing the surface, a hair dryer or iron, a soft wallpaper spatula for removing air | Ammonia (or other degreaser), soft rags, self-adhesive film, trim tape |
| Decoupage | Small scissors, synthetic brushes for applying decoupage glue, background or varnish, palette knife (a budget alternative is a small rubber spatula), foam sponges, trays, palette | Motif (paper decoupage card, rice paper, patterned napkins), primers, acrylic-based varnishes and paints, adhesive varnish |
| Artificial aging of furniture surfaces | Brushes, abrasives, rags | Waxes, glazes, glazes (glezal), stains, bitumen, acrylic or wax patina, shellac varnishes, craquelure compositions, etchings |
Regardless of the operation being performed, furniture remodeling is carried out, if possible, in a ventilated but covered area. If there is no workshop, the work site is prepared in advance, the floors and interior items are covered with film or thick fabric.
Dismantling the sofa
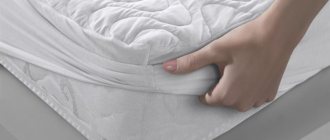
First of all, the sofa needs to be disassembled, that is, the upholstery must be removed. Unfortunately, this process is accompanied by the appearance of a large amount of dirt. First, the paper clips that secure the upholstery to the frame are removed.
After removing the fabric covering from the sofa, you will need to remove the old foam and spring block. Usually, after a few years of use, a foam rubber gasket begins to lose its properties and simply falls apart, thus forming a whole heap of garbage.
Remodeling methods
A variety of techniques allow you to update furniture with your own hands, but the basic algorithm of actions remains unchanged. In any case, the structures are carefully inspected, strengthened and cleaned of dirt. The preliminary stage is completed by preparing the workplace, tools and materials.
Design features of furniture gas lifts, nuances of selection and installation
Painting
This method is considered universal, since the “correct” paints help to remake any cabinet furniture, including a Soviet wall or outdoor (garden) sets. There is only one general condition: the surfaces to be painted must be as smooth, clean and dry as possible. To simplify the work, the painting process is divided into several stages:
- Disassembling furniture into individual parts, removing fasteners, fittings, and sliding parts.
- Protect fragile, non-paintable surfaces with film using tape.
- Removing dirt, old coatings, grease stains.
- Cleaning surfaces with abrasive materials.
- Covering cracks or chips (if any) with wax or wood putty.
- Priming, dust removal, drying of parts.
- Consistent painting of hard-to-reach areas and all other furniture surfaces.
- Varnishing (if necessary).
- Removing the film, reassembling.
To renew furniture coatings, it is recommended to use environmentally friendly paints and varnishes with a corresponding mark on the label. Acrylic, chalk or thixotropic paints that form a minimum of drips are best suited for these purposes. The terms and conditions for their drying are specified in advance.
Furniture disassembly
Removing dirt, old coatings, grease stains
Surface cleaning
Closing cracks or chips
Priming, dust removal, drying of parts Painting Varnishing
Reassembly
Pasting with film
This remodeling technique is valued for its high speed of work, the ability to simultaneously improve the moisture resistance and decorative properties of furniture coverings, its low cost and the absence of dirty processes. Suitable for all types of furniture, except upholstered ones. The step-by-step instructions largely coincide with painting: the product must be washed, degreased, and dried. Film blanks are cut out in advance, after careful measurements of the structures.
Installation is carried out from a corner or edge, with gradual removal of the protective film (in the absence of experience - 5 cm). To level the coating, use a wallpaper spatula, cut off the excess with a stationery knife, and correct any defects immediately. After gluing the ends with a hair dryer or iron, the furniture can be put into operation immediately.
Types of furniture cleaning, rules and nuances of using each of them
Artificial aging
This technique allows you to radically change the style of furniture at home and at relatively low cost. Work begins as standard with surface cleaning, degreasing and drying. The further procedure depends on the specifics of the chosen method.
| Name of equipment | The essence of the method, the materials used |
| Dry brush | Apply a little contrasting paint to a flat brush with synthetic bristles, and wipe off the excess with paper. The surface is painted with an almost dry brush, without pressure or rubbing of paint. |
| Patination | A paint composition (bitumen or shellac varnishes, highly diluted acrylic paints, oxidizing agents, colored waxes, stain) is applied or poured onto furniture coverings; the excess is wiped off with a clean, lint-free cloth. |
| Glaze | Surfaces are painted with translucent compounds; individual layers can be multi-colored |
| Artistic spray | A hard, wide brush is moistened with water, lightly picks up paint and shakes over the product. If desired, the process is repeated with brushes of different formats (up to a toothbrush). After drying, the surface is opened with transparent varnish |
| Craquelure | One- or two-layer coating of furniture with self-cracking varnishes |
| Creating decorative abrasions | Corners, joints and similar problematic abraded areas are successively covered with bright, saturated paint, paraffin, and the entire surface is covered with 2 layers of light paint. After drying, the top layer is removed with sandpaper along with paraffin. |
| Etching | The technique is used when working with natural wood to emphasize its texture. There are 2 options: applying etching compounds with swabs or soaking parts in a container with a solution |
| Brushing | Old furniture is cleaned with metal brushes or hot sand. The treated surface is glazed, varnished or painted with a dry brush. |
Artificial aging is perfect for furniture made of natural wood, chipboard, MDF.
The above list is far from complete; if desired, methods of artificially aging the surface can be combined to obtain unique patterns and coatings. The technique is considered simple, but to understand the essence of the processes, it is worth studying a master class on remaking furniture or checking the procedure with paint and varnish sellers. To save money, test strokes are made on other surfaces.
Dry Brush Patination
Glaze
Artistic spray
Craquelure
Creating decorative abrasions
Etching
Brushing
Upholstery of upholstered furniture
The essence of this method is to update the textile coverings (and in some cases, the internal filling) of upholstered furniture for any purpose. The technology is considered costly, complex, but pays off. With proper selection and installation, new upholstery will last for decades. The standard algorithm includes the following steps:
- Assessment of the condition of upholstered furniture, selection and calculation of materials.
- Dismantling, strengthening structures, removing old upholstery. At this stage, the internal wooden elements should be well soaked with antiseptics.
- Textile cutting, fitting, preliminary and final fixation with staples with fine steps. Properly fastened fabric will not form wrinkles, distortion of the pattern or sagging.
- Reassembly.
What and how to paint furniture, stages of work and useful recommendations
If it is necessary to update foam rubber, springs or supports of upholstered furniture, the scheme becomes more complicated. In such cases, a layer of new foam rubber is attached to the frame first, and only then the fabric. There are no problems with choosing the latter; the range of modern furniture textiles is represented by materials for every taste and budget.
Selection and calculation of materials
Dismantling, strengthening structures, removing old upholstery. Cutting textiles, fitting
Fixing the fabric with staples Reassembly
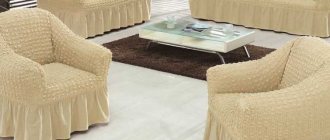
Case
It is better to order cutting and sewing of new sofa covers to specialists, because every, even the smallest mistake will be clearly visible and you should not take on work that is beyond your capabilities.
The only thing you should take care of is the material for the case; it should be strong enough and durable. The size of the material should be sufficient to cover the entire sofa.
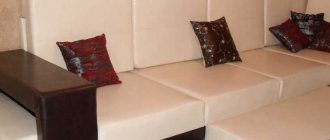
As a result, you will receive a high-quality sofa cover and be proud to post a photo of your upholstered furniture on the Internet after reupholstery.
Photo of reupholstering upholstered furniture with your own hands
0
Did you like the article?
0