Published June 17, 2021
Restoring interior items is a way to show your artistic talent and at the same time solve practical problems: save on buying a new element of home furnishings, give the interior of the room a “zest”. Don’t rush to get rid of “outdated” things: they often turn out to be high-quality products made of natural wood and forged metal, which, with the right approach, will decorate the room and last for many years. Use our tips on how to update an old table to create a kitchen set with your own hands that will be of higher quality, aesthetically pleasing and original than modern mass-market products.
Method 1. Painting
Painting a solid wood, MDF or chipboard kitchen table is the easiest way to breathe new life into it. The first step in restoration is choosing paint. The following options are available on the market:
- Oil-based ones give a glossy shine and are inexpensive. The downside of such paints is an unpleasant odor, long drying time (up to 2 days), inability to allow air to pass through and fading under the sun.
- Acrylic ones are environmentally friendly, do not emit an unpleasant odor, dry quickly, do not fade in the sun, and have excellent vapor permeability. Their only disadvantage is their high cost.
- Alkyd provides a water-repellent effect and does not fade. Their disadvantage is that they are not resistant to abrasion, so such options are rarely used for dining tables.
Enamel is often used instead of paint when restoring countertops. This is a varnish-based suspension that, after drying, forms a thin layer of varying texture. The advantages of the coating are aesthetics and durability, minus the high price.
How to update an old table with your own hands using paint or enamel? First you need to prepare the surface. You can remove the old layer of finish using a paint remover. The next step is to clean the wood from dust, sand it with sandpaper, soak it with an antiseptic and treat it with a primer. The final stage is applying the finishing coat.
The tabletop can be painted entirely in one color, or you can show your design ingenuity and, by cutting out stencils from paper or cardboard, apply lines, diamonds or other shapes on it in a color contrasting with the main background.
Stages of work execution
The result of table restoration depends on the thoroughness of execution and adherence to the sequence of actions. Only under this condition will it be possible to restore damaged furniture.
The work consists of the following steps:
- selection of tools and materials;
- inspection and initial repairs;
- cleaning surfaces from old coating, restoring wood;
- roughing;
- finishing, decoration.
If the table is badly damaged, the work plan will expand. Additional operations will be required. Their type is determined separately in each specific case.
Preparation
The initial stage of table restoration is an analysis of its condition. The inspection should begin with the structure: check the condition of the fastenings, stability, and whether there are any height differences. If necessary, the product is disassembled, marking the places of fastening with the base with a pencil, and circling small defects with a marker.
After the inspection, work to restore the integrity of the table parts: sealing holes, gluing dried elements. If the legs or tabletop cannot be repaired, they are replaced. Moving parts and mechanisms are cleaned of rust, lubricated with oil, if there are any breakdowns, they are repaired or new ones are installed. Poorly fastened parts are fixed with glue, liquid nails or screws.
If the table is varnished or painted, then the next step is to remove the old coating. You can clean it manually with a spatula, sandpaper, sanding machine, or wash it off with a solvent. When restoring a wooden table, mechanical removal must be carried out along the grain so as not to spoil the natural pattern.
Step-by-step creation of a wooden table with your own hands, useful tips
Inspect the table
Disassemble the product
Mark the places of fastenings with the underframe
Repair broken parts
Remove old coating
Glue all the parts
Primer and sanding
After eliminating structural defects and removing the old coating, it is necessary to remove dust from the surface. Then treat with an antiseptic and leave to dry for a day. This operation is necessary for products made from different materials: not only wood, but also MDF, chipboard.
The next stage is priming. The product is applied to the countertop and frame parts. The step-by-step process looks like this:
- Apply a small amount of product to a separate area, spread with a spatula as evenly as possible. Continue to the next section. It is recommended to carry out the work in small fragments to achieve a smooth surface. When priming, differences should not be allowed at the boundaries of areas.
- After the first layer has dried (1–6 hours), repeat priming. Subsequent operations are carried out with intermediate drying.
- Sanding primed surfaces by hand or with a sanding machine. The surface should be perfectly flat.
After this, putty is applied. The dried layer is sanded until smooth. The operation must be carried out as carefully as possible, since the quality of the rough finish determines how smoothly the paint or varnish will lie.
The furniture primer should match the tone of the paint you choose. If you plan to make a dark-colored wooden table, you should not use a light product and vice versa. Otherwise, it will be difficult to achieve uniform coloring.
Apply product
Sand the surfaces
Apply putty and sand until smooth.
Final coating
The choice of finishing depends on the design decision. The table can be glossy or matte, painted, slightly tinted or exposed varnish. The last technique is recommended for furniture made of wood with a spectacular grain pattern.
Painting is done with a brush, roller or spray in several stages, each time waiting for the previous layer to dry. If decoration is to be done with painting or other techniques that require a prepared surface, the operation is performed last. For example, they decorate the kitchen table top with drawings or do decoupage and then varnish it.
Step-by-step making of a table from boards with your own hands, examples of decor
The final stage is fixing the final coating. To do this, use varnish or wax. The first product is ideal for home furniture, the second is best used to protect tables that are often exposed to the sun, wind, and precipitation.
Method 2. Artistic painting
This is an interesting way to update an old wooden table and at the same time make it the “highlight” of the interior. Figures and images are applied to the base layer of paint in accordance with the author’s idea. This design option will fit into rooms furnished in ethnic or country style and will look good in a children's room.
To make an artistic painting, you will need acrylic paints and stencils. The latter can be cut out of paper or cardboard yourself, or you can purchase ready-made versions at a book or stationery store.
Acrylic paints
If your old table sadly looks at the world with chips and cracks, standard painting with acrylic paints will do. The work is quite labor intensive.
- Old varnish and paint must be thoroughly cleaned
- Sand the rough edges with sandpaper or a grinder
- Damage to the surface should be repaired with wooden or polyester putty.
- After the patches have dried, sand again
- If the surface is well preserved, it is enough to cover it with stain and varnish.
- If not, prime and apply acrylic paint.
Method 3. Craquelure and decoupage
Proven ways to update an old dining table are:
- Decoupage is a decoration technique based on attaching a cut-out design or ornament to an object.
- Craquelure is an artificial creation of a network of small cracks on an object, similar to those that appear in old paintings.
To decoupage the tabletop, you need to purchase paper napkins with a pattern and PVA glue. The bottom layer of paper is removed from the applications, placed in the required place, and coated with glue on top to avoid the appearance of folds and other defects. The next step is to coat the resulting composition with varnish to ensure its durability and provide the desired visual effect.
Craquelure looks especially stylish when combined with decoupage. To achieve the effect of a surface in cracks, countertops are treated with special compounds. They are one-component or two-component. The entire surface of the table is covered first, after which small cracks appear on it. The latter involve a two-stage application mechanism: first, the wood is coated with paint, then a second layer of additive is applied to those places where the aging effect needs to be achieved.
Repair of a table with a sliding mechanism
How to repair a table with sliding mechanisms? To repair tables with moving parts, other measures are needed. Damaged sliding table mechanisms can be corrected by cleaning and lubricating its sliding parts; If they are broken, bent or lost, they need to be replaced. The simplest method to repair a sagging board is to wedge it and then glue the wedge to its underside.
It's good to have a glue injector. It will help to introduce glue into all hidden places. Clamps are also an important tool. You'll need G-clamps to seal existing cracks, and girdle clamps to ensure equal pressure is maintained across all glued frame-to-leg joints. When using clamps, you need to place the thinnest pieces of soft wood or cork under their grips to avoid damage to the surface of the clamped elements. In order to close the glued sections, you need to apply the minimum required force, since excessive pressure can lead to all the applied glue being squeezed out, leaving the joint dry and weak.
If you need to secure a part with a keyed joint, you will need a keyed jig (to guide the drill) and keyed metal centers. These tools help ensure accurate placement as well as alignment of all key holes. Dowels that have special grooves, which are made stronger by adhesive bonds, are also useful.
Method 4. Mosaic
To revive an old table, you can assemble a mosaic composition on it. The material used for the work is tiled or glass mosaic, available for sale in hardware stores. For finishing, you can use fragments of tiles, for example, used to decorate a bathroom, or elements of old CDs.
To assemble the composition, remove the old layer of paint from the tabletop, then level it with sandpaper and cover it with acrylic primer. When the surface is prepared, a mosaic is made on it. The plot and composition of the future film are limited only by the author’s flight of fancy. The elements are attached with liquid nails or superglue.
For those who do not have time to create their own compositions, mosaic canvases are on sale. These are small tiles that form a pattern and are attached to fiberglass. The buyer just needs to attach it to the tabletop using tile adhesive, and then fill the gaps. This is a quick and inexpensive way to revive your kitchen table.
Replacing with laminate
A home craftsman, having the tools and skill in working with wood, can easily replace old countertops with laminated ones. You should:
- measure and cut to size;
- buy an edge strip with a layer that melts when heated;
- carefully lay it along the edge of the parts and iron it.
Each of the methods can give new life to the good old tables. A little sanding, adding some fresh paint and inspiration, and a new design item decorates the interior. Good luck to you and your creative flight!
Method 5. Film sticker
How to update an old kitchen table without wasting time and money? An excellent option is to use self-adhesive film. Construction stores offer many types of materials: imitation of natural wood or stone, various ornaments, landscapes, flowers, etc. In a wide assortment, everyone will find a product to their liking, and its sticker will take 30-40 minutes.
Applying film to the countertop consists of 3 steps:
- Cleaning the surface from dust, polishing with sandpaper, applying 2-3 layers of acrylic primer. Each subsequent one is applied after the previous one has dried.
- Apply a soap solution to the surface with a soft sponge.
- Gluing the film starting from the edge of the tabletop to the center. In order for the surface to be smooth, it must be smoothed with a spatula, “expelling” excess air and soap solution from the setting points.
The secret to success in gluing decorative film is high-quality surface treatment: it must be perfectly smooth, polished with sandpaper.
Decorative film: a budget method
This option cannot be called durable. The advantage is a huge selection of colors and minimal costs. Even a girl who has no knowledge in this area is able to cope with the task on her own.
Second life for old phones, interesting ideas and unusual uses
The first thing you need to do is decide on the color. The film should match the style and shade of the interior. Next, measurements are taken. It is better to take a little more material in case of any defects. Measurements are carried out independently or call a specialist for help. With the data obtained, you can go to the market or to a specialized store. Buy good quality material so that gluing is easy and successful. Usually the manufacturer writes instructions on the back.
Important! Make sure that there are no air bubbles left between the film and the surface. It looks unsightly, and as a result, wrinkles and cavities are formed, which shorten the service life.
There is another tip for using adhesive film. Under no circumstances should you use several pieces for the surface if you are going to cut or cook food on the table. Several elements of the film are good only as decoration. If you leave the glued parts on the surface that is in use, soon air, dirt, dust, moisture will get into the joints and edges and they will move away from the plane.
The pasting method is considered the simplest and most inexpensive. The top layer of the table does not need to be cleaned or sanded; just wash the tabletop well.
Method 6. Decorative tape
This material is sold in office supply and creative supply stores. It takes half an hour to apply it to the countertop. Scotch tape is available in different colors, so its use helps to create a bright and stylish item in the interior of the room.
To carry out restoration, you need to remove the old layer of paint, polish and degrease the surface with alcohol-containing products (for example, old cologne). It is better to start pasting from the edge of the tabletop along pre-drawn stripes. Layers of adhesive tape are applied end-to-end. Subsequently, if the owner gets tired of the decor, he can remove it with acetone and replace it with another one.
How to repair a crack
If a crack appears around the socket in the upper area of the leg, glue should be injected into the crack and into the hair hole between the tenon and the socket. It is necessary to compress the connection using two clamps. First, you should install a G-shaped clamp on the upper area of the leg in order to close the resulting crack; then place a girdle or tubular clamp, stretching it from the outer side of one leg to the outer side of the other, in order to hold the tenon in its socket. Let the glue dry overnight; then you should remove the clamps.
To level an overhanging folding board, mark the farthest point where the table leg or support slide touches the bottom side of the board; scrape off the old glue and trim and attach a small tapered wedge to the board. Cut a wedge out of a piece of hardwood, apply glue to the top side of it, and push it between the board and the sled, adjusting it until the board is level. You need to place a weight on the top of this board while the glue dries. After reading this article, you will know how to repair a table.
Method 7. Epoxy resin
Epoxy resin is a special compound that, when dried, turns into plastic. As a rule, a transparent substance is used for the restoration of furniture. As the material hardens, it fills cracks in the wood and creates an “elegant antique” effect. To make the table a “highlight” of the interior, you can add luminescent powder to the material.
Other interesting solutions are adding dry leaves or flowers, coins, beads, etc. to the substance. After the epoxy dries, it creates an amber or ice effect. To ensure that the surface of the table top is perfectly smooth, it must be sanded with sandpaper.
Ways to update an old kitchen table with your own hands do not end with the tips listed. To restore an “outdated” wardrobe item, use your imagination and read the advice on specialized websites and forums. Remember: all it takes is desire and a small amount of perseverance to turn a used item into a modern, trendy and bright one.
WORK EXAMPLES
Empire table
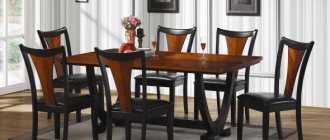
Solid oak dining table
Mahogany table
Lambert table, early 19th century
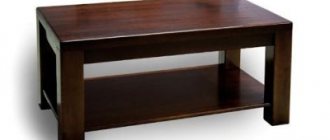
Table with replacement tabletops
Console 1913
Table 19th century
Do not rush to throw away tables if they have lost their former attractiveness. Restoration will return the furniture to its beauty and make it a real interior decoration. provides a range of services for the restoration of any tables, restoring their functionality and improving their design.
Restoration of the dining table
The company’s specialists will quickly and efficiently carry out restoration work on dining tables of any complexity at the customer’s home. Using professional tools, they will remove household dirt from hard-to-reach places, carved decorative elements, glue dry parts, and replace fittings with high-quality ones. The dining table is a frequently used piece of furniture, so only durable materials that are resistant to mechanical and temperature stress are used to process it.

![How to beautifully fold napkins for a festive table: a variety of options [master classes]](https://ecokresla.ru/wp-content/uploads/kak-krasivo-slozhit-salfetki-dlya-prazdnichnogo-stola-raznoobrazie-variantov-master-330x140.jpg)